Operation & User’s Manual (56 pages)
Content of the Document:
-
Safety ........................................................................................................................................................................ 4 p. 2
-
Warranty Statement for Europe........................................................................................................................ 53 p. 3
-
The following subsections describe notational conventions used in this document. p. 4
-
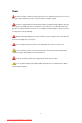
The monitor should be operated only from the type of power source indicated on the label. If you are not sure p. 5
-
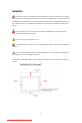
Do not place the monitor on an unstable cart, stand, tripod, bracket, or table. If the monitor falls, it can injure a p. 6
-
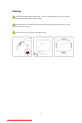
Clean the cabinet regularly with the cloth provided. You can use soft-detergent to wipe out the stain, instead p. 8
-
If the product is emitting a strange smell, sound or smoke, disconnect the power plug IMMEDIATELY and p. 9
-
Contents in Box p. 10
-
Setup Stand & Base p. 11
-
Adjusting Viewing Angle p. 12
-
Connecting the Monitor p. 13
-
Preparing to Install An Optional Wall Mounting Arm. p. 14
-
Setting Optimal Resolution p. 15
-
5 Click Display Settings. p. 16
-
For Windows XP: p. 17
-
6 Click SETTINGS. p. 18
-
Press to turn on or turn off the monitor. p. 19
-
Basic and simple instruction on the control keys. p. 20
-
Select to active p. 22
-
on or off p. 24
-
Gamma1, 2, 3 p. 26
-
Adjust picture Clock to p. 28
-
Red Gain from p. 30
-
Adjust Frame horizontal p. 32
-
Select the OSD language p. 34
-
Full Power Mode p. 36
-
1. Start Windows® 2000 p. 37
-
1. Start Windows® XP p. 38
-
5. Select the 'Settings' tab then click on the 'Advanced' button. p. 39
-
8. Select the 'Install from a list or specific location [advanced]' radio button and then click on the 'Next' button. p. 40
-
1. Click "Start " and "Control Panel". Then, double-click on "Appearance and Personalization". p. 41
-
4. Click "Properties" in the "Monitor" tab. If the "Properties" button is deactivated, it means the configuration for your p. 42
-
Welcome to “i-Menu” software by AOC. i-Menu makes it easy to adjust your monitor display setting by using on p. 43
-
Problem & Question p. 44
-
Monitor Is Stuck In Active p. 45
-
TFT Color LCD p. 46
-
Weight (monitor only) 4.2kg p. 47
-
15-Pin Side of the Signal Cable p. 48
-
Plug and Play p. 49
-
FCC Class B Radio Frequency Interference Statement WARNING: (FOR FCC CERTIFIED MODELS) p. 50
-
Disposal of Waste Equipment by Users in Private Household in the European Union. p. 51
-
EPEAT is a system to help purchasers in the public and private sectors evaluate, compare and select desktop p. 52
-
Warranty Statement for Europe p. 53
-
modified or altered; you bear the sole responsibility and liability for any such modification or alteration. p. 54
-
Warranty Statement for North & South America (excluding Brazil) p. 55
-
ALL EXPRESS AND IMPLIED WARRANTIES FOR THIS PRODUCT (INCLUDING THE WARRANTIES OF p. 56
Service Manual (71 pages)
Content of the Document:
-
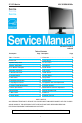
20"LCD Monitor AOC 2036S&2036Sa p. 1
-
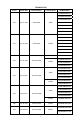
TPV Model Name p. 2
-
Add power PCB p. 3
-
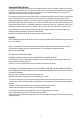
Important Safety Notice p. 4
-
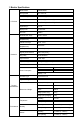
1. Monitor Specifications p. 5
-
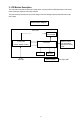
2. LCD Monitor Description p. 6
-
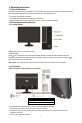
3. Operating Instructions p. 7
-
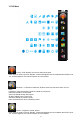
3.3 OSD Menu p. 8
-
Image Setup ---Clock, Phase, H.Position, V.Position, Exit p. 9
-
4. Input/Output Specification p. 10
-
4.3 Panel Specification p. 11
-
4.3.3 Optical Characteristic p. 12
-
4.3.4 Electrical Characteristics p. 13
-
5. Block Diagram p. 14
-
5.2 Power Board p. 15
-
6.1 Main Board p. 16
-
330 OHM 1/4W p. 19
-
1K 1/16W 5% p. 20
-
6.2 Power Board p. 21
-
T P V ( Top Victory Electronics Co . , Ltd. ) p. 22
-
715G2892 2 3(With audio) for 2036Sa p. 23
-
6.3 Key Board p. 26
-
6.4 USB Board p. 27
-
1 2 3 4 p. 28
-
7. PCB Layout p. 29
-
7.2 Power Board p. 32
-
7.3 Key Board p. 35
-
8.1 Equipments and Tools Requirement p. 37
-
(2). No Picture p. 38
-
(3). White screen p. 39
-
8.2.2 Power/Inverter Board p. 40
-
2.) W / LED, No Backlight p. 41
-
8.2.3 Key Board p. 42
-
9. White- Balance, Luminance Adjustment p. 43
-
C. Adjust Cool (9300K) color-temperature p. 44
-
10. Monitor Exploded View p. 45
-
11. BOM List p. 46
-
057G 417 6 p. 47
-
MLCC 0402 0.1UF K 16V X5R p. 48
-
RST CHIP MAX 0R05 1/10W p. 49
-
095G 825 9E518 p. 50
-
RST CHIPR 100 OHM +-5% 1/4W p. 51
-
095G 90 23 p. 52
-
CARTON LABEL FOR 2036S WW p. 53
-
IC ESD AZC199-04S SOT23-6L p. 54
-
RST CHIP MAX 0 OHM 3/4W p. 55
-
TRA LMBT3904LT1G 200MA/40V SOT-23 LRC p. 56
-
LOW ESR EC 470UF 16V M 10*12.5MM p. 57
-
RST CHIP 10K 1/10W 5% p. 58
-
MLCC 0603 0.47UF K 16V X7R p. 59
-
026G 800504 H p. 61
-
088G 35315F XH p. 62
-
057G 417 22 T p. 63
-
CAP CHIP 0402 100nF K 16V X7R p. 64
-
CHIP 2.2uF 10V X5R p. 65
-
NO-SUGGEST RST CHIPR 100 OHM +-5% 1/4W p. 66
-
084G 56 4W p. 67
-
12. Different Parts List p. 68
-
Diversity of TA9SMGNP6WA5QN compared with TA9SMGNK6WA2QN p. 69
-
Diversity of TA9SMGNQ6WA2UN compared with TA9SMGNC6WA2UN p. 70
-
Q52G 1185 99 p. 71
Specifications (1 pages)
Content of the Document:
-
Piano-black Glossy Finish p. 1
Operation & User’s Manual (56 pages)
Content of the Document:
-
Downloaded from ManualMonitor.com Manuals p. 1
-
Safety ........................................................................................................................................................................ 4 p. 2
-
Warranty Statement for Europe........................................................................................................................ 53 p. 3
-
The following subsections describe notational conventions used in this document. p. 4
-
The monitor should be operated only from the type of power source indicated on the label. If you are not sure p. 5
-
Do not place the monitor on an unstable cart, stand, tripod, bracket, or table. If the monitor falls, it can injure a p. 6
-
Clean the cabinet regularly with the cloth provided. You can use soft-detergent to wipe out the stain, instead p. 8
-
If the product is emitting a strange smell, sound or smoke, disconnect the power plug IMMEDIATELY and p. 9
-
Contents in Box p. 10
-
Setup Stand & Base p. 11
-
Adjusting Viewing Angle p. 12
-
Connecting the Monitor p. 13
-
Preparing to Install An Optional Wall Mounting Arm. p. 14
-
Setting Optimal Resolution p. 15
-
5 Click Display Settings. p. 16
-
For Windows XP: p. 17
-
6 Click SETTINGS. p. 18
-
Press to turn on or turn off the monitor. p. 19
-
Basic and simple instruction on the control keys. p. 20
-
Select to active p. 22
-
on or off p. 24
-
Gamma1, 2, 3 p. 26
-
Adjust picture Clock to p. 28
-
Red Gain from p. 30
-
Adjust Frame horizontal p. 32
-
Select the OSD language p. 34
-
Full Power Mode p. 36
-
1. Start Windows® 2000 p. 37
-
1. Start Windows® XP p. 38
-
5. Select the 'Settings' tab then click on the 'Advanced' button. p. 39
-
8. Select the 'Install from a list or specific location [advanced]' radio button and then click on the 'Next' button. p. 40
-
1. Click "Start " and "Control Panel". Then, double-click on "Appearance and Personalization". p. 41
-
4. Click "Properties" in the "Monitor" tab. If the "Properties" button is deactivated, it means the configuration for your p. 42
-
Welcome to “i-Menu” software by AOC. i-Menu makes it easy to adjust your monitor display setting by using on p. 43
-
Problem & Question p. 44
-
Monitor Is Stuck In Active p. 45
-
TFT Color LCD p. 46
-
Weight (monitor only) 4.2kg p. 47
-
15-Pin Side of the Signal Cable p. 48
-
Plug and Play p. 49
-
FCC Class B Radio Frequency Interference Statement WARNING: (FOR FCC CERTIFIED MODELS) p. 50
-
Disposal of Waste Equipment by Users in Private Household in the European Union. p. 51
-
EPEAT is a system to help purchasers in the public and private sectors evaluate, compare and select desktop p. 52
-
Warranty Statement for Europe p. 53
-
modified or altered; you bear the sole responsibility and liability for any such modification or alteration. p. 54
-
Warranty Statement for North & South America (excluding Brazil) p. 55
-
ALL EXPRESS AND IMPLIED WARRANTIES FOR THIS PRODUCT (INCLUDING THE WARRANTIES OF p. 56
Specifications (1 pages)