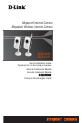
Operation & User’s Manual (68 pages)
Content of the Document:
-
Table of Contents p. 2
-
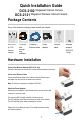
If any of the below items are missing from your package, please contact your retailer. p. 4
-
Minimum System Requirements p. 5
-
Congratulations on your purchase of the DCS-2121 Megapixel Internet Camera! The DCS-2121 is a versatile and unique solution for your small office or home. p. 6
-
Features and Benefits p. 7
-
WPS button and LED p. 8
-
External speaker jack p. 9
-
Attach the Antenna p. 10
-
Connect the Ethernet Cable p. 11
-
Using D-Link Click ‘n Connect p. 12
-
will be needed later. Click Next to continue. p. 13
-
If you have not yet connected the power, do so now. Check the LED on the front of the camera p. 14
-
If your network does not have an active DHCP server, it is necessary to assign IP settings to p. 15
-
Installation of the camera is now completed. To configure advanced option or to view the video p. 16
-
Install Setup Wizard Software p. 17
-
Click the Next button to proceed with the installation of the Setup Wizard. You will be able to choose where to p. 18
-
To use the default location on your computer for the Setup Wizard software, click Next. If you prefer to put the p. 19
-
Using the Setup Wizard p. 21
-
Here, you can set whether the camera should use a direct or static IP. If you use a static IP, the camera's IP Address, p. 22
-
If you need to make any changes, click Back to modify your camera settings. Otherwise, click Restart to save and p. 23
-
After you click the Link button, the Installation Wizard will automatically open your Web browser to the IP address of p. 24
-
Using the ffdshow p. 25
-
Before using ffdshow, you must configure its properties. From your computer, please click on p. 27
-
Adjusting the Camera Focus p. 28
-
Setting up a Wireless Connection with WPS p. 29
-
Using the Configuration Menu p. 30
-
This section allows you to set up your IP camera's live video by using the buttons below. p. 31
-
This section allows you to further set up or change the configuration of your IP camera. p. 32
-
SETUP > Network Setup p. 33
-
SETUP > Wireless p. 34
-
SETUP > Dynamic DNS p. 35
-
SETUP > Image Setup p. 36
-
SETUP > Audio and Video p. 37
-
Night mode allows the camera to use a longer shutter speed when the camera is in a low-light p. 38
-
SETUP > Motion Detection p. 39
-
SETUP > Time and Date p. 40
-
SETUP > Recording p. 41
-
Resolution: This will let you set which video profile you wish to use to record video. Please p. 42
-
SETUP > Snapshot p. 43
-
FTP Server: When checked, the camera will send the snapshots it takes to the e-mail address p. 44
-
SETUP > Digital Output p. 45
-
MAINTENANCE > Device Management p. 46
-
MAINTENANCE > Backup and Restore p. 47
-
MAINTENANCE > Firmware Upgrade p. 48
-
The Status section provides the detail information about your IP camera. p. 49
-
The log shows you a list of events that have happened recently. You can download the log by p. 50
-
The Help screen provides you with support information about the DCS-2121 for your reference. p. 51
-
Installing the DCS-2121 Behind a Router p. 52
-
2) Assign a Local IP Address and Port for Your Camera p. 53
-
3) Open the HTTP Port p. 54
-
The following steps generally apply to any router that you have on your network. The D-Link DIR-300 is used as an example to clarify the configuration process. p. 55
-
4) Open Virtual Server Ports to Enable Remote Image Viewing p. 56
-
Viewing Your Camera Over the Internet p. 57
-
Frequently Asked Questions p. 58
-
10 Why can’t I access the Internet Camera from a web browser? p. 59
-
18 Why are no images available through the Web browser? p. 60
-
How to Ping Your IP Address p. 61
-
If you fail to connect to your camera you will see the following: p. 62
-
Time Zone Table p. 63
-
DI/DO Input specifications p. 64
-
MPEG-4 / MJPEG p. 65
-
Reset to factory default p. 66
-
• MPEG-4/MJPEG simultaneous dual-format compression p. 67
-
Windows 2000 / Windows XP / Windows Vista / 3GPP Mobile Phone p. 68