Huawei IPC6091-P360 Quick Start Manual
Specifications
| Brand | Huawei |
| Model | IPC6091-P360 |
| Category | Security Camera |
| File type | Quick Start Manual (PDF) |
| Language | English |
Huawei IPC6091-P360 PDF Manual: Read Online
Use the built-in viewer to read the manual online without downloading the PDF.
How to Use This Guide
- Read Online: Scroll down to view the full interactive manual directly in your browser.
- Download PDF: Click the "Download" button to save a high-quality, printable version for offline use.
- Searchable Content: Use Ctrl + F (Cmd + F on Mac) within the online viewer to quickly locate specific error codes, parts lists, or schematics.
Jump to Page

Important Sections from This Manual
Below are selected important pages and sections. Click a page to quickly identify the information you need.
- Quick Start Guide p. 1
- Copyright © Huawei Technologies Co., Ltd. 2019. All rights reserved. p. 2
- 1 Important Safeguards and Warnings.........................................................................................1 p. 3
- 1 Important Safeguards and Warnings p. 4
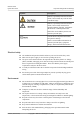
- Indicates a potentially hazardous situation p. 5
- Heavy stress, violent vibration or water splash are not allowed during transportation, p. 6
- l Please strengthen the protection of network, device data and personal information, adopt p. 7
- 2 Product Overview p. 8
- It can be applied to places which require HD image quality and large scenario p. 9
- 3 Unpacking Inspection p. 10
- 4 Device Structure p. 11
- The following figures are for reference only, which are used to know the device dimension. Please refer p. 12
- 5 Device Installation p. 13
- Figure 5-1 SD card installation diagram p. 14
- Figure 5-2 Installation diagram p. 15
- 5.2.3 Connect Device Cable p. 16
- Step 4 Put the waterproof locking cover on the main body of waterproof connector and rotate it p. 17
- 6 Network Configuration p. 18
- Figure 6-1 Device initialization p. 19
- 6.2 Modify IP Address p. 20
- Step 6 Click Save to complete modification of device IP address. p. 21
- 7 Smart Track Setup p. 22
- 7.2 Set Calibration Parameters p. 23
- After clicking Position, click calibration location in the image of the tracking PTZ dome p. 24
- 8 Warranty Card p. 25
View Extracted Full Text
IPC6091-P360
V300R019C00
Quick Start Guide
Issue
01
Date
2019-02-22
HUAWEI TECHNOLOGIES CO., LTD.

IPC6091-P360
V300R019C00
Quick Start Guide
Issue
01
Date
2019-02-22
HUAWEI TECHNOLOGIES CO., LTD.

Copyright © Huawei Technologies Co., Ltd. 2019. All rights reserved.
No part of this document may be reproduced or transmitted in any form or by any means without prior written
consent of Huawei Technologies Co., Ltd.
Trademarks and Permissions
 and other Huawei trademarks are trademarks of Huawei Technologies Co., Ltd.
All other trademarks and trade names mentioned in this document are the property of their respective
holders.
Notice
The purchased products, services and features are stipulated by the contract made between Huawei and the
customer. All or part of the products, services and features described in this document may not be within the
purchase scope or the usage scope. Unless otherwise specified in the contract, all statements, information,
and recommendations in this document are provided "AS IS" without warranties, guarantees or
representations of any kind, either express or implied.
The information in this document is subject to change without notice. Every effort has been made in the
preparation of this document to ensure accuracy of the contents, but all statements, information, and
recommendations in this document do not constitute a warranty of any kind, express or implied.
Huawei Technologies Co., Ltd.
Address:
Huawei Industrial Base
Bantian, Longgang
Shenzhen 518129
People's Republic of China
Website:
http://e.huawei.com
Issue 01 (2019-02-22)
Copyright © Huawei Technologies Co., Ltd.
i

Copyright © Huawei Technologies Co., Ltd. 2019. All rights reserved.
No part of this document may be reproduced or transmitted in any form or by any means without prior written
consent of Huawei Technologies Co., Ltd.
Trademarks and Permissions
 and other Huawei trademarks are trademarks of Huawei Technologies Co., Ltd.
All other trademarks and trade names mentioned in this document are the property of their respective
holders.
Notice
The purchased products, services and features are stipulated by the contract made between Huawei and the
customer. All or part of the products, services and features described in this document may not be within the
purchase scope or the usage scope. Unless otherwise specified in the contract, all statements, information,
and recommendations in this document are provided "AS IS" without warranties, guarantees or
representations of any kind, either express or implied.
The information in this document is subject to change without notice. Every effort has been made in the
preparation of this document to ensure accuracy of the contents, but all statements, information, and
recommendations in this document do not constitute a warranty of any kind, express or implied.
Huawei Technologies Co., Ltd.
Address:
Huawei Industrial Base
Bantian, Longgang
Shenzhen 518129
People's Republic of China
Website:
http://e.huawei.com
Issue 01 (2019-02-22)
Copyright © Huawei Technologies Co., Ltd.
i

Contents
1 Important Safeguards and Warnings.........................................................................................1
2 Product Overview..........................................................................................................................5
3 Unpacking Inspection...................................................................................................................7
4 Device Structure.............................................................................................................................8
4.1 Device Cable...................................................................................................................................................................8
4.2 Dimensions..................................................................................................................................................................... 9
5 Device Installation...................................................................................................................... 10
5.1 Install SD Card (Optional)............................................................................................................................................10
5.2 Install Device................................................................................................................................................................11
5.2.1 Fix Mounting Bracket................................................................................................................................................12
5.2.2 Install Adapter Block.................................................................................................................................................12
5.2.3 Connect Device Cable............................................................................................................................................... 13
5.2.4 Fix Device..................................................................................................................................................................14
6 Network Configuration..............................................................................................................15
6.1 Set the Initial Password................................................................................................................................................ 15
6.2 Modify IP Address........................................................................................................................................................17
6.3 Login Web Interface..................................................................................................................................................... 18
7 Smart Track Setup....................................................................................................................... 19
7.1 Enable Alarm Track......................................................................................................................................................19
7.2 Set Calibration Parameters........................................................................................................................................... 20
8 Warranty Card.............................................................................................................................. 22
IPC6091-P360
Quick Start Guide
Contents
Issue 01 (2019-02-22)
Copyright © Huawei Technologies Co., Ltd.
ii

Contents
1 Important Safeguards and Warnings.........................................................................................1
2 Product Overview..........................................................................................................................5
3 Unpacking Inspection...................................................................................................................7
4 Device Structure.............................................................................................................................8
4.1 Device Cable...................................................................................................................................................................8
4.2 Dimensions..................................................................................................................................................................... 9
5 Device Installation...................................................................................................................... 10
5.1 Install SD Card (Optional)............................................................................................................................................10
5.2 Install Device................................................................................................................................................................11
5.2.1 Fix Mounting Bracket................................................................................................................................................12
5.2.2 Install Adapter Block.................................................................................................................................................12
5.2.3 Connect Device Cable............................................................................................................................................... 13
5.2.4 Fix Device..................................................................................................................................................................14
6 Network Configuration..............................................................................................................15
6.1 Set the Initial Password................................................................................................................................................ 15
6.2 Modify IP Address........................................................................................................................................................17
6.3 Login Web Interface..................................................................................................................................................... 18
7 Smart Track Setup....................................................................................................................... 19
7.1 Enable Alarm Track......................................................................................................................................................19
7.2 Set Calibration Parameters........................................................................................................................................... 20
8 Warranty Card.............................................................................................................................. 22
IPC6091-P360
Quick Start Guide
Contents
Issue 01 (2019-02-22)
Copyright © Huawei Technologies Co., Ltd.
ii

1 Important Safeguards and Warnings
The following describes the instructions for using the device. To prevent crisis and asset
losses, carefully read the instructions before using the device and strictly comply with the
instructions during device usage. Please keep this user manual well for future reference.
FCC SDOC Compliance Statement
Supplier's Declaration of Conformity (SDoC)
Unique Identifier: trade name: HUAWEI; product name: Network camera; model number:
IPC6091-P360
Responsible Party- U.S. Contact Information
Huawei Technologies USA Inc.
5700 Tennyson Parkway, Suite 500
Plano, Texas 75024
Main: 214-919-6000 / TAC Hotline: 877-448-2934
FCC Compliance Statement ( for products subject to Part 15)
This device complies with part 15 of the FCC Rules. Operation is subject to the following two
conditions: (1) This device may not cause harmful interference, and (2) this device must
accept any interference received, including interference that may cause undesired operation.
Symbol Conventions
The symbols that may be found in this document are defined as follows:
Symbol
Description
Indicates an imminently hazardous situation
which, if not avoided, will result in death or
serious injury.
Indicates a potentially hazardous situation
which, if not avoided, could result in death
or serious injury.
IPC6091-P360
Quick Start Guide
1 Important Safeguards and Warnings
Issue 01 (2019-02-22)
Copyright © Huawei Technologies Co., Ltd.
1

1 Important Safeguards and Warnings
The following describes the instructions for using the device. To prevent crisis and asset
losses, carefully read the instructions before using the device and strictly comply with the
instructions during device usage. Please keep this user manual well for future reference.
FCC SDOC Compliance Statement
Supplier's Declaration of Conformity (SDoC)
Unique Identifier: trade name: HUAWEI; product name: Network camera; model number:
IPC6091-P360
Responsible Party- U.S. Contact Information
Huawei Technologies USA Inc.
5700 Tennyson Parkway, Suite 500
Plano, Texas 75024
Main: 214-919-6000 / TAC Hotline: 877-448-2934
FCC Compliance Statement ( for products subject to Part 15)
This device complies with part 15 of the FCC Rules. Operation is subject to the following two
conditions: (1) This device may not cause harmful interference, and (2) this device must
accept any interference received, including interference that may cause undesired operation.
Symbol Conventions
The symbols that may be found in this document are defined as follows:
Symbol
Description
Indicates an imminently hazardous situation
which, if not avoided, will result in death or
serious injury.
Indicates a potentially hazardous situation
which, if not avoided, could result in death
or serious injury.
IPC6091-P360
Quick Start Guide
1 Important Safeguards and Warnings
Issue 01 (2019-02-22)
Copyright © Huawei Technologies Co., Ltd.
1

Symbol
Description
Indicates a potentially hazardous situation
which, if not avoided, may result in minor
or moderate injury.
Indicates a potentially hazardous situation
which, if not avoided, could result in
equipment damage, data loss, performance
deterioration, or unanticipated results.
NOTICE is used to address practices not
related to personal injury.
Calls attention to important information,
best practices and tips.
NOTE is used to address information not
related to personal injury, equipment
damage, and environment deterioration.
Electrical safety
l
All installation and operation should conform to your local electrical safety codes.
l
Make sure the power supply is correct before operating the device.
l
The power source shall conform to the requirement of the Safety Extra Low Voltage
(SELV) standard, and supply power with rated voltage which conforms to Limited power
Source requirement according IEC60950-1. Please note that the power supply
requirement is subject to the device label.
l
A readily accessible disconnect device shall be incorporated in the building installation
wiring.
l
Prevent the power cable from being trampled or pressed, especially the plug, power
socket and the junction extruded from the device.
Environment
l
Do not aim the device at strong light to focus, such as lamp light and sun light, otherwise
it might cause over brightness or light marks, which are not the device malfunction, and
affect the longevity of Charge Coupled Device (CCD) or Complementary Metal-Oxide
Semiconductor (CMOS).
l
Transport, use and store the device within the range of allowed humidity and
temperature.
l
Do not place the device in a damp or dusty environment, extremely hot or cold
temperatures, or the locations with strong electromagnetic radiation or unstable lighting.
l
Keep the camera away from water or other liquid to avoid damages to the internal
components.
l
Keep the indoor device away from rain or damp to avoid fire or lightning.
l
Keep sound ventilation to avoid heat accumulation.
l
Pack the device with standard factory packaging or the equivalent material when
transporting the device.
IPC6091-P360
Quick Start Guide
1 Important Safeguards and Warnings
Issue 01 (2019-02-22)
Copyright © Huawei Technologies Co., Ltd.
2

Symbol
Description
Indicates a potentially hazardous situation
which, if not avoided, may result in minor
or moderate injury.
Indicates a potentially hazardous situation
which, if not avoided, could result in
equipment damage, data loss, performance
deterioration, or unanticipated results.
NOTICE is used to address practices not
related to personal injury.
Calls attention to important information,
best practices and tips.
NOTE is used to address information not
related to personal injury, equipment
damage, and environment deterioration.
Electrical safety
l
All installation and operation should conform to your local electrical safety codes.
l
Make sure the power supply is correct before operating the device.
l
The power source shall conform to the requirement of the Safety Extra Low Voltage
(SELV) standard, and supply power with rated voltage which conforms to Limited power
Source requirement according IEC60950-1. Please note that the power supply
requirement is subject to the device label.
l
A readily accessible disconnect device shall be incorporated in the building installation
wiring.
l
Prevent the power cable from being trampled or pressed, especially the plug, power
socket and the junction extruded from the device.
Environment
l
Do not aim the device at strong light to focus, such as lamp light and sun light, otherwise
it might cause over brightness or light marks, which are not the device malfunction, and
affect the longevity of Charge Coupled Device (CCD) or Complementary Metal-Oxide
Semiconductor (CMOS).
l
Transport, use and store the device within the range of allowed humidity and
temperature.
l
Do not place the device in a damp or dusty environment, extremely hot or cold
temperatures, or the locations with strong electromagnetic radiation or unstable lighting.
l
Keep the camera away from water or other liquid to avoid damages to the internal
components.
l
Keep the indoor device away from rain or damp to avoid fire or lightning.
l
Keep sound ventilation to avoid heat accumulation.
l
Pack the device with standard factory packaging or the equivalent material when
transporting the device.
IPC6091-P360
Quick Start Guide
1 Important Safeguards and Warnings
Issue 01 (2019-02-22)
Copyright © Huawei Technologies Co., Ltd.
2

l
Heavy stress, violent vibration or water splash are not allowed during transportation,
storage and installation.
l
The device needs to be installed in the location where professional staff can cover
(professionals need to know the attentions of using the device), non-professionals are not
allowed to enter device installation area when the device is operating normally, which
may cause accidental damage.
l
Ensure the network link quality during project construction and device installation.
l
When a camera is installed near the seaside or salt water lake, ensure that the camera is
more than 10 km away from the coastline and lake shoreline.
Operation and Daily Maintenance
l
Do not directly touch the heat dissipation component of the device to avoid scald.
l
Do not dismantle the device because there is no component that can be fixed by users
themselves. Otherwise, it might cause water leakage or bad image due to unprofessional
dismantling. Please contact after-sale service to replace desiccant when it becomes green.
(The desiccant is not provided by default)
l
It is advised to use the device together with lightning arrester to improve lightning
protection effect.
l
It is advised to get the grounding holes to be grounded to enhance the reliability of the
device.
l
Do not directly touch the optic component CCD or CMOS. You can use the air blower to
blow away the dust or dirt on the lens surface. Please use a dry cloth wetted by alcohol to
wipe away the dust gently if necessary.
l
Use the dry soft cloth to clean the device. If the dust is difficult to be removed, please
wipe it away with a clean cloth wetted slightly by the mild detergent, and then use the
dry cloth to clean the device. Do not use volatile solvents like alcohol, benzene, thinner,
or strong detergent with abrasiveness, otherwise it will damage the surface coating or
reduce the working performance of the device.
l
The IPC shield is a kind of optical component, please do not touch or wipe the shield
surface during installation and application, it may stain dust, grease or fingerprint, you
can use absorbent cotton to dip some diethyl ether or use soft cloth to dip some water
and then wipe gently. You can also use air gun to remove the dust if the shield is stained
with dust.
IPC6091-P360
Quick Start Guide
1 Important Safeguards and Warnings
Issue 01 (2019-02-22)
Copyright © Huawei Technologies Co., Ltd.
3

l
Heavy stress, violent vibration or water splash are not allowed during transportation,
storage and installation.
l
The device needs to be installed in the location where professional staff can cover
(professionals need to know the attentions of using the device), non-professionals are not
allowed to enter device installation area when the device is operating normally, which
may cause accidental damage.
l
Ensure the network link quality during project construction and device installation.
l
When a camera is installed near the seaside or salt water lake, ensure that the camera is
more than 10 km away from the coastline and lake shoreline.
Operation and Daily Maintenance
l
Do not directly touch the heat dissipation component of the device to avoid scald.
l
Do not dismantle the device because there is no component that can be fixed by users
themselves. Otherwise, it might cause water leakage or bad image due to unprofessional
dismantling. Please contact after-sale service to replace desiccant when it becomes green.
(The desiccant is not provided by default)
l
It is advised to use the device together with lightning arrester to improve lightning
protection effect.
l
It is advised to get the grounding holes to be grounded to enhance the reliability of the
device.
l
Do not directly touch the optic component CCD or CMOS. You can use the air blower to
blow away the dust or dirt on the lens surface. Please use a dry cloth wetted by alcohol to
wipe away the dust gently if necessary.
l
Use the dry soft cloth to clean the device. If the dust is difficult to be removed, please
wipe it away with a clean cloth wetted slightly by the mild detergent, and then use the
dry cloth to clean the device. Do not use volatile solvents like alcohol, benzene, thinner,
or strong detergent with abrasiveness, otherwise it will damage the surface coating or
reduce the working performance of the device.
l
The IPC shield is a kind of optical component, please do not touch or wipe the shield
surface during installation and application, it may stain dust, grease or fingerprint, you
can use absorbent cotton to dip some diethyl ether or use soft cloth to dip some water
and then wipe gently. You can also use air gun to remove the dust if the shield is stained
with dust.
IPC6091-P360
Quick Start Guide
1 Important Safeguards and Warnings
Issue 01 (2019-02-22)
Copyright © Huawei Technologies Co., Ltd.
3

l Please strengthen the protection of network, device data and personal information, adopt
necessary measures of guarantee device network security, including but not limited to
using strong password, modifying password regularly, upgrading firmware to the latest
version, isolating computer network and so on. For the IP camera firmware of some old
version, the ONVIF password will not be modified automatically after the main password
of the system is modified. You need to upgrade the camera firmware or upgrade the
ONVIF password manually. Please modify the default password after login to avoid being
stolen. For details about how to change the ONVIF password, see ONVIF User in the User
Manual.
l Use the standard components provided by manufacturer and make sure the device is
installed and fixed by professional engineers.
l The surface of the image sensor should not be exposed to laser beam radiation in an
environment where a laser beam device is used.
l Do not provide two or more power supply sources for the device; otherwise it might
damage the device.
Disclaimer
l
This manual is for reference only. Please refer to the actual product for more details.
l
Minor differences might be found in user interface, and there might be deviation between
the actual value of some data and the value provided in the manual due to the reasons
such as the real environment is not stable. Please refer to the final explanation of the
company if there is any doubt or dispute.
l
The company is not liable for any loss caused by the operation that does not comply with
the manual.
l
Please contact the supplier or customer service if there is any problem occurred when
using the device.
l
If the obtained PDF file cannot be opened, upgrade the reading tool to the latest version
or use another mainstream reading tool.
l
All the designs and software are subject to change without prior written notice. The
manual will be regularly updated according to the product upgrade without prior
announcement.
l
If there is any uncertainty or controversy, please refer to our final explanation.
IPC6091-P360
Quick Start Guide
1 Important Safeguards and Warnings
Issue 01 (2019-02-22)
Copyright © Huawei Technologies Co., Ltd.
4

l Please strengthen the protection of network, device data and personal information, adopt
necessary measures of guarantee device network security, including but not limited to
using strong password, modifying password regularly, upgrading firmware to the latest
version, isolating computer network and so on. For the IP camera firmware of some old
version, the ONVIF password will not be modified automatically after the main password
of the system is modified. You need to upgrade the camera firmware or upgrade the
ONVIF password manually. Please modify the default password after login to avoid being
stolen. For details about how to change the ONVIF password, see ONVIF User in the User
Manual.
l Use the standard components provided by manufacturer and make sure the device is
installed and fixed by professional engineers.
l The surface of the image sensor should not be exposed to laser beam radiation in an
environment where a laser beam device is used.
l Do not provide two or more power supply sources for the device; otherwise it might
damage the device.
Disclaimer
l
This manual is for reference only. Please refer to the actual product for more details.
l
Minor differences might be found in user interface, and there might be deviation between
the actual value of some data and the value provided in the manual due to the reasons
such as the real environment is not stable. Please refer to the final explanation of the
company if there is any doubt or dispute.
l
The company is not liable for any loss caused by the operation that does not comply with
the manual.
l
Please contact the supplier or customer service if there is any problem occurred when
using the device.
l
If the obtained PDF file cannot be opened, upgrade the reading tool to the latest version
or use another mainstream reading tool.
l
All the designs and software are subject to change without prior written notice. The
manual will be regularly updated according to the product upgrade without prior
announcement.
l
If there is any uncertainty or controversy, please refer to our final explanation.
IPC6091-P360
Quick Start Guide
1 Important Safeguards and Warnings
Issue 01 (2019-02-22)
Copyright © Huawei Technologies Co., Ltd.
4

2 Product Overview
This series product is a type of integrated camera which consists of panoramic camera and
tracking PTZ dome camera. It provides monitoring effect of both panoramic and partial
details. Panoramic camera can provide realtime HD surveillance of 360° or 180° view
coverage. Besides, it is convenient to recognize and exclude abnormity via quick positioning
and zoom in of tracking PTZ dome camera when abnormity happens.
l
Support H.265/H.264/H.264B/H.264H/MJPEG encoding, high compression ratio and
ultralow stream for H.265.
l
Support panoramic 360° or 180° ultra-large view range, well suited for large scenario
monitoring, support smart monitoring, auto tracking, detail snapshot and other functions
by coordinating with speed dome.
l
Support starlight sensor, realize 24 x 7 all-weather monitoring even in the totally dark
environment.
l
Adopt ultralow illuminance 2 megapixel (1920*1080) CMOS image sensor, excellent
low illuminance effect, high image resolution.
l
Panoramic video supports to output 1 or 2 channel 4096*1080@30fps and realizes high
resolution realtime or high frame rate image output, speed dome video supports
1920*1080 resolution output.
l
Support MP2L2, G.711Mu, G.711A, G.726, G.722, AAC and PCM audio compression
standard.
l
Support ROI encoding, defocus detection, intrusion, tripwire, abandoned/missing object
detection, scene changing, audio abnormity detection, external alarm, motion detection
and video tampering detection.
l
Support triple stream simultaneous output and ACF.
l
Support WDR, 3DNR, HLC and BLC, well suited for different monitoring
environments.
l
Support local 1 channel analog video output, convenient for installation and debugging.
l
Support max. 128G Micro SD card storage, audio alarm and so on.
l
Support multiple network protocols, suited for different application schemes.
l
Support intelligent alarm for no SD card, SD card capacity warning, SD card error,
network disconnection and IP conflict.
l
Support panoramic image correction on the client end.
l
Support smart track, auto tracking and other intelligent functions.
IPC6091-P360
Quick Start Guide
2 Product Overview
Issue 01 (2019-02-22)
Copyright © Huawei Technologies Co., Ltd.
5

2 Product Overview
This series product is a type of integrated camera which consists of panoramic camera and
tracking PTZ dome camera. It provides monitoring effect of both panoramic and partial
details. Panoramic camera can provide realtime HD surveillance of 360° or 180° view
coverage. Besides, it is convenient to recognize and exclude abnormity via quick positioning
and zoom in of tracking PTZ dome camera when abnormity happens.
l
Support H.265/H.264/H.264B/H.264H/MJPEG encoding, high compression ratio and
ultralow stream for H.265.
l
Support panoramic 360° or 180° ultra-large view range, well suited for large scenario
monitoring, support smart monitoring, auto tracking, detail snapshot and other functions
by coordinating with speed dome.
l
Support starlight sensor, realize 24 x 7 all-weather monitoring even in the totally dark
environment.
l
Adopt ultralow illuminance 2 megapixel (1920*1080) CMOS image sensor, excellent
low illuminance effect, high image resolution.
l
Panoramic video supports to output 1 or 2 channel 4096*1080@30fps and realizes high
resolution realtime or high frame rate image output, speed dome video supports
1920*1080 resolution output.
l
Support MP2L2, G.711Mu, G.711A, G.726, G.722, AAC and PCM audio compression
standard.
l
Support ROI encoding, defocus detection, intrusion, tripwire, abandoned/missing object
detection, scene changing, audio abnormity detection, external alarm, motion detection
and video tampering detection.
l
Support triple stream simultaneous output and ACF.
l
Support WDR, 3DNR, HLC and BLC, well suited for different monitoring
environments.
l
Support local 1 channel analog video output, convenient for installation and debugging.
l
Support max. 128G Micro SD card storage, audio alarm and so on.
l
Support multiple network protocols, suited for different application schemes.
l
Support intelligent alarm for no SD card, SD card capacity warning, SD card error,
network disconnection and IP conflict.
l
Support panoramic image correction on the client end.
l
Support smart track, auto tracking and other intelligent functions.
IPC6091-P360
Quick Start Guide
2 Product Overview
Issue 01 (2019-02-22)
Copyright © Huawei Technologies Co., Ltd.
5

l
It can be applied to places which require HD image quality and large scenario
monitoring, such as square, airport, supermarket, hotel, government, school, factory,
public safety, forensic security and safe city etc.
IPC6091-P360
Quick Start Guide
2 Product Overview
Issue 01 (2019-02-22)
Copyright © Huawei Technologies Co., Ltd.
6

l
It can be applied to places which require HD image quality and large scenario
monitoring, such as square, airport, supermarket, hotel, government, school, factory,
public safety, forensic security and safe city etc.
IPC6091-P360
Quick Start Guide
2 Product Overview
Issue 01 (2019-02-22)
Copyright © Huawei Technologies Co., Ltd.
6

3 Unpacking Inspection
After unpacking the package, check whether the device is intact and confirm the accessory
list. For details, see the accessory list delivered with the device. For details about the
configuration, see the specific product documentation.
IPC6091-P360
Quick Start Guide
3 Unpacking Inspection
Issue 01 (2019-02-22)
Copyright © Huawei Technologies Co., Ltd.
7

3 Unpacking Inspection
After unpacking the package, check whether the device is intact and confirm the accessory
list. For details, see the accessory list delivered with the device. For details about the
configuration, see the specific product documentation.
IPC6091-P360
Quick Start Guide
3 Unpacking Inspection
Issue 01 (2019-02-22)
Copyright © Huawei Technologies Co., Ltd.
7

4 Device Structure
4.1 Device Cable
4.2 Dimensions
4.1 Device Cable
NOTE
The following figure is for reference only, which is used to know the function of cable port. Different
devices have different cables, please refer to the actual device for more details.
Figure 4-1 External ports
IPC6091-P360
Quick Start Guide
4 Device Structure
Issue 01 (2019-02-22)
Copyright © Huawei Technologies Co., Ltd.
8

4.2 Dimensions
NOTE
The following figures are for reference only, which are used to know the device dimension. Please refer
to the actual device for more details.
Figure 4-2 Device dimensions 1 (unit: mm)
Figure 4-3 Bracket dimensions 1 (unit: mm)
IPC6091-P360
Quick Start Guide
4 Device Structure
Issue 01 (2019-02-22)
Copyright © Huawei Technologies Co., Ltd.
9

5 Device Installation
5.1 Install SD Card (Optional)
5.2 Install Device
5.1 Install SD Card (Optional)
NOTE
l
Please implement this step when it needs to use SD card and there is a SD card slot for the device.
l
Please cut off the device power before installing SD card.
Step 1 Demount the device decoration cover, use screwdriver to dismantle the device enclosure, take
out the small filling material around the module.
NOTE
Please make sure the device enclosure is installed back within 30 minutes after it is dismantled, which is
to avoid water vapor entering the device and causing water mist and other abnormities.
Step 2 Find the SD card slot in the location shown in Figure 5-1, adjust the direction of Micro SD
card well and insert it into the slot and complete installation.
IPC6091-P360
Quick Start Guide
5 Device Installation
Issue 01 (2019-02-22)
Copyright © Huawei Technologies Co., Ltd.
10

Figure 5-1 SD card installation diagram
Step 3 Install back the device enclosure and use screwdriver to tighten it firmly and install the device
decoration cover back in position.
----End
5.2 Install Device
NOTE
l
The following figure is for reference only, which is only used to know the device installation, please
refer to the actual device for more details.
l
The bracket installation wall needs to sustain at least 4X weight of the bracket and camera.
l
Please cut off the device power when installing Micro SD card. It can install the anti-drop rope on
the hook of the device bottom and use installation handle to carry the device when moving the
device.
IPC6091-P360
Quick Start Guide
5 Device Installation
Issue 01 (2019-02-22)
Copyright © Huawei Technologies Co., Ltd.
11

Figure 5-2 Installation diagram
5.2.1 Fix Mounting Bracket
Step 1 Mark the mounting hole sites on the surface according to the installation holes of the device
pedestal and dig holes on the surface, insert the expansion bolts into the holes you just dug.
Step 2 Pull the device external cable (network cable without crystal connector) out from the
installation bracket.
Step 3 Align the installation holes of the bracket pedestal with the installation hole sites on the
surface, and then insert the expansion bolts into the bracket pedestal and lock them firmly.
----End
5.2.2 Install Adapter Block
Pull the device external cable through the adapter block and twist it into the installation
bracket, then use the locking screw to tighten it firmly.
IPC6091-P360
Quick Start Guide
5 Device Installation
Issue 01 (2019-02-22)
Copyright © Huawei Technologies Co., Ltd.
12

5.2.3 Connect Device Cable
l
Connect device corresponding power, video output, audio cable and RS485 control cable
to external cable well according to requirement, and then use insulated tape to twine the
connection respectively to make it waterproof.
NOTE
Please be noted that the bending radius of optical fiber needs to be no less than 30mm when
connecting to optical fiber.
l
Connect network cable to corresponding network port of the device cable according to
Install Waterproof Connector (Optional).
Install Anti-drop Rope
l
When the device adopts wall-mounted installation mode, it needs to hang one end of
both anti-drop ropes on the hook of the device bottom, and then hang the other end of
both anti-drop ropes on the two hooks of the installation bracket.
l
When the device adopts pendant installation mode, it needs to hang one end of both anti-
drop ropes on the hook of the device bottom, and then hang the other end of both anti-
drop ropes on the two hooks of the adapter block.
Install Waterproof Connector (Optional)
The installation process of waterproof connector for network port is shown in Figure 5-3.
NOTE
It needs to implement the operation when the device is equipped with waterproof connector and it is
used outdoors.
Figure 5-3 Waterproof connector installation
Step 1 Keep the convex groove outward and install the rubber ring into the network port, keep the
smaller hole of the rubber ring outward and install the fixing rubber ring into the main body
of the waterproof connector.
Step 2 Pull the network cable without crystal head through main body of waterproof connector,
fixing rubber ring and waterproof locking cover, make the crystal head of network cable, and
then insert it into the network cable.
Step 3 Put the main body of waterproof connector on the network port and rotate it clockwise to lock
the network port and waterproof connector firmly.
IPC6091-P360
Quick Start Guide
5 Device Installation
Issue 01 (2019-02-22)
Copyright © Huawei Technologies Co., Ltd.
13

Step 4 Put the waterproof locking cover on the main body of waterproof connector and rotate it
clockwise to lock the waterproof connector and waterproof locking cover firmly.
----End
5.2.4 Fix Device
Step 1 Twist the device into the adapter block and use anti-drop screw to tighten it firmly.
Step 2 Adjust the monitoring angle well according to the requirements.
Step 3 Use locking screw to fix the device firmly.
----End
IPC6091-P360
Quick Start Guide
5 Device Installation
Issue 01 (2019-02-22)
Copyright © Huawei Technologies Co., Ltd.
14

6 Network Configuration
You can initialize device and modify IP address on the Web interface. Please refer to the User
Manual in the disk for more details.
NOTE
l
It needs to set the initial password if it is the first time use device or the device is restored to factory
default.
l
It can access the camera web page only when the device IP address (192.168.0.120 by default) and
the IP address of PC are in the same network segment.
l
In order to make the camera have access to network smoothly, please plan available IP segment
according to the actual network environment.
l
The following figures are for reference only; different models may have different interfaces.
6.1 Set the Initial Password
6.2 Modify IP Address
6.3 Login Web Interface
6.1 Set the Initial Password
Step 1 In the address box of Internet Explorer, enter http://IPC IP address and press Enter.
The Device Initialization page is displayed, as shown in Figure 6-1.
NOTE
192.168.0.120 is the default IP address of the camera.
IPC6091-P360
Quick Start Guide
6 Network Configuration
Issue 01 (2019-02-22)
Copyright © Huawei Technologies Co., Ltd.
15

Figure 6-1 Device initialization
Step 2 Enter the new and confirm passwords and deselect Email Address.
NOTE
The password can be set as 8 to 32 characters; it can be a combination of number(s), letter(s) and
symbol(s) with at least two kinds of them (excluding "'",""",";",":","&"). Please set password with high
security according to the password strong and weak prompt.
Step 3 Click OK.
The Online Upgrade page is displayed, as shown in Figure 6-2.
Figure 6-2 Online Upgrade
Step 4 Deselect Auto-check for updates.
Step 5 Click OK to complete device initialization.
----End
IPC6091-P360
Quick Start Guide
6 Network Configuration
Issue 01 (2019-02-22)
Copyright © Huawei Technologies Co., Ltd.
16

6.2 Modify IP Address
Step 1 In the address box of Internet Explorer, enter http://IPC IP address and press Enter.
NOTE
192.168.0.120 is the default IP address of the camera.
Step 2 Enter the default user name and password.
The default user name is admin. The default password is the one set in 6.1 Set the Initial
Password.
Step 3 Click Login.
The camera home page is displayed.
Step 4 Choose Setting > Network > TCP/IP.
The system will display the Setting dialog box, as shown in Figure 6-3.
Figure 6-3 Setting the IP address
Step 5 Set the Mode as Static, and enter the planned start IP, subnet mask and gateway.
NOTE
Set the Mode as DHCP when there is DHCP server in the network, the device will automatically
acquire IP address from the DHCP server.
IPC6091-P360
Quick Start Guide
6 Network Configuration
Issue 01 (2019-02-22)
Copyright © Huawei Technologies Co., Ltd.
17

Step 6 Click Save to complete modification of device IP address.
----End
6.3 Login Web Interface
Step 1 Open IE browser, enter the modified camera IP address into the address bar and then press
Enter button.
Please operate according to the interface prompt if the interface displays guide of Online
Upgrade.
Step 2 Enter username and password, click Login.
Step 3 For the first login, click Please click here to download and install the plug-in., install
controls according to system prompt.
The main interface will be shown in Figure 6-4 after control installation is completed.
Figure 6-4 Web Interface
NOTE
l
Click
 on the right of corresponding camera in the device list, you can switch the preview
stream, please select according to the actual situation.
l
 and
 represent substream 1 and substream 2 respectively;
 represents mainstream.
----End
IPC6091-P360
Quick Start Guide
6 Network Configuration
Issue 01 (2019-02-22)
Copyright © Huawei Technologies Co., Ltd.
18

7 Smart Track Setup
After enabling alarm track and setting calibration parameters, the tracking PTZ dome will
auto activate to corresponding position and track the object until it is beyond the monitoring
range when the intelligent rules of panoramic camera trigger alarm.
Precondition
The panoramic camera has set the intelligent rules of intrusion or tripwire.
7.1 Enable Alarm Track
7.2 Set Calibration Parameters
7.1 Enable Alarm Track
Alarm track is disabled by default; smart track is valid only after alarm track is enabled.
Step 1 Choose Setup > Event > Smart Track > Alarm Track.
The Alarm Track tab page is displayed, as shown in Figure 7-1.
Figure 7-1 Alarm Track tab page
Step 2 Click the slider to enable Alarm Track.
----End
IPC6091-P360
Quick Start Guide
7 Smart Track Setup
Issue 01 (2019-02-22)
Copyright © Huawei Technologies Co., Ltd.
19

7.2 Set Calibration Parameters
The device is equipped with calibration parameter by default when it is delivered out of
factory, please refer to manual calibration described in the chapter below when the effect of
default config is not good.
Step 1 Choose Setup > Event > Smart Track > Smart Track.
The Smart Track tab page is displayed, as shown in Figure 7-2.
Figure 7-2 Smart Track tab page
Step 2 Select the lens number under the video image successively (as shown in Figure 7-3), and then
you can add calibration point for video image of corresponding lens.
Figure 7-3 Selecting a lens ID
1.
Click
 and click video image to display calibration box, drag the calibration box to
proper location.
IPC6091-P360
Quick Start Guide
7 Smart Track Setup
Issue 01 (2019-02-22)
Copyright © Huawei Technologies Co., Ltd.
20

2.
After clicking Position, click calibration location in the image of the tracking PTZ dome
and turn the video image of tracking PTZ dome to the corresponding location of
calibration point.
3.
Click
 to save calibration record.
4.
It can add at least 4 calibration points for video image of each lens by repeating step
Step 2.1 to Step 2.3.
Step 3 Click Save to complete setting.
----End
IPC6091-P360
Quick Start Guide
7 Smart Track Setup
Issue 01 (2019-02-22)
Copyright © Huawei Technologies Co., Ltd.
21

8 Warranty Card
IPC6091-P360
Quick Start Guide
8 Warranty Card
Issue 01 (2019-02-22)
Copyright © Huawei Technologies Co., Ltd.
22