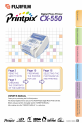
FujiFilm CX-550 Owner's Manual
Specifications
| Brand | FujiFilm |
| Model | CX-550 |
| Category | Printer |
| File type | Owner's Manual (PDF) |
| Language | English |
FujiFilm CX-550 PDF Manual: Read Online
Use the built-in viewer to read the manual online without downloading the PDF.
How to Use This Guide
- Read Online: Scroll down to view the full interactive manual directly in your browser.
- Download PDF: Click the "Download" button to save a high-quality, printable version for offline use.
- Searchable Content: Use Ctrl + F (Cmd + F on Mac) within the online viewer to quickly locate specific error codes, parts lists, or schematics.
Jump to Page
Important Sections from This Manual
Below are selected important pages and sections. Click a page to quickly identify the information you need.
- To prevent fire or shock hazard, do not expose the unit to rain or moisture. p. 3
- Always grasp the plug itself when unplugging the p. 4
- Try to print! . . . . . . . . . . . . . . . . . . . . . . . . . . . . . . . . . . . . . . . . . . . . . . . . . . . . . . . . . . . . . . . . . . . . . . 10 p. 5
- The CX-550 is equipped with a LCD (liquid crystal) monitor. By merely operating the printer in accordance with the p. 6
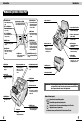
- Name and Operation of Each Part p. 7
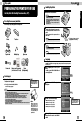
- Try to print! p. 8
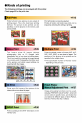
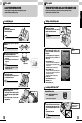
- Enjoy various printing! p. 12
- Other methods of use p. 26
- When trouble occurs p. 28
- Connecting to a Digital Camera and Printing p. 34
- Using the printer connected to a PC p. 36
- FUJIFILM Digital Photo Printer CX-550 p. 44
- EC DECLARATION OF CONFORMITY p. 45
View Extracted Full Text
1 WARNING To prevent fire or shock hazard, do not expose the unit to rain or moisture. This symbol is intended to alert the user to the presence of uninsulated “dangerous voltage” within the product’s enclosure that may be of sufficient magnitude to constitute a risk of electric shock to persons. This symbol is intended to alert the user to the presence of important operating and maintenance (servicing) instructions in the literature accompanying the appliance. For customers in the U.S.A. FCC Statement This device complies with part 15 of the FCC Rules. Operation is subject to the following two conditions: (1) This device may not cause harmful interference, and (2) this device must accept any interference received, including interference that may cause undesired operation. CAUTION This equipment has been tested and found to comply with the limits for a Class B digital device, pursuant to Part 15 of the FCC Rules. These limits are designed to provide reasonable protection against harmful interference in a residential installation. This equipment generates, uses, and can radiate radio frequency energy and, if not installed and used in accordance with the instructions, may cause harmful interference to radio communications. However, there is no guarantee that interference will not occur in a particular installation. If this equipment does cause harmful interference to radio or television reception, which can be determined by turning the equipment off and on, the user is encouraged to try to correct the interference by one or more of the following measures: Reorient or relocate the receiving antenna. Increase the separation between the equipment and receiver. Connect the equipment into an outlet on a circuit different from that to which the receiver is connected. Consult the dealer or an experienced radio/ TV technician for help. You are cautioned that any changes or modifications not expressly approved in this manual could void the user’s authority to operate the equipment. For customers in Canada CAUTION This Class B digital apparatus complies with Canadian ICES-003. Owner’s Record The model and serial numbers are located on the rear panel. Record the serial number in the space provided rear. Refer to these whenever you call upon your FUJIFILM dealer regarding this product. Model No. Printpix CX-550 CAUTION: TO REDUCE THE RISK OF ELECTRIC SHOCK. DO NOT REMOVE COVER (OR BACK). NO USER-SERVICEABLE PARTS INSIDE. REFER SERVICING TO QUALIFIED SERVICE PERSONNEL. The graphical symbols are located on the rear panel of the case. INotes on Copyright GThe use of prints made using images other than those created or photographed by you without the permission of the copyright holder is prohibited under copyright law, except where the prints are for personal use only. 1 WARNING To prevent fire or shock hazard, do not expose the unit to rain or moisture. This symbol is intended to alert the user to the presence of uninsulated “dangerous voltage” within the product’s enclosure that may be of sufficient magnitude to constitute a risk of electric shock to persons. This symbol is intended to alert the user to the presence of important operating and maintenance (servicing) instructions in the literature accompanying the appliance. For customers in the U.S.A. FCC Statement This device complies with part 15 of the FCC Rules. Operation is subject to the following two conditions: (1) This device may not cause harmful interference, and (2) this device must accept any interference received, including interference that may cause undesired operation. CAUTION This equipment has been tested and found to comply with the limits for a Class B digital device, pursuant to Part 15 of the FCC Rules. These limits are designed to provide reasonable protection against harmful interference in a residential installation. This equipment generates, uses, and can radiate radio frequency energy and, if not installed and used in accordance with the instructions, may cause harmful interference to radio communications. However, there is no guarantee that interference will not occur in a particular installation. If this equipment does cause harmful interference to radio or television reception, which can be determined by turning the equipment off and on, the user is encouraged to try to correct the interference by one or more of the following measures: Reorient or relocate the receiving antenna. Increase the separation between the equipment and receiver. Connect the equipment into an outlet on a circuit different from that to which the receiver is connected. Consult the dealer or an experienced radio/ TV technician for help. You are cautioned that any changes or modifications not expressly approved in this manual could void the user’s authority to operate the equipment. For customers in Canada CAUTION This Class B digital apparatus complies with Canadian ICES-003. Owner’s Record The model and serial numbers are located on the rear panel. Record the serial number in the space provided rear. Refer to these whenever you call upon your FUJIFILM dealer regarding this product. Model No. Printpix CX-550 CAUTION: TO REDUCE THE RISK OF ELECTRIC SHOCK. DO NOT REMOVE COVER (OR BACK). NO USER-SERVICEABLE PARTS INSIDE. REFER SERVICING TO QUALIFIED SERVICE PERSONNEL. The graphical symbols are located on the rear panel of the case. INotes on Copyright GThe use of prints made using images other than those created or photographed by you without the permission of the copyright holder is prohibited under copyright law, except where the prints are for personal use only. 3 2 Always grasp the plug itself when unplugging the printer. Pulling on the cord could damage the cord and cause a fire or electric shock. Unplug the printer when cleaning it or not used for an extended period. Unplug the printer for safety. Request routine inspection and cleaning of the interior of the printer. Accumulated dust inside the printer can cause fire or other trouble. G Request your FUJIFILM dealer or authorized FUJIFILM service facility to clean the interior of the printer about once every three years. Do not move the printer while it is still plugged in. This could damage the cord and cause a fire or electric shock. Do not stare for a long time at the light emitting from the printer. Looking for short periods should not cause any harm, but staring at the light for lengthy periods could result in impaired eyesight. Printer is not completely isolated from power line without pulling off the power cable, even when the power switch and the power lamp of printer are off. MISCELLANEOUS NOTE Installation site G Do not use or store the printer where the temperature and humidity are high, where vibrations are present, where the printer will be in direct sunlight, where it is dusty or sandy, or where the printer may be exposed to rain. G If the printer interferes with radio or television reception, install it away from the radio or television set. Transporting G Store the original packing material. It is needed when repacking and shipping the printer later. G When moving the printer, always remove the memory card. Data G The memory contents cannot be compensated. If data cannot be written or read due to hardware or software trouble, FUJIFILM is not responsible for memory contents compensation. Use G Do not cover the printer with a cloth or blanket while it is in use. It may cause erroneous operation or a serious accident. G Use the printer on a firm and flat surface. G Do not move the printer while it is operating. It may cause trouble. G Do not subject the printer to shock or vibration while it is operating. It may cause an error or destroy the data. Safety G If foreign matter or a liquid gets into the printer, immediately stop use, unplug the power cord, and contact your FUJIFILM dealer or nearest FUJIFILM service facility. Copyright G The use of prints other than those created or photographed by you without the permission of the copyright holder is prohibited by copyright law, except when the prints are for personal use. Cooling Fan Operation G When the temperature inside the printer rises to a certain level, a cooling fan automatically begins to operate. Similarly, when the temperature inside the printer drops below a certain level, the cooling fan automatically stops. Thermal Head Wear G The thermal head will wear out, which results in diminished print quality. When this occurs, the thermal head must be replaced. Contact your FUJIFILM dealer. Condensation G Note that the following can result in the formation of condensation in the printer: • Placing the printer in very humid or steamy locations • Moving the printer from a cold outdoor location into a warm room. • Moving the printer suddenly from an air-conditioned room into a very warm and humid environment. G Using the printer when condensation has formed inside the printer can cause faults or abnormal operation, such as impaired image quality, uneven color distribution and paper jams. G To dispel any condensation inside the printer, plug the printer power cord into a power outlet, turn on the power by pressing the POWER button, and leave the printer for approximately 2 hours. The inside of the printer will warm-up and dry out. I These specifications are subject to change without notice. FUJIFILM shall not be held liable for damages resulting from errors in this Owner’s Manual. SAFETY NOTES Thank you for purchasing this FUJIFILM product. Before using your new product, thoroughly read the “Owner’s Manual” and use the product correctly. After reading the “Owner’s Manual” store it in a safe place. The warning types explained below indicate the severity of the injury or damage that can result if a warning is ignored or the product is used incorrectly. Indicates that the subject of this warning may cause death or serious injury. Indicates that the subject of this warning may cause personal injury or material damage. The icons shown below indicate the type of warning to be observed. Triangular icons notify the user that care is required. Circular icons with a diagonal bar notify the user that the action indicated is prohibited. WARNING Do not use this product if the power cable is not plugged incorrectly. Do not damage or modify the power cord. Do not bend, twist or pull the power cord excessively. Do not place heavy objects on the power cord or lay the power cord under objects with corners. Do not place the power cord near heating appliances or expose the power cord to heat. A short-circuit or heat discharge can cause an electric shock or fire. Do not place the printer in an unstable location. If the printer looses its balance and tips over or falls, it could cause injury. Do not place metal objects or receptacles containing liquids on or near the printer. Do not let water or foreign objects enter the printer. If water or foreign objects enters the printer, turn off the power switch and unplug the power cable from the power outlet. Continued use of the printer in these circumstances can result in short-circuit and cause a fire or electric short. G Contact your FUJIFILM dealer or authorized FUJIFILM service facility. If an abnormality occurs, turn off the power switch and unplug it from the power outlet. Continued use when smoke or abnormal odor emanates from the printer can cause a fire or electric shock. G Contact your FUJIFILM dealer or authorized FUJIFILM service facility. Do not get wet. Unplug from the power outlet. CAUTION Do not place the printer in location where oily smoke, steam, moisture, or dust is prevalent. This could cause a fire or electric shock. Keep out of the reach of small children. Small children may stick their hand into the printer (paper compartment cover, trash box slot, etc.) and be injured. Do not block the ventilation slits. Any blockage of the ventilation slits during use could result in a buildup of heat inside the printer, causing a fire or other damaged. I Never do the following: G Push the printer into a place that is narrow and poorly ventilated. G Use the printer on a carpet or blanket. Do not place heavy objects on the printer. The object or the printer could loose its balance and tip over or fall, causing injury. Do not use voltages other than the specified power supply voltage. This can cause a fire or electric shock. Never attempt to disassemble or modify the printer (remove the casing, etc.). Do not use the printer when it has been dropped or the casing is damaged. This can cause fire or electric shock. G Contact your FUJIFILM dealer or authorized FUJIFILM service facility. Do not plug in or unplug the printer with wet hands. This can cause electric shock. Wet hands prohibited. WARNING CAUTION Filled circles with an exclamation mark notify the user that an action must be performed. 3 2 Always grasp the plug itself when unplugging the printer. Pulling on the cord could damage the cord and cause a fire or electric shock. Unplug the printer when cleaning it or not used for an extended period. Unplug the printer for safety. Request routine inspection and cleaning of the interior of the printer. Accumulated dust inside the printer can cause fire or other trouble. G Request your FUJIFILM dealer or authorized FUJIFILM service facility to clean the interior of the printer about once every three years. Do not move the printer while it is still plugged in. This could damage the cord and cause a fire or electric shock. Do not stare for a long time at the light emitting from the printer. Looking for short periods should not cause any harm, but staring at the light for lengthy periods could result in impaired eyesight. Printer is not completely isolated from power line without pulling off the power cable, even when the power switch and the power lamp of printer are off. MISCELLANEOUS NOTE Installation site G Do not use or store the printer where the temperature and humidity are high, where vibrations are present, where the printer will be in direct sunlight, where it is dusty or sandy, or where the printer may be exposed to rain. G If the printer interferes with radio or television reception, install it away from the radio or television set. Transporting G Store the original packing material. It is needed when repacking and shipping the printer later. G When moving the printer, always remove the memory card. Data G The memory contents cannot be compensated. If data cannot be written or read due to hardware or software trouble, FUJIFILM is not responsible for memory contents compensation. Use G Do not cover the printer with a cloth or blanket while it is in use. It may cause erroneous operation or a serious accident. G Use the printer on a firm and flat surface. G Do not move the printer while it is operating. It may cause trouble. G Do not subject the printer to shock or vibration while it is operating. It may cause an error or destroy the data. Safety G If foreign matter or a liquid gets into the printer, immediately stop use, unplug the power cord, and contact your FUJIFILM dealer or nearest FUJIFILM service facility. Copyright G The use of prints other than those created or photographed by you without the permission of the copyright holder is prohibited by copyright law, except when the prints are for personal use. Cooling Fan Operation G When the temperature inside the printer rises to a certain level, a cooling fan automatically begins to operate. Similarly, when the temperature inside the printer drops below a certain level, the cooling fan automatically stops. Thermal Head Wear G The thermal head will wear out, which results in diminished print quality. When this occurs, the thermal head must be replaced. Contact your FUJIFILM dealer. Condensation G Note that the following can result in the formation of condensation in the printer: • Placing the printer in very humid or steamy locations • Moving the printer from a cold outdoor location into a warm room. • Moving the printer suddenly from an air-conditioned room into a very warm and humid environment. G Using the printer when condensation has formed inside the printer can cause faults or abnormal operation, such as impaired image quality, uneven color distribution and paper jams. G To dispel any condensation inside the printer, plug the printer power cord into a power outlet, turn on the power by pressing the POWER button, and leave the printer for approximately 2 hours. The inside of the printer will warm-up and dry out. I These specifications are subject to change without notice. FUJIFILM shall not be held liable for damages resulting from errors in this Owner’s Manual. SAFETY NOTES Thank you for purchasing this FUJIFILM product. Before using your new product, thoroughly read the “Owner’s Manual” and use the product correctly. After reading the “Owner’s Manual” store it in a safe place. The warning types explained below indicate the severity of the injury or damage that can result if a warning is ignored or the product is used incorrectly. Indicates that the subject of this warning may cause death or serious injury. Indicates that the subject of this warning may cause personal injury or material damage. The icons shown below indicate the type of warning to be observed. Triangular icons notify the user that care is required. Circular icons with a diagonal bar notify the user that the action indicated is prohibited. WARNING Do not use this product if the power cable is not plugged incorrectly. Do not damage or modify the power cord. Do not bend, twist or pull the power cord excessively. Do not place heavy objects on the power cord or lay the power cord under objects with corners. Do not place the power cord near heating appliances or expose the power cord to heat. A short-circuit or heat discharge can cause an electric shock or fire. Do not place the printer in an unstable location. If the printer looses its balance and tips over or falls, it could cause injury. Do not place metal objects or receptacles containing liquids on or near the printer. Do not let water or foreign objects enter the printer. If water or foreign objects enters the printer, turn off the power switch and unplug the power cable from the power outlet. Continued use of the printer in these circumstances can result in short-circuit and cause a fire or electric short. G Contact your FUJIFILM dealer or authorized FUJIFILM service facility. If an abnormality occurs, turn off the power switch and unplug it from the power outlet. Continued use when smoke or abnormal odor emanates from the printer can cause a fire or electric shock. G Contact your FUJIFILM dealer or authorized FUJIFILM service facility. Do not get wet. Unplug from the power outlet. CAUTION Do not place the printer in location where oily smoke, steam, moisture, or dust is prevalent. This could cause a fire or electric shock. Keep out of the reach of small children. Small children may stick their hand into the printer (paper compartment cover, trash box slot, etc.) and be injured. Do not block the ventilation slits. Any blockage of the ventilation slits during use could result in a buildup of heat inside the printer, causing a fire or other damaged. I Never do the following: G Push the printer into a place that is narrow and poorly ventilated. G Use the printer on a carpet or blanket. Do not place heavy objects on the printer. The object or the printer could loose its balance and tip over or fall, causing injury. Do not use voltages other than the specified power supply voltage. This can cause a fire or electric shock. Never attempt to disassemble or modify the printer (remove the casing, etc.). Do not use the printer when it has been dropped or the casing is damaged. This can cause fire or electric shock. G Contact your FUJIFILM dealer or authorized FUJIFILM service facility. Do not plug in or unplug the printer with wet hands. This can cause electric shock. Wet hands prohibited. WARNING CAUTION Filled circles with an exclamation mark notify the user that an action must be performed. 5 4 Try to print! . . . . . . . . . . . . . . . . . . . . . . . . . . . . . . . . . . . . . . . . . . . . . . . . . . . . . . . . . . . . . . . . . . . . . . 10 1 I WARNING . . . . . . . . . . . . . . . . . . . . . . . . . . . . . . . . . 1 I SAFETY NOTES . . . . . . . . . . . . . . . . . . . . . . . . . . . . 2 I MISCELLANEOUS NOTE . . . . . . . . . . . . . . . . . . . . . 3 I Contents . . . . . . . . . . . . . . . . . . . . . . . . . . . . . . . . . . 4 I INTRODUCTION . . . . . . . . . . . . . . . . . . . . . . . . . . . . 6 Feature/System Configuration . . . . . . . . . . . . . . . . . . . . . . . . 6 CHECKING THE CONTENTS OF THE CARTON . . . . . . . . . 7 Name and Operation of Each Part . . . . . . . . . . . . . . . . . . . . 8 PREPARING THE PRINTER FOR USE . . . . . . . . . . . 10 Procuring the necessary materials . . . . . . . . . . . . . . . . . . . 10 Usable paper . . . . . . . . . . . . . . . . . . . . . . . . . . . . . . . . . . . 10 Installing the printer . . . . . . . . . . . . . . . . . . . . . . . . . . . . . . . 11 Language . . . . . . . . . . . . . . . . . . . . . . . . . . . . . . . . . . . . . . 11 LOAD THE PRINTING PAPER . . . . . . . . . . . . . . . . . . 12 Loading the paper . . . . . . . . . . . . . . . . . . . . . . . . . . . . . . . . 12 TURN ON THE POWER AND LOAD THE MEMORY CARD . . . . . . . . . . . . . . . . . . . . . . . . . . . . . . . . . . . . . 13 Turning on the printer power . . . . . . . . . . . . . . . . . . . . . . . . 13 Loading an xD-Picture Card™ . . . . . . . . . . . . . . . . . . . . . . 13 Loading a PC card . . . . . . . . . . . . . . . . . . . . . . . . . . . . . . . 14 SELECTING THE PHOTOGRAPHS AND PRINTING . . 15 Select the picture to be printed . . . . . . . . . . . . . . . . . . . . . . 15 Setting the print quantity . . . . . . . . . . . . . . . . . . . . . . . . . . . 15 Printing . . . . . . . . . . . . . . . . . . . . . . . . . . . . . . . . . . . . . . . . 15 AT THE END OF PRINTING . . . . . . . . . . . . . . . . . . . . 16 Removing the memory card . . . . . . . . . . . . . . . . . . . . . . . . 16 Turning off the printer power . . . . . . . . . . . . . . . . . . . . . . . . 16 Removing and storing the paper . . . . . . . . . . . . . . . . . . . . 16 Enjoy various printing! . . . . . . . . . . . . . . . . . . . . . . . . . . . . . . . . . . . . . . . . . . . . . . . . . . . . . . . . . . . . 18 2 DISPLAY OF PICTURE SWITCHING/PRINT SIZE SETTING . . . . . . . . . . . . . . . . . . . . . . . . . . . . . . . . . . . 18 Switching the display of picture. . . . . . . . . . . . . . . . . . . . . . 18 Setting print size by printer button . . . . . . . . . . . . . . . . . . . 18 Setting print size by window operation . . . . . . . . . . . . . . . . 18 ALL FRAMES PRINT . . . . . . . . . . . . . . . . . . . . . . . . . 20 Print setting . . . . . . . . . . . . . . . . . . . . . . . . . . . . . . . . . . . . . 20 Setting print sets . . . . . . . . . . . . . . . . . . . . . . . . . . . . . . . . 20 OTHER PRINT . . . . . . . . . . . . . . . . . . . . . . . . . . . . . . 21 Other Print . . . . . . . . . . . . . . . . . . . . . . . . . . . . . . . . . . . . . 21 FULL PRINT SETTINGS . . . . . . . . . . . . . . . . . . . . . . . 22 Print settings . . . . . . . . . . . . . . . . . . . . . . . . . . . . . . . . . . . . 22 Set data print . . . . . . . . . . . . . . . . . . . . . . . . . . . . . . . . . . . . 22 Set border . . . . . . . . . . . . . . . . . . . . . . . . . . . . . . . . . . . . . . 23 Set frame . . . . . . . . . . . . . . . . . . . . . . . . . . . . . . . . . . . . . . . 23 Finish setting . . . . . . . . . . . . . . . . . . . . . . . . . . . . . . . . . . . . 23 MULTIPLE PRINT . . . . . . . . . . . . . . . . . . . . . . . . . . . . 24 Setting multiple print . . . . . . . . . . . . . . . . . . . . . . . . . . . . . . 24 Multiple print (same picture) . . . . . . . . . . . . . . . . . . . . . . . . 25 Multiple print (random picture - each frame) . . . . . . . . . . . 26 Multiple print (random picture - layout) . . . . . . . . . . . . . . . . 27 Multiple print (random picture - all frames) . . . . . . . . . . . . . 28 INDEX PRINT . . . . . . . . . . . . . . . . . . . . . . . . . . . . . . . 29 Setting index print . . . . . . . . . . . . . . . . . . . . . . . . . . . . . . . . 29 Setting photography information . . . . . . . . . . . . . . . . . . . . . 29 Print image selection . . . . . . . . . . . . . . . . . . . . . . . . . . . . . . 29 Index print (all frames) . . . . . . . . . . . . . . . . . . . . . . . . . . . . 30 Index print (set range) . . . . . . . . . . . . . . . . . . . . . . . . . . . . . 31 ID PRINT . . . . . . . . . . . . . . . . . . . . . . . . . . . . . . . . . . . 32 Setting ID print . . . . . . . . . . . . . . . . . . . . . . . . . . . . . . . . . . 32 ID SETTINGS . . . . . . . . . . . . . . . . . . . . . . . . . . . . . . . 34 ID settings . . . . . . . . . . . . . . . . . . . . . . . . . . . . . . . . . . . . . . 34 Set paper size . . . . . . . . . . . . . . . . . . . . . . . . . . . . . . . . . . . 34 Set frame size . . . . . . . . . . . . . . . . . . . . . . . . . . . . . . . . . . . 34 Set number of frame . . . . . . . . . . . . . . . . . . . . . . . . . . . . . . 35 Setting check . . . . . . . . . . . . . . . . . . . . . . . . . . . . . . . . . . . 35 Try printing at the registered settings . . . . . . . . . . . . . . . . . 35 DPOF PRINT . . . . . . . . . . . . . . . . . . . . . . . . . . . . . . . . 36 DPOF print . . . . . . . . . . . . . . . . . . . . . . . . . . . . . . . . . . . . . . 36 EDIT/PRINT QUALITY . . . . . . . . . . . . . . . . . . . . . . . . 37 Setting the Edit/Print Quality menu . . . . . . . . . . . . . . . . . . . 37 Zoom/Move . . . . . . . . . . . . . . . . . . . . . . . . . . . . . . . . . . . . . 37 Rotation . . . . . . . . . . . . . . . . . . . . . . . . . . . . . . . . . . . . . . . . 38 Preferable quality . . . . . . . . . . . . . . . . . . . . . . . . . . . . . . . . 38 Cancel edit . . . . . . . . . . . . . . . . . . . . . . . . . . . . . . . . . . . . . 39 Print quality . . . . . . . . . . . . . . . . . . . . . . . . . . . . . . . . . . . . . 39 Preferable quality - Mode . . . . . . . . . . . . . . . . . . . . . . . . . . 40 Preferable quality - Pinpoint color conv. . . . . . . . . . . . . . . . 40 Preferable quality - Effect . . . . . . . . . . . . . . . . . . . . . . . . . . 41 Preferable quality - Cancel Effect . . . . . . . . . . . . . . . . . . . . 41 SAVE IMAGE/ERASE PICTURES . . . . . . . . . . . . . . . 42 Save Image/Erase Pictures . . . . . . . . . . . . . . . . . . . . . . . . . 42 Save Image - Save . . . . . . . . . . . . . . . . . . . . . . . . . . . . . . . 43 Save Image - Erase frame . . . . . . . . . . . . . . . . . . . . . . . . . . 44 Save Image - Erase all . . . . . . . . . . . . . . . . . . . . . . . . . . . . 45 Using the printer connected to a PC . . . . . . . . . . . . . . . . . . . . . . . . . . . . . . . . . . . . . . . . . . . . . . . . . 67 6 Specifications . . . . . . . . . . . . . . . . . . . . . . . . . . . . . . . 82 IMPORTANT (End User License Agreement) . . . . . . . 83 Contents Connecting to a Digital Camera and Printing . . . . . . . . . . . . . . . . . . . . . . . . . . . . . . . . . . . . . . . . . . 63 5 CONNECTING TO A DIGITAL CAMERA AND PRINTING . . . . . . . . . . . . . . . . . . . . . . . . . . . . . . 63 Glossary of Terms . . . . . . . . . . . . . . . . . . . . . . . . . . . . . . . . 63 Preparing the printer and digital camera . . . . . . . . . . . . . . 64 Printing . . . . . . . . . . . . . . . . . . . . . . . . . . . . . . . . . . . . . . . . 64 Printer display screen . . . . . . . . . . . . . . . . . . . . . . . . . . . . . 65 Procedures for FUJIFILM digital cameras and printers . . . 66 INSTALLATION WORKFLOW . . . . . . . . . . . . . . . . . . 67 INSTALLATION . . . . . . . . . . . . . . . . . . . . . . . . . . . . . . 68 Start up the software installer (Windows) . . . . . . . . . . . . . . 68 Start up the software installer (Macintosh) . . . . . . . . . . . . . 68 Starting of the installer of software . . . . . . . . . . . . . . . . . . . 68 TROUBLESHOOTING TABLE-Windows . . . . . . . . . . 69 INSTALLATION PROBLEMS-Windows . . . . . . . . . . . 70 PRINTER PROBLEMS-Windows . . . . . . . . . . . . . . . . 72 MEMORY CARD PROBLEMS-Windows . . . . . . . . . . 73 APPLICATION PROBLEMS-Windows . . . . . . . . . . . . 75 TROUBLESHOOTING TABLE-Macintosh . . . . . . . . . 76 INSTALLATION PROBLEMS-Macintosh . . . . . . . . . . 77 PRINTER PROBLEMS-Macintosh . . . . . . . . . . . . . . . 77 MEMORY CARD PROBLEMS-Macintosh . . . . . . . . . 78 APPLICATION PROBLEMS-Macintosh . . . . . . . . . . . 79 SWITCHING BETWEEN PRINTER AND CARD READER CONNECTIONS . . . . . . . . . . . . . . . . . . . . . 80 The change of printer connection/ card reader connection . . . . . . . . . . . . . . . . . . . . . . . . . . . . 80 Other methods of use . . . . . . . . . . . . . . . . . . . . . . . . . . . . . . . . . . . . . . . . . . . . . . . . . . . . . . . . . . . . . 46 3 OTHER FUNCTIONS . . . . . . . . . . . . . . . . . . . . . . . . . 46 Other functions . . . . . . . . . . . . . . . . . . . . . . . . . . . . . . . . . . 46 Various settings . . . . . . . . . . . . . . . . . . . . . . . . . . . . . . . . . . 46 Various settings - Start up mode . . . . . . . . . . . . . . . . . . . . . 47 Various settings - Auto quality adjustment . . . . . . . . . . . . . 47 Various settings - Image display order . . . . . . . . . . . . . . . . 48 Various settings - Setting slide show . . . . . . . . . . . . . . . . . 48 Various settings - LCD monitor brightness adjustment . . . . 48 Various settings - Initialize settings . . . . . . . . . . . . . . . . . . . 49 Selecting the Memory card . . . . . . . . . . . . . . . . . . . . . . . . . 50 Show total number of prints . . . . . . . . . . . . . . . . . . . . . . . . 50 When trouble occurs . . . . . . . . . . . . . . . . . . . . . . . . . . . . . . . . . . . . . . . . . . . . . . . . . . . . . . . . . . . . . . 51 4 HEAD CLEANING . . . . . . . . . . . . . . . . . . . . . . . . . . . . 51 Executing head cleaning . . . . . . . . . . . . . . . . . . . . . . . . . . 51 PRINTER UNIT . . . . . . . . . . . . . . . . . . . . . . . . . . . . . . 52 When the memory card cover is removed . . . . . . . . . . . . . 52 WHEN AN ERROR IS DISPLAYED ON THE LCD MONITOR . . . . . . . . . . . . . . . . . . . . . . . . . . . . . . . . . . 54 WHEN DATA IS DISPLAYED ON THE LCD MONITOR . . 58 Definition of terms . . . . . . . . . . . . . . . . . . . . . . . . . . . . . . . . . . 62 Maintenance . . . . . . . . . . . . . . . . . . . . . . . . . . . . . . . . . . . . . . . 62 5 4 Try to print! . . . . . . . . . . . . . . . . . . . . . . . . . . . . . . . . . . . . . . . . . . . . . . . . . . . . . . . . . . . . . . . . . . . . . . 10 1 I WARNING . . . . . . . . . . . . . . . . . . . . . . . . . . . . . . . . . 1 I SAFETY NOTES . . . . . . . . . . . . . . . . . . . . . . . . . . . . 2 I MISCELLANEOUS NOTE . . . . . . . . . . . . . . . . . . . . . 3 I Contents . . . . . . . . . . . . . . . . . . . . . . . . . . . . . . . . . . 4 I INTRODUCTION . . . . . . . . . . . . . . . . . . . . . . . . . . . . 6 Feature/System Configuration . . . . . . . . . . . . . . . . . . . . . . . . 6 CHECKING THE CONTENTS OF THE CARTON . . . . . . . . . 7 Name and Operation of Each Part . . . . . . . . . . . . . . . . . . . . 8 PREPARING THE PRINTER FOR USE . . . . . . . . . . . 10 Procuring the necessary materials . . . . . . . . . . . . . . . . . . . 10 Usable paper . . . . . . . . . . . . . . . . . . . . . . . . . . . . . . . . . . . 10 Installing the printer . . . . . . . . . . . . . . . . . . . . . . . . . . . . . . . 11 Language . . . . . . . . . . . . . . . . . . . . . . . . . . . . . . . . . . . . . . 11 LOAD THE PRINTING PAPER . . . . . . . . . . . . . . . . . . 12 Loading the paper . . . . . . . . . . . . . . . . . . . . . . . . . . . . . . . . 12 TURN ON THE POWER AND LOAD THE MEMORY CARD . . . . . . . . . . . . . . . . . . . . . . . . . . . . . . . . . . . . . 13 Turning on the printer power . . . . . . . . . . . . . . . . . . . . . . . . 13 Loading an xD-Picture Card™ . . . . . . . . . . . . . . . . . . . . . . 13 Loading a PC card . . . . . . . . . . . . . . . . . . . . . . . . . . . . . . . 14 SELECTING THE PHOTOGRAPHS AND PRINTING . . 15 Select the picture to be printed . . . . . . . . . . . . . . . . . . . . . . 15 Setting the print quantity . . . . . . . . . . . . . . . . . . . . . . . . . . . 15 Printing . . . . . . . . . . . . . . . . . . . . . . . . . . . . . . . . . . . . . . . . 15 AT THE END OF PRINTING . . . . . . . . . . . . . . . . . . . . 16 Removing the memory card . . . . . . . . . . . . . . . . . . . . . . . . 16 Turning off the printer power . . . . . . . . . . . . . . . . . . . . . . . . 16 Removing and storing the paper . . . . . . . . . . . . . . . . . . . . 16 Enjoy various printing! . . . . . . . . . . . . . . . . . . . . . . . . . . . . . . . . . . . . . . . . . . . . . . . . . . . . . . . . . . . . 18 2 DISPLAY OF PICTURE SWITCHING/PRINT SIZE SETTING . . . . . . . . . . . . . . . . . . . . . . . . . . . . . . . . . . . 18 Switching the display of picture. . . . . . . . . . . . . . . . . . . . . . 18 Setting print size by printer button . . . . . . . . . . . . . . . . . . . 18 Setting print size by window operation . . . . . . . . . . . . . . . . 18 ALL FRAMES PRINT . . . . . . . . . . . . . . . . . . . . . . . . . 20 Print setting . . . . . . . . . . . . . . . . . . . . . . . . . . . . . . . . . . . . . 20 Setting print sets . . . . . . . . . . . . . . . . . . . . . . . . . . . . . . . . 20 OTHER PRINT . . . . . . . . . . . . . . . . . . . . . . . . . . . . . . 21 Other Print . . . . . . . . . . . . . . . . . . . . . . . . . . . . . . . . . . . . . 21 FULL PRINT SETTINGS . . . . . . . . . . . . . . . . . . . . . . . 22 Print settings . . . . . . . . . . . . . . . . . . . . . . . . . . . . . . . . . . . . 22 Set data print . . . . . . . . . . . . . . . . . . . . . . . . . . . . . . . . . . . . 22 Set border . . . . . . . . . . . . . . . . . . . . . . . . . . . . . . . . . . . . . . 23 Set frame . . . . . . . . . . . . . . . . . . . . . . . . . . . . . . . . . . . . . . . 23 Finish setting . . . . . . . . . . . . . . . . . . . . . . . . . . . . . . . . . . . . 23 MULTIPLE PRINT . . . . . . . . . . . . . . . . . . . . . . . . . . . . 24 Setting multiple print . . . . . . . . . . . . . . . . . . . . . . . . . . . . . . 24 Multiple print (same picture) . . . . . . . . . . . . . . . . . . . . . . . . 25 Multiple print (random picture - each frame) . . . . . . . . . . . 26 Multiple print (random picture - layout) . . . . . . . . . . . . . . . . 27 Multiple print (random picture - all frames) . . . . . . . . . . . . . 28 INDEX PRINT . . . . . . . . . . . . . . . . . . . . . . . . . . . . . . . 29 Setting index print . . . . . . . . . . . . . . . . . . . . . . . . . . . . . . . . 29 Setting photography information . . . . . . . . . . . . . . . . . . . . . 29 Print image selection . . . . . . . . . . . . . . . . . . . . . . . . . . . . . . 29 Index print (all frames) . . . . . . . . . . . . . . . . . . . . . . . . . . . . 30 Index print (set range) . . . . . . . . . . . . . . . . . . . . . . . . . . . . . 31 ID PRINT . . . . . . . . . . . . . . . . . . . . . . . . . . . . . . . . . . . 32 Setting ID print . . . . . . . . . . . . . . . . . . . . . . . . . . . . . . . . . . 32 ID SETTINGS . . . . . . . . . . . . . . . . . . . . . . . . . . . . . . . 34 ID settings . . . . . . . . . . . . . . . . . . . . . . . . . . . . . . . . . . . . . . 34 Set paper size . . . . . . . . . . . . . . . . . . . . . . . . . . . . . . . . . . . 34 Set frame size . . . . . . . . . . . . . . . . . . . . . . . . . . . . . . . . . . . 34 Set number of frame . . . . . . . . . . . . . . . . . . . . . . . . . . . . . . 35 Setting check . . . . . . . . . . . . . . . . . . . . . . . . . . . . . . . . . . . 35 Try printing at the registered settings . . . . . . . . . . . . . . . . . 35 DPOF PRINT . . . . . . . . . . . . . . . . . . . . . . . . . . . . . . . . 36 DPOF print . . . . . . . . . . . . . . . . . . . . . . . . . . . . . . . . . . . . . . 36 EDIT/PRINT QUALITY . . . . . . . . . . . . . . . . . . . . . . . . 37 Setting the Edit/Print Quality menu . . . . . . . . . . . . . . . . . . . 37 Zoom/Move . . . . . . . . . . . . . . . . . . . . . . . . . . . . . . . . . . . . . 37 Rotation . . . . . . . . . . . . . . . . . . . . . . . . . . . . . . . . . . . . . . . . 38 Preferable quality . . . . . . . . . . . . . . . . . . . . . . . . . . . . . . . . 38 Cancel edit . . . . . . . . . . . . . . . . . . . . . . . . . . . . . . . . . . . . . 39 Print quality . . . . . . . . . . . . . . . . . . . . . . . . . . . . . . . . . . . . . 39 Preferable quality - Mode . . . . . . . . . . . . . . . . . . . . . . . . . . 40 Preferable quality - Pinpoint color conv. . . . . . . . . . . . . . . . 40 Preferable quality - Effect . . . . . . . . . . . . . . . . . . . . . . . . . . 41 Preferable quality - Cancel Effect . . . . . . . . . . . . . . . . . . . . 41 SAVE IMAGE/ERASE PICTURES . . . . . . . . . . . . . . . 42 Save Image/Erase Pictures . . . . . . . . . . . . . . . . . . . . . . . . . 42 Save Image - Save . . . . . . . . . . . . . . . . . . . . . . . . . . . . . . . 43 Save Image - Erase frame . . . . . . . . . . . . . . . . . . . . . . . . . . 44 Save Image - Erase all . . . . . . . . . . . . . . . . . . . . . . . . . . . . 45 Using the printer connected to a PC . . . . . . . . . . . . . . . . . . . . . . . . . . . . . . . . . . . . . . . . . . . . . . . . . 67 6 Specifications . . . . . . . . . . . . . . . . . . . . . . . . . . . . . . . 82 IMPORTANT (End User License Agreement) . . . . . . . 83 Contents Connecting to a Digital Camera and Printing . . . . . . . . . . . . . . . . . . . . . . . . . . . . . . . . . . . . . . . . . . 63 5 CONNECTING TO A DIGITAL CAMERA AND PRINTING . . . . . . . . . . . . . . . . . . . . . . . . . . . . . . 63 Glossary of Terms . . . . . . . . . . . . . . . . . . . . . . . . . . . . . . . . 63 Preparing the printer and digital camera . . . . . . . . . . . . . . 64 Printing . . . . . . . . . . . . . . . . . . . . . . . . . . . . . . . . . . . . . . . . 64 Printer display screen . . . . . . . . . . . . . . . . . . . . . . . . . . . . . 65 Procedures for FUJIFILM digital cameras and printers . . . 66 INSTALLATION WORKFLOW . . . . . . . . . . . . . . . . . . 67 INSTALLATION . . . . . . . . . . . . . . . . . . . . . . . . . . . . . . 68 Start up the software installer (Windows) . . . . . . . . . . . . . . 68 Start up the software installer (Macintosh) . . . . . . . . . . . . . 68 Starting of the installer of software . . . . . . . . . . . . . . . . . . . 68 TROUBLESHOOTING TABLE-Windows . . . . . . . . . . 69 INSTALLATION PROBLEMS-Windows . . . . . . . . . . . 70 PRINTER PROBLEMS-Windows . . . . . . . . . . . . . . . . 72 MEMORY CARD PROBLEMS-Windows . . . . . . . . . . 73 APPLICATION PROBLEMS-Windows . . . . . . . . . . . . 75 TROUBLESHOOTING TABLE-Macintosh . . . . . . . . . 76 INSTALLATION PROBLEMS-Macintosh . . . . . . . . . . 77 PRINTER PROBLEMS-Macintosh . . . . . . . . . . . . . . . 77 MEMORY CARD PROBLEMS-Macintosh . . . . . . . . . 78 APPLICATION PROBLEMS-Macintosh . . . . . . . . . . . 79 SWITCHING BETWEEN PRINTER AND CARD READER CONNECTIONS . . . . . . . . . . . . . . . . . . . . . 80 The change of printer connection/ card reader connection . . . . . . . . . . . . . . . . . . . . . . . . . . . . 80 Other methods of use . . . . . . . . . . . . . . . . . . . . . . . . . . . . . . . . . . . . . . . . . . . . . . . . . . . . . . . . . . . . . 46 3 OTHER FUNCTIONS . . . . . . . . . . . . . . . . . . . . . . . . . 46 Other functions . . . . . . . . . . . . . . . . . . . . . . . . . . . . . . . . . . 46 Various settings . . . . . . . . . . . . . . . . . . . . . . . . . . . . . . . . . . 46 Various settings - Start up mode . . . . . . . . . . . . . . . . . . . . . 47 Various settings - Auto quality adjustment . . . . . . . . . . . . . 47 Various settings - Image display order . . . . . . . . . . . . . . . . 48 Various settings - Setting slide show . . . . . . . . . . . . . . . . . 48 Various settings - LCD monitor brightness adjustment . . . . 48 Various settings - Initialize settings . . . . . . . . . . . . . . . . . . . 49 Selecting the Memory card . . . . . . . . . . . . . . . . . . . . . . . . . 50 Show total number of prints . . . . . . . . . . . . . . . . . . . . . . . . 50 When trouble occurs . . . . . . . . . . . . . . . . . . . . . . . . . . . . . . . . . . . . . . . . . . . . . . . . . . . . . . . . . . . . . . 51 4 HEAD CLEANING . . . . . . . . . . . . . . . . . . . . . . . . . . . . 51 Executing head cleaning . . . . . . . . . . . . . . . . . . . . . . . . . . 51 PRINTER UNIT . . . . . . . . . . . . . . . . . . . . . . . . . . . . . . 52 When the memory card cover is removed . . . . . . . . . . . . . 52 WHEN AN ERROR IS DISPLAYED ON THE LCD MONITOR . . . . . . . . . . . . . . . . . . . . . . . . . . . . . . . . . . 54 WHEN DATA IS DISPLAYED ON THE LCD MONITOR . . 58 Definition of terms . . . . . . . . . . . . . . . . . . . . . . . . . . . . . . . . . . 62 Maintenance . . . . . . . . . . . . . . . . . . . . . . . . . . . . . . . . . . . . . . . 62 Introduction 7 Introduction 6 The CX-550 is equipped with a LCD (liquid crystal) monitor. By merely operating the printer in accordance with the directions displayed on the monitor screen, you can enjoy the following: Printer Paper case 1 Retaining ring 1 Cleaning paper 1 CD-ROM 1 Software for Printpix Digital Photo Printer CX-550 Cleaning paper core 1 Power cord 1 Owner’s Manual 1 (this manual) Feature/System Configuration CHECKING THE CONTENTS OF THE CARTON Multiple Print TV monitor Video cable✽ ✽ Use a video cable less than 3.0m long. Index Print Notebook PC xD-Picture Card PC card PC card adapter Digital Camera Use a USB cable less than 3.0m long. Use a USB cable less than 3.0m long. Personal Computer with USB as a standard feature USB Card reader OS Windows® 98/98 SE/Me/2000/XP Mac OS 8.6 to 9.2 USB Printer Only connect digital cameras that support PictBridge to the printer. G System Configuration IEasily print digital camera picture data! Memory card picture data can be directly printed. When full-size prints are printed, borderless printing is possible. When printing, various photo finishing can also be performed. For more information, see page 10. IConnect to a PC or Digital Camera and Print. You can print by connecting to a PC or digital camera using a USB cable. For more information, see page 63. IEasy backup for digital camera images. The CX-550 features 2 memory card slots that accommodate PC cards and xD-Picture Cards to provide a quick and easy way of backing up images on memory cards. For more information, see page 42. IConnect the CX-550 to a PC and read the memory card data! The CX-550 can be connected to a PC using the USB cable and used as a card reader. For more information, see page 67. If there are any missing or damaged parts, please contact your dealer. After printing, always place the paper into the paper case and store it (→P.17). Use when cleaning the head (→P.51). ✽The type of power cord and plug depends on the country. Introduction 7 Introduction 6 The CX-550 is equipped with a LCD (liquid crystal) monitor. By merely operating the printer in accordance with the directions displayed on the monitor screen, you can enjoy the following: Printer Paper case 1 Retaining ring 1 Cleaning paper 1 CD-ROM 1 Software for Printpix Digital Photo Printer CX-550 Cleaning paper core 1 Power cord 1 Owner’s Manual 1 (this manual) Feature/System Configuration CHECKING THE CONTENTS OF THE CARTON Multiple Print TV monitor Video cable✽ ✽ Use a video cable less than 3.0m long. Index Print Notebook PC xD-Picture Card PC card PC card adapter Digital Camera Use a USB cable less than 3.0m long. Use a USB cable less than 3.0m long. Personal Computer with USB as a standard feature USB Card reader OS Windows® 98/98 SE/Me/2000/XP Mac OS 8.6 to 9.2 USB Printer Only connect digital cameras that support PictBridge to the printer. G System Configuration IEasily print digital camera picture data! Memory card picture data can be directly printed. When full-size prints are printed, borderless printing is possible. When printing, various photo finishing can also be performed. For more information, see page 10. IConnect to a PC or Digital Camera and Print. You can print by connecting to a PC or digital camera using a USB cable. For more information, see page 63. IEasy backup for digital camera images. The CX-550 features 2 memory card slots that accommodate PC cards and xD-Picture Cards to provide a quick and easy way of backing up images on memory cards. For more information, see page 42. IConnect the CX-550 to a PC and read the memory card data! The CX-550 can be connected to a PC using the USB cable and used as a card reader. For more information, see page 67. If there are any missing or damaged parts, please contact your dealer. After printing, always place the paper into the paper case and store it (→P.17). Use when cleaning the head (→P.51). ✽The type of power cord and plug depends on the country. Introduction 9 Introduction 8 Name and Operation of Each Part G Paper compartment cover Open when loading and unloading the paper roll. Make sure to use the printer with this cover closed. G LCD (Liquid crystal monitor) Displays the operation menus and the pictures in the memory card. G [4” × 6” SIZE] button Press to switch the print size to [4” × 6” size]. G [3” × 4” SIZE] button Press to switch the print size to [3” × 4” size]. G [ID PRINT] button Press to switch print to [ID print]. G [MENU] button Press this button to save images or to specify printing or camera settings. G [BACK] button Press to return to the last picture and to interrupt operation. G [SET] button Press to set the setting contents and picture. G [DISPLAY] button Press this button to switch image display in the following sequence: Single-frame → 9-frame →Preview. G[EDIT] button Press to perform the photo finish and print quality functions. G [PRINT] button Press to perform printing. When the picture, quantity of prints, etc. are set and printing is possible, the lamp lights steadily. During printing, the lamp blinks. G [QUANTITY] button : [+] [-] Use to set the print number (set number). G Direction buttons: fg Use to select the menu and picture and to change the picture zoom rate. G [OPEN] button Press to open the paper compartment cover. G [BUSY] lamp Blinks or lights when the xD- Picture Card or PC card is operating. G [EJECT] button Press to remove the PC card. ✽Press this button until the PC card is completely ejected. G PC card slot A PC card inserts into this slot. ✽Insert the PC card until it clicks. G xD-Picture Card slot Insert xD-PictureCards into this slot. See P.13 and P.16 for information on loading and removing xD- Picture Cards. G [POWER] button Press to turn the printer power on and off. G Trash box Receives the cuttings while printing. Always install the trash box. G USB terminal (PC connection) Connects the USB cable (commercial part) when connecting the printer to a PC. G Ventilation holes Exhaust the printer heat. Do not block these holes. G Power input terminal Connects the power cable. G Picture output terminal (video output) Connects to a television set using a video cable. G Paper alignment position Use to align the top edge of the paper when loading the paper. G Paper holder slot The paper holder fits here. IOwner’s Manual symbols : Precautions to be observed during operation. : More suitable usage method and operation points. “ ” : Represents the name of the menu or window displayed on the LCD monitor. [ ] : Represents the name of a printer button. ✽In this manual, “memory card” refers to both xD-Picture Cards and PC cards. Note TIP I Screen saver : This function prevents burning of the LCD monitor screen. When the display does not change within 20 minutes, the monitor enters the screen saver mode. When any button is pressed, the monitor returns to the original window. GPict Bridge cable terminal (digital camera connection) When you connect with a digital camera, use a USB cable (digital camera enclosure article). GMemory card cover It is the cover of a memory card slot. ✽Please do not open, except in case you take out and insert memory card. Introduction 9 Introduction 8 Name and Operation of Each Part G Paper compartment cover Open when loading and unloading the paper roll. Make sure to use the printer with this cover closed. G LCD (Liquid crystal monitor) Displays the operation menus and the pictures in the memory card. G [4” × 6” SIZE] button Press to switch the print size to [4” × 6” size]. G [3” × 4” SIZE] button Press to switch the print size to [3” × 4” size]. G [ID PRINT] button Press to switch print to [ID print]. G [MENU] button Press this button to save images or to specify printing or camera settings. G [BACK] button Press to return to the last picture and to interrupt operation. G [SET] button Press to set the setting contents and picture. G [DISPLAY] button Press this button to switch image display in the following sequence: Single-frame → 9-frame →Preview. G[EDIT] button Press to perform the photo finish and print quality functions. G [PRINT] button Press to perform printing. When the picture, quantity of prints, etc. are set and printing is possible, the lamp lights steadily. During printing, the lamp blinks. G [QUANTITY] button : [+] [-] Use to set the print number (set number). G Direction buttons: fg Use to select the menu and picture and to change the picture zoom rate. G [OPEN] button Press to open the paper compartment cover. G [BUSY] lamp Blinks or lights when the xD- Picture Card or PC card is operating. G [EJECT] button Press to remove the PC card. ✽Press this button until the PC card is completely ejected. G PC card slot A PC card inserts into this slot. ✽Insert the PC card until it clicks. G xD-Picture Card slot Insert xD-PictureCards into this slot. See P.13 and P.16 for information on loading and removing xD- Picture Cards. G [POWER] button Press to turn the printer power on and off. G Trash box Receives the cuttings while printing. Always install the trash box. G USB terminal (PC connection) Connects the USB cable (commercial part) when connecting the printer to a PC. G Ventilation holes Exhaust the printer heat. Do not block these holes. G Power input terminal Connects the power cable. G Picture output terminal (video output) Connects to a television set using a video cable. G Paper alignment position Use to align the top edge of the paper when loading the paper. G Paper holder slot The paper holder fits here. IOwner’s Manual symbols : Precautions to be observed during operation. : More suitable usage method and operation points. “ ” : Represents the name of the menu or window displayed on the LCD monitor. [ ] : Represents the name of a printer button. ✽In this manual, “memory card” refers to both xD-Picture Cards and PC cards. Note TIP I Screen saver : This function prevents burning of the LCD monitor screen. When the display does not change within 20 minutes, the monitor enters the screen saver mode. When any button is pressed, the monitor returns to the original window. GPict Bridge cable terminal (digital camera connection) When you connect with a digital camera, use a USB cable (digital camera enclosure article). GMemory card cover It is the cover of a memory card slot. ✽Please do not open, except in case you take out and insert memory card. 11 Try to print! 1 Try to print! 10 Try to print! 1 1 Install the printer. Set the printer on a flat, wide surface. 2 Connect the power cord to the printer. Connect one end of the accessory power cord to the power input terminal on the back of the printer. Plug the other end of the power cord into a power outlet. 3 Install the trash box to the printer. • Place the printer far enough from a wall so that the ventilation holes are not blocked. • When the paper is loaded, the paper compartment cover opens upward. Therefore, provide a free space of far enough above the printer. • The first time you use a memory card, peel the protection sticker off the cover. Note • Do not turn on the printer power yet. Note • Always install the trash box. • Do not turn on the printer power yet. Note • Do not obstruct the paper outlet or grab the paper. Note PREPARING THE PRINTER FOR USE Use the printer after checking the accessories (→P.7). Procuring the necessary materials Before starting to print, always procure the following items: Usable paper Printpix Paper (Sold separately) This printer uses roll type paper. Printer Trash box Power cord Paper holder Retaining ring Paper (Sold separately) Paper case Memory card (Sold separately) (xD-Picture Card™, PC card) G Photo Type (100 mm/4 in. wide): RK-SD40 This is normal photo type paper. Installing the printer • Be sure that the paper retaining ring is installed. • After use, always place the paper into the paper case. • After using the printer, always place the paper into the paper case and store it avoiding the following locations: - Where it is dry, where the humidity is high, or where it is dusty. - In a vehicle in the summer, near heating equipment, and other places where the temperature is high. - Near a window or other places where the paper will be exposed to direct sunlight or strong light. • Paper with the protective bag unsealed cannot be stored for a long time. Use it as quickly as possible. • Do not use paper whose effective date is expired. • When the paper curls immediately after printing, it will flatten naturally if left alone. • Do not drop the paper and damage the corners. It will cause the paper to jam. • When there are water droplets on the print surface after printing, immediately wipe the droplets off by patting the surface with a soft cloth or tissue. Note h Paper When the printer detects the paper end holes, it judges that there is no more paper and does not print any farther. Do not cut off and use this part. It will cause paper jamming and printer trouble. Language The language displayed on the LCD monitor can be switched among “ENGLISH”, “FRENCH”, “GERMAN” and “SPANISH”. The language display setting is saved even when the printer power is turned off (→P.46). 1 Press the [MENU] button on the top of the printer. Use f to select “OTHER FUNCTIONS” and press the [SET] button. 3 Use f to select the desired language. ENGLISH: English language display FRENCH: French language display GERMAN: German language display SPANISH: Spanish language display 4 When the [SET] button is pressed at the end of setting, the monitor returns to the “OTHERS” window. TIP • Initial setting is “ENGLISH”. • The language display setting is saved even when the printer power is turned off. Paper end hole ✽The type of power cord and plug depends on the country. Select 2 Use f to select “LANGUAGE” and press the [SET] button. Select TIP • For the best possible print quality, print at temperatures between 18°C and 28°C with a relative humidity of 40% to 60%. 11 Try to print! 1 Try to print! 10 Try to print! 1 1 Install the printer. Set the printer on a flat, wide surface. 2 Connect the power cord to the printer. Connect one end of the accessory power cord to the power input terminal on the back of the printer. Plug the other end of the power cord into a power outlet. 3 Install the trash box to the printer. • Place the printer far enough from a wall so that the ventilation holes are not blocked. • When the paper is loaded, the paper compartment cover opens upward. Therefore, provide a free space of far enough above the printer. • The first time you use a memory card, peel the protection sticker off the cover. Note • Do not turn on the printer power yet. Note • Always install the trash box. • Do not turn on the printer power yet. Note • Do not obstruct the paper outlet or grab the paper. Note PREPARING THE PRINTER FOR USE Use the printer after checking the accessories (→P.7). Procuring the necessary materials Before starting to print, always procure the following items: Usable paper Printpix Paper (Sold separately) This printer uses roll type paper. Printer Trash box Power cord Paper holder Retaining ring Paper (Sold separately) Paper case Memory card (Sold separately) (xD-Picture Card™, PC card) G Photo Type (100 mm/4 in. wide): RK-SD40 This is normal photo type paper. Installing the printer • Be sure that the paper retaining ring is installed. • After use, always place the paper into the paper case. • After using the printer, always place the paper into the paper case and store it avoiding the following locations: - Where it is dry, where the humidity is high, or where it is dusty. - In a vehicle in the summer, near heating equipment, and other places where the temperature is high. - Near a window or other places where the paper will be exposed to direct sunlight or strong light. • Paper with the protective bag unsealed cannot be stored for a long time. Use it as quickly as possible. • Do not use paper whose effective date is expired. • When the paper curls immediately after printing, it will flatten naturally if left alone. • Do not drop the paper and damage the corners. It will cause the paper to jam. • When there are water droplets on the print surface after printing, immediately wipe the droplets off by patting the surface with a soft cloth or tissue. Note h Paper When the printer detects the paper end holes, it judges that there is no more paper and does not print any farther. Do not cut off and use this part. It will cause paper jamming and printer trouble. Language The language displayed on the LCD monitor can be switched among “ENGLISH”, “FRENCH”, “GERMAN” and “SPANISH”. The language display setting is saved even when the printer power is turned off (→P.46). 1 Press the [MENU] button on the top of the printer. Use f to select “OTHER FUNCTIONS” and press the [SET] button. 3 Use f to select the desired language. ENGLISH: English language display FRENCH: French language display GERMAN: German language display SPANISH: Spanish language display 4 When the [SET] button is pressed at the end of setting, the monitor returns to the “OTHERS” window. TIP • Initial setting is “ENGLISH”. • The language display setting is saved even when the printer power is turned off. Paper end hole ✽The type of power cord and plug depends on the country. Select 2 Use f to select “LANGUAGE” and press the [SET] button. Select TIP • For the best possible print quality, print at temperatures between 18°C and 28°C with a relative humidity of 40% to 60%. 13 Try to print! 1 Try to print! 12 Try to print! 1 TURN ON THE POWER AND LOAD THE MEMORY CARD Insert the memory card after turning on the printer power. The CX-550 can print the data of xD-Picture Card and PC card. Insert the memory card to be used. Turning on the printer power LOAD THE PRINTING PAPER Place the roll type paper onto the paper holder before loading the paper into the printer. The printer automatically recognizes the type of paper. Loading the paper 1 Press the [OPEN] button at the upper right-hand side of the printer. Open the paper compartment cover. Remove the paper holder. 2 Separate the paper holder to two parts, white and black. 3 Remove the printing paper from the moisture- proof bag and insert the paper holders. q Insert the white paper holder into the white end of the paper core. w Insert the black paper holder into the black end of the paper core. • Do not turn on the printer power yet. Note • Do not turn on the printer power yet. Note • Do not peel the paper holding sticker from the paper yet. Note • Do not peel the paper holding sticker from the paper yet. • When loading the paper, ensure that there is no gap between the paper and the paper holder. Note 4 5 Peel the paper holding sticker from the paper and adjust the paper position. Turn the paper in the arrow direction, and align the top edge of the paper to the paper alignment position. After loading the paper, close the paper compartment cover. Grasp the paper holder knob and place the paper holder into the printer. Insert the paper holder into the printer from the top and pull it gently to the front. 1 Press the [POWER] button at the bottom front left-hand corner of the printer. The printer power comes on and a window appears on the LCD monitor screen. Loading an xD-Picture CardTM 1 • Do not touch the power supply section (gold-colored area) of the xD-Picture Card Note Open the memory card cover. Insert the xD-Picture Card into the xD-Picture Card slot with the power supply section (gold- colored area) downwards and push it in until it clicks. Close the memory card cover. Capacity: 16 MB, 32 MB, 64 MB, 128 MB, 256 MB, 512 MB • Format xD-Picture Cards on the digital camera. Usable xD-Picture Card White White Paper holding sticker Black Black q w TIP • When the [BUSY] lamp is off, the memory card can be removed at any time. TIP • To set “STARTUP MODE”, refer to P.47. • Do not disconnect the power cord or remove the memory card during printing. Note Adjust the paper position 2 The “MENU” window appears. Insert the memory card. Use f to select “PRINT : EACH FRAME”, and then press the [SET] button. For more information, see “Loading an xD- Picture Card™”: (→P.13) or “Loading a PC Card”: (→P.14). PRINT : EACH FRAME: (→P.15) The pictures on the memory card are displayed on the monitor screen one frame at a time. Each frame can be selected. ✽When DPOF settings are specified (→P.36) PRINT : ALL FRAMES: (→P.20) The pictures on the memory card are displayed on the monitor screen in batches of 9 frames each. All the frames can be selected. ✽When DPOF settings are specified (→P.36) ID PRINT: (→P.32) OTHER PRINTING OPTIONS: (→P.21) SAVE IMAGE: (→P.42) OTHER FUNCTIONS: (→P.46) When “STARTUP MODE” is “FULL” When “STARTUP MODE” is “ID PRINT” Direction of the roll paper 13 Try to print! 1 Try to print! 12 Try to print! 1 TURN ON THE POWER AND LOAD THE MEMORY CARD Insert the memory card after turning on the printer power. The CX-550 can print the data of xD-Picture Card and PC card. Insert the memory card to be used. Turning on the printer power LOAD THE PRINTING PAPER Place the roll type paper onto the paper holder before loading the paper into the printer. The printer automatically recognizes the type of paper. Loading the paper 1 Press the [OPEN] button at the upper right-hand side of the printer. Open the paper compartment cover. Remove the paper holder. 2 Separate the paper holder to two parts, white and black. 3 Remove the printing paper from the moisture- proof bag and insert the paper holders. q Insert the white paper holder into the white end of the paper core. w Insert the black paper holder into the black end of the paper core. • Do not turn on the printer power yet. Note • Do not turn on the printer power yet. Note • Do not peel the paper holding sticker from the paper yet. Note • Do not peel the paper holding sticker from the paper yet. • When loading the paper, ensure that there is no gap between the paper and the paper holder. Note 4 5 Peel the paper holding sticker from the paper and adjust the paper position. Turn the paper in the arrow direction, and align the top edge of the paper to the paper alignment position. After loading the paper, close the paper compartment cover. Grasp the paper holder knob and place the paper holder into the printer. Insert the paper holder into the printer from the top and pull it gently to the front. 1 Press the [POWER] button at the bottom front left-hand corner of the printer. The printer power comes on and a window appears on the LCD monitor screen. Loading an xD-Picture CardTM 1 • Do not touch the power supply section (gold-colored area) of the xD-Picture Card Note Open the memory card cover. Insert the xD-Picture Card into the xD-Picture Card slot with the power supply section (gold- colored area) downwards and push it in until it clicks. Close the memory card cover. Capacity: 16 MB, 32 MB, 64 MB, 128 MB, 256 MB, 512 MB • Format xD-Picture Cards on the digital camera. Usable xD-Picture Card White White Paper holding sticker Black Black q w TIP • When the [BUSY] lamp is off, the memory card can be removed at any time. TIP • To set “STARTUP MODE”, refer to P.47. • Do not disconnect the power cord or remove the memory card during printing. Note Adjust the paper position 2 The “MENU” window appears. Insert the memory card. Use f to select “PRINT : EACH FRAME”, and then press the [SET] button. For more information, see “Loading an xD- Picture Card™”: (→P.13) or “Loading a PC Card”: (→P.14). PRINT : EACH FRAME: (→P.15) The pictures on the memory card are displayed on the monitor screen one frame at a time. Each frame can be selected. ✽When DPOF settings are specified (→P.36) PRINT : ALL FRAMES: (→P.20) The pictures on the memory card are displayed on the monitor screen in batches of 9 frames each. All the frames can be selected. ✽When DPOF settings are specified (→P.36) ID PRINT: (→P.32) OTHER PRINTING OPTIONS: (→P.21) SAVE IMAGE: (→P.42) OTHER FUNCTIONS: (→P.46) When “STARTUP MODE” is “FULL” When “STARTUP MODE” is “ID PRINT” Direction of the roll paper 14 Try to print! 1 15 Try to print! 1 Try to print! SELECTING THE PHOTOGRAPHS AND PRINTING Select the picture to be printed Loading a PC card 1 • When using a PC card adapter, insert the memory card to the adapter in advance. Note Open the memory card cover. Insert the PC card fully into the slot with the front of the card facing upward. Close the memory card cover. Always use a PC card corresponding to PCMCIA TYPE I/II Standard compliant ATA. Various memory cards can be used by using a PC card adapter matched to the memory card.Usable PC cards • Microdrive only PC card adapter (IBM, MELCO, FUJIFILM) • PC card adapter MSAC PC2/MSAC-PC3 for memory stick (SONY) • PC card adapter for CompactFlash (SanDisk) • PC card adapter for SD card (MATSUSHITA ELECTRIC) • PC card adapter DPC-AD for xD-Picture Card (FUJIFILM) ✽Use a Digital Camera to format xD-Picture Card. • Windows 98/98 SE/Me: Normal format • Windows 2000 Professional / XP: FAT • Macintosh: DOS format 1 The picture window is displayed. Use g to select the picture you want to print. • Do not touch the moving paper while printing. • Do not remove the memory card while printing. • Do not pull out the trash box while printing. • When an error window or information window is displayed, refer to pages 54 to 61. • Do not turn off the printer during printing. • Do not open the memory card cover during printing. Note TIP • When the image is 4 frames or more, and g is pressed for 1 second or longer, the image is quick scrolled. However, for files other than Exif (JPEG, TIFF-YC/RGB), only image type characters are displayed. TIP • When the [BACK] button is pressed before printing is executed, the monitor is returned to the picture window. TIP • When the LCD monitor is difficult to view, adjust the brightness by pressing the [DISPLAY] button for 2 seconds. TIP • Plural frames can be selected and the number of prints can then be specified for those frames. To select an additional frame, use the g buttons to view the frame and then specify the number of prints. • To view your print press the [DISPLAY] button to open the preview window. • Press the [PRINT] button in the preview window to print your images (→P.18). TIP • When there is DPOF information, pictures are printed in accordance with the DPOF information (→P.36). TIP • To halt printing during multi- picture printing, press the [BACK] button. Setting the print quantity 1 Use the [QUANTITY] [+] [–] buttons to set the print quantity. After setting the print quantity, press the [SET] button. Printing Note: Do not pull out the trash box while printing. 1 Press the [PRINT] button. The printing window is displayed, and printing is started. I The following files cannot be printed in the full print, multi print and ID print modes: Voice file Cannot be printed. Destroyed file Files of supportable format, but since the picture was destroyed, they cannot be displayed. Supportable formats: Page 82 (Specifications) Unknown file File other than supportable format. Cannot be displayed. Supportable formats : Page 82 (Specifications) Picture file with voice memory Can be printed. Picture file (AVI) Cannot be printed. PRINT ALL PICTURES (→P.20): The number of prints is counted for files that cannot be printed, but the files are not printed. INDEX PRINT (→P.29): Icons are printed depending on the kind of picture. See page 30. TIP • When the [BUSY] lamp is off, the memory card can be removed at any time. I Image display order • Images are displayed by directory number and by file name. I Images that cannot be displayed or saved/erased • No more than 9999 images can be displayed. • It is also possible to display and save or erase only the images saved on a specific level. Images that conform to the DCF digital camera industry standard and images in and immediately below the first- level folder can be displayed and saved or erased (See figure at right). • The supported file formats are JPEG, TIFF, BMP, AVI and WAV (→P.82). 2 During image display, the information shown below is displayed on the screen. (single frame / with text) ✽Use the [DISPLAY] button to switch to a window with no information displayed (single frame - no text) or a window showing 9 frames (9 frame). !: Print type, print size @: Help (functions of each button) #: Image file name, shooting date and time $: Photo editing icon (Displayed for images where ZOOM/MOVE, ROTATION, PREFERABLE QUALITY, etc. has been used.) %: Number of prints (The number on left shows the number of prints currently selected, while the number on the right shows the total number of prints.) @ # $ % ! First level Third level Second level Images can be displayed or saved/erased. { { { 14 Try to print! 1 15 Try to print! 1 Try to print! SELECTING THE PHOTOGRAPHS AND PRINTING Select the picture to be printed Loading a PC card 1 • When using a PC card adapter, insert the memory card to the adapter in advance. Note Open the memory card cover. Insert the PC card fully into the slot with the front of the card facing upward. Close the memory card cover. Always use a PC card corresponding to PCMCIA TYPE I/II Standard compliant ATA. Various memory cards can be used by using a PC card adapter matched to the memory card. Usable PC cards • Microdrive only PC card adapter (IBM, MELCO, FUJIFILM) • PC card adapter MSAC PC2/MSAC-PC3 for memory stick (SONY) • PC card adapter for CompactFlash (SanDisk) • PC card adapter for SD card (MATSUSHITA ELECTRIC) • PC card adapter DPC-AD for xD-Picture Card (FUJIFILM) ✽Use a Digital Camera to format xD-Picture Card. • Windows 98/98 SE/Me: Normal format • Windows 2000 Professional / XP: FAT • Macintosh: DOS format 1 The picture window is displayed. Use g to select the picture you want to print. • Do not touch the moving paper while printing. • Do not remove the memory card while printing. • Do not pull out the trash box while printing. • When an error window or information window is displayed, refer to pages 54 to 61. • Do not turn off the printer during printing. • Do not open the memory card cover during printing. Note TIP • When the image is 4 frames or more, and g is pressed for 1 second or longer, the image is quick scrolled. However, for files other than Exif (JPEG, TIFF-YC/RGB), only image type characters are displayed. TIP • When the [BACK] button is pressed before printing is executed, the monitor is returned to the picture window. TIP • When the LCD monitor is difficult to view, adjust the brightness by pressing the [DISPLAY] button for 2 seconds. TIP • Plural frames can be selected and the number of prints can then be specified for those frames. To select an additional frame, use the g buttons to view the frame and then specify the number of prints. • To view your print press the [DISPLAY] button to open the preview window. • Press the [PRINT] button in the preview window to print your images (→P.18). TIP • When there is DPOF information, pictures are printed in accordance with the DPOF information (→P.36). TIP • To halt printing during multi- picture printing, press the [BACK] button. Setting the print quantity 1 Use the [QUANTITY] [+] [–] buttons to set the print quantity. After setting the print quantity, press the [SET] button. Printing Note: Do not pull out the trash box while printing. 1 Press the [PRINT] button. The printing window is displayed, and printing is started. I The following files cannot be printed in the full print, multi print and ID print modes: Voice file Cannot be printed. Destroyed file Files of supportable format, but since the picture was destroyed, they cannot be displayed. Supportable formats: Page 82 (Specifications) Unknown file File other than supportable format. Cannot be displayed. Supportable formats : Page 82 (Specifications) Picture file with voice memory Can be printed. Picture file (AVI) Cannot be printed. PRINT ALL PICTURES (→P.20): The number of prints is counted for files that cannot be printed, but the files are not printed. INDEX PRINT (→P.29): Icons are printed depending on the kind of picture. See page 30. TIP • When the [BUSY] lamp is off, the memory card can be removed at any time. I Image display order • Images are displayed by directory number and by file name. I Images that cannot be displayed or saved/erased • No more than 9999 images can be displayed. • It is also possible to display and save or erase only the images saved on a specific level. Images that conform to the DCF digital camera industry standard and images in and immediately below the first- level folder can be displayed and saved or erased (See figure at right). • The supported file formats are JPEG, TIFF, BMP, AVI and WAV (→P.82). 2 During image display, the information shown below is displayed on the screen. (single frame / with text) ✽Use the [DISPLAY] button to switch to a window with no information displayed (single frame - no text) or a window showing 9 frames (9 frame). !: Print type, print size @: Help (functions of each button) #: Image file name, shooting date and time $: Photo editing icon (Displayed for images where ZOOM/MOVE, ROTATION, PREFERABLE QUALITY, etc. has been used.) %: Number of prints (The number on left shows the number of prints currently selected, while the number on the right shows the total number of prints.) @ # $ % ! First level Third level Second level Images can be displayed or saved/erased. { { { 17 Try to print! 1 Try to print! 16 Try to print! 1 AT THE END OF PRINTING Removing and storing the printing paper. Removing the memory card 1 Open the memory card cover. For a PC card, press the [EJECT] button and remove the card. For an xD-Picture Card, push the xD-Picture Card in and then pull it straight out. • Do not remove the memory card while the [BUSY] lamp is lit or blinking. • Do not touch the power supply section (gold colored area) of the xD-Picture Card • When using a PC card adapter, always remove it by pressing the [EJECT] button (Do not remove only the memory card in the PC card adapter). Note • Load the trash box. • When the printer power is off and when the memory card is removed, the quantity and edit settings are cleared. • A full trash box will cause paper jams or other printer faults. Note • Always use the retaining ring to prevent the paper from becoming loose. If the retaining ring is not used, the paper will come loose and cause jamming the next time the printer is used. • Do not remove the paper holder yet. Note Turning off the printer power 1 1) Press the [POWER] button at the front bottom left-hand corner of the printer. The LCD monitor and the printer power are turned off. 2) Empty and reload the trash box. Removing and storing the paper Remove the paper from the printer and store it in the paper case. When the paper is not in use, always store it in the paper case. 1 Press the [OPEN] button at the top right-hand side of the printer. Open the paper compartment cover. 2 Installing the retaining ring to the paper. Install the retaining ring by pressing it firmly onto the paper so that it will not become detached. 3 Grasp the paper holder knobs with both hands and remove the holder from the printer. Remove the paper holder after gently pushing it to the back. 4 Remove the printing paper from the paper holders. q Remove the black paper holder. w Remove the white paper holder. 5 Store the paper in the paper case. Completely close the cover of the paper case until it clicks and store it in a cool, dark place. After removing the paper, close the printer paper compartment cover. • Be sure the retaining ring does not become detached from the paper. Note • Be sure the retaining ring does not become detached from the paper. Note • Be sure that the paper retaining ring is installed. • After use, always place the paper into the paper case. • After using the printer, always place the paper into the paper case and store it while avoiding the following locations: - Where it is dry, where the humidity is high, or where it is dusty. - In a vehicle in the summer, near heating equipment, and other places where the temperature is high. - Near a window or other places where the paper will be exposed to direct sunlight or strong light. • Paper with the protective bag sealed cannot be stored for a long time. Use it as quickly as possible. • Do not use paper whose effective date is expired. • Always empty the trash box before moving the printer. Paper fragments in the printer will cause paper jams or other printer faults. Note 6 From the second printing, remove the retaining ring after loading the paper into the printer. This completes the basic operation. To enjoy various printing, refer to page 18 to 45. White Black w q TIP • Leave the paper holder in the printer in preparation for the next use. ✽Close the cover of the paper case completely. click • How to open Open while pressing the bottom of the case with your finger. Retaining ring 1 2 Retaining ring 19 Enjoy various printing! 2 Enjoy various printing! 2 The “MODE” window is displayed. Use f to select the preferred print mode, and press the [SET] button. 4 Use f to select the preferred print size, and press the [SET] button. 5 The display returns to the Set print window. Select “FINISH SETTINGS” and press the [SET] button. The Selection of picture window of each mode is displayed. • The items that are displayed vary depending on the print mode and the type of paper loaded into the printer. Note • When the picture is to be photo finished, the message “CANCEL THE QUANTITY AND EDIT SETTINGS?” is displayed. Note • The items that are displayed vary depending on the print mode. Note • The items that are displayed vary dispending on the print mode. Note Select Select 3 Use f to select “SIZE”, and press the [SET] button. Select 18 DISPLAY OF PICTURE SWITCHING/PRINT SIZE SETTING This section introduces the Display of picture switching function. Enjoy printing of various sizes using this printer. Enjoy various printing! 2 Switching the display of picture When the [DISPLAY] button is pressed, the Display of picture is switched to 1 frame or 9 (4) frames. Setting print size by printer button 1 The print size can be changed by pressing the printer buttons. Setting print size by window operation 1 Load the paper and memory card into the printer, and then press the [MENU] button on the top of the printer. Use f to select “OTHER PRINTING OPTIONS” and then press the [SET] button. Various print sizes can be set by window operation. Single frame With text Single frame No text 9(4) frame Single frame With text Single frame No text 9(4) frame Preview With text Preview No text Select Button Photo Type 100 mm wide (Units mm/in.) 4” × 6” SIZE 100 mm × 148 mm/4 in. × 6 in. 3” × 4” SIZE 74 mm × 100 mm/3 in. × 4 in. (1) When quantity is not set. (1) When quantity is set. Type of Paper Photo Type Print Size (Units mm/in.) 4” × 6” Size 100 mm × 148 mm/3.9 in. × 5.8 in. 3” × 4” Size 74 mm × 100 mm/2.9 in. × 3.9 in. CD Jacket Size 100 mm × 120 mm/3.9 in. × 4.7 in. 4” × 5.2” OR 6” 100 mm × 133 mm/3.9 in. × 5.2 in. 100 mm × 148 mm/3.9 in. × 5.8 in. 4” × 7” Size 100 mm × 178 mm/3.9 in. × 7.0 in. TIP • See P.22 for information on settings other than “SIZE”. 21 OTHER PRINT Enjoy various printing! 2 Enjoy various printing! • The item that is displayed varies depending on the print mode. Note SET CURRENT FRAME TO 0: Sets the number of prints of the selected frame to 0. SET ALL FRAMES TO 0: Sets the number of prints of all the frames to 0. TO THE MENU: Return to the menu window. SELECT EACH FRAME: Switches from the current “ALL FRAMES” mode to the “EACH FRAME” mode. DESELECT THIS FRAME: Cancels the selected frame from the specification. DESELECT ALL FRAMES: Cancels all the frames from the specification. NO. OF SETS: 1: Sets the quantity of print sets to be printed to 1. DESELECT CHOSEN FRAME: Cancels the selected frames from the specification. BACK TO RANGE SETTING: Returns to frame selection zone determining. I Cancelling the print quantity (set quantity) When the [BACK] button is pressed at the “after print quantity setting” window, the “SET QUANTITY” window is displayed. Use f to the select the desired item, and press the [SET] button. 1 Press the [MENU] button. Use f to select “OTHER PRINTING OPTIONS”, and then press the [SET] button. 2 The “MODE” window is displayed. FULL: (→P.22) MULTIPLE: (→P.24) INDEX: (→P.29) ID PRINT: (→P.32) ID SETTINGS: (→P.34) Select 20 Enjoy various printing! 2 ALL FRAMES PRINT Print setting Other print 1 Load the paper and memory card into the printer, and press the [MENU] button at the top of the printer. Setting print sets 3 The picture (9 frame) is displayed. Use fg to select the picture in the memory card. 4 Use the [QUANTITY] [+] [-] buttons to set the print sets quantity. After setting the sets quantity, press the [SET] button. 5 Press the [PRINT] button. The Printing window is displayed and printing is started. At the end of printing, the paper ejects from the printer and the monitor returns to the picture window. TIP • To halt printing while printing multiple prints, press the [BACK] button. TIP • To cancel numbers of set, refer to P.21. • Do not touch the moving paper while printing. • Do not remove the memory card while printing. • Do not pull out the trash box while printing. • When an error window or information window is displayed, refer to pages 54 to 61. • Do not turn off the printer during printing. • Do not open a memory card cover during printing. Note 2 Use f to select “PRINT : ALL FRAMES”, and then press the [SET] button. Select 23 Enjoy various printing! 2 Enjoy various printing! 3 At the end of setting, press the [SET] button. Return to step . • This setting can be used only in the [FULL] print mode. Note Set border 2 Use f to select the desired setting. WITH: A border is printed around the picture when printing. WITHOUT: A border is not printed around the picture when printing. TIP • Initial setting is “WITHOUT”. 1 Use f to select “BORDER”, and then press the [SET] button. 3 At the end of setting, press the [SET] button. Return to step . Set frame 2 Use f to select the desired setting. EACH FRAME: Each frame of pictures are able to select and print. ALL FRAMES: All frame of pictures are able to select and print. 1 Use f to select “FRAME”, and then press the [SET] button. Select Select Finish setting 1 Use f to select “FINISH SETTING”, and then press the [SET] button. The picture window (EACH: P.15, ALL: P.20) is displayed. Select • The settings except “DATA” are cleared by turning off the printer power. Note 22 FULL PRINT SETTINGS Pictures can be printed by setting [Print size], [Set border], and other items, as preferred. Enjoy various printing! 2 Print settings 1 Use f to select the preferred print mode, and press the [SET] button. 2 The “SETTINGS FOR FULL” window is displayed. Use f to select the item you want to set and press the [SET] button. • The items that are displayed vary depending on the print mode. Note TIP • To set print size, refer to P.19. • This setting can be used only in the “FULL” and “MULTIPLE” print modes. • The date is not printed on pictures without date data. • Only English numerals and English letters can be printed. • The order of year, month and day depends on the country. Note Set data print 2 Use f to select the desired setting. DATE: The photographed date is printed at the bottom right-hand corner of the picture when printing. (Example: 10/12/2003) FILE NAME: The filename of the picture is printed at the bottom right-hand of the picture when printing. (Example: 100-0001) NOTHING: Characters are not printed when printing. 3 At the end of setting, press the [SET] button. Return to step . Following English numerals and letters can be printed. A B C D E F G H I J K L M N A B C D E F G H I J 0 1 2 3 4 5 6 7 8 9 K L M N O P Q R S T U V W X Y Z 1 Use f to select “DATA” and press the [SET] button. • The items that are displayed vary depending on the print mode. Note e e e OTHER PRINT (➔P.21) continued Select 25 Enjoy various printing! 2 Enjoy various printing! Multiple print (same picture) 6 At the “SETTINGS FOR MULTIPLE” window, use f to select “FINISH SETTINGS”, and press the [SET] button. The picture is displayed. Use g to select the picture to be printed. 7 Use the [QUANTITY] [+] [-] buttons to set the print quantity. After setting the print quantity, press the [SET] button. 8 Press the [PRINT] button. The Printing window is displayed and printing is started. At the end of printing, the paper ejects from the printer and the monitor returns to the picture window. The following steps vary depending on the picture arrangement type. THE SAME PICTURE: Prints the same picture at all frames (→P.25). RANDOM (EACH FRAME): Sequentially prints the pictures beginning from the top left (→P.26). RANDOM (LAYOUT): Selects and prints the picture for each frame (→P.27). RANDOM (ALL FRAMES): Sequentially prints all the pictures on the memory card beginning from the top left (→P.28). e e e MULTIPLE PRINT (➔P.24) continued TIP • To halt printing while printing multiple prints, press the [BACK] button. TIP • When the image is 4 frames or more, and g is pressed for 1 second or longer, the image is quick scrolled. However, for files other than Exif (JPEG, TIFF-YC/RGB), only image type characters are displayed. • Do not touch the moving paper while printing. • Do not remove the memory card while printing. • Do not pull out the trash box while printing. • When an error window or information window is displayed, refer to pages 54 to 61. • Do not turn off the printer during printing. • Do not open a memory card cover during printing. Note TIP • A preview window can be displayed if the [DISPLAY] button is pressed for checking a print image. 24 MULTIPLE PRINT Multiple print prints the preferred number of frames (2UP, 4UP, 9UP, 16UP, 25UP) on one sheet of paper. When the print size is [3”×4” Size], only 2UP and 4UP multiple printing are possible. Enjoy various printing! 2 Setting multiple print 1 Use f to select “MULTIPLE”, and press the [SET] button. 2 Use f to select “DIVISION”, and press the [SET] button. 3 Use f to select the preferred number of frames, and press the [SET] button. 4 5 Use f to select the preferred picture layout, and press the [SET] button. Use f to select “PICTURE”, and press the [SET] button. • At this time, the number of frames cannot be selected for . Note • “BORDER” cannot be set in the multiple print mode. Pictures are printed with a border. Note Select Select Select TIP • To set print size, refer to P.19. e e e OTHER PRINT (➔P.21) continued 27 Enjoy various printing! 2 Enjoy various printing! Multiple print (random picture - layout) 6 At the “SETTINGS FOR MULTIPLE” window, use f to select “FINISH SETTINGS”, and press the [SET] button. The Select frame window is displayed. Use fg to arrange the pictures, and press the [SET] button. 7 Use g to select the picture to be printed, and press the [SET] button. The step window is displayed. Select the pictures to be printed by repeating steps and . 7 6 6 8 Use the [QUANTITY] [+] [-] buttons to set the print quantity. After setting the print quantity, press the [SET] button. e e e MULTIPLE PRINT (➔P.24) continued TIP • To halt printing while printing multiple prints, press the [BACK] button. TIP • The picture of all frames does not have to be selected. Unselected frames are displayed as a white space on a colored background. Therefore, you can enjoy various forms of multiple printing. 9 Press the [PRINT] button. The Printing window is displayed and printing is started. When printing is finished, the paper is ejected from the printer and the Setting frame window is displayed. • Do not touch the moving paper while printing. • Do not remove the memory card while printing. • Do not pull out the trash box while printing. • When an error window or information window is displayed, refer to pages 54 to 61. • Do not turn off the printer during printing. • Do not open a memory card cover during printing. Note TIP • When the image is 4 frames or more, and g is pressed for 1 second or longer, the image is quick scrolled. However, for files other than Exif (JPEG, TIFF-YC/RGB), only image type characters are displayed. TIP • A preview screen can be displayed if the [DISPLAY] button is pushed for checking a print image. 26 Enjoy various printing! 2 Multiple print (random picture - each frame) 6 At the “SETTINGS FOR MULTIPLE” window, use f to select “FINISH SETTINGS”, and press the [SET] button. The picture is displayed. Use g to select the picture to be printed, and press the [SET] button. Repeat selecting frame multiple times as you like. 7 Use the [QUANTITY] [+] [-] buttons to set the print sets quantity. After setting the sets quantity, press the [SET] button. 8 e e e MULTIPLE PRINT (➔P.24) continued TIP • When Preview is displayed, frames can be fed using g for 1 SET/2 PCS, or more. • To halt printing while printing multiple prints, press the [BACK] button. TIP • Example of number of sets The number of sets for 2UP is shown below. - When 4 pictures selected =1 SET/2 PCS - When 5 pictures selected =1 SET/3 PCS Press the [PRINT] button. The Printing window is displayed and printing is started. At the end of printing, the paper ejects from the printer and the monitor returns to the picture window. • Do not touch the moving paper while printing. • Do not remove the memory card while printing. • Do not pull out the trash box while printing. • When an error window or information window is displayed, refer to pages 54 to 61. • Do not turn off the printer during printing. • Do not open a memory card cover during printing. Note TIP • When the image is 4 frames or more, and g is pressed for 1 second or longer, the image is quick scrolled. However, for files other than Exif (JPEG, TIFF-YC/RGB), only image type characters are displayed. TIP • A preview window can be displayed if the [DISPLAY] button is pressed for checking a print image. Enjoy various printing! 29 INDEX PRINT Index print prints the pictures of 25 frames on one sheet of paper. It is very convenient in checking the pictures on the memory card. Print size is [4” × 6” Size]. Enjoy various printing! 2 Setting index print 1 Use f to select “INDEX”, and press the [SET] button. 2 Use f to select “SHOT INFO”, and then press the [SET] button. 3 Use f to select the desired setting, and then press the [SET] button. Select Select 4 Use f to select “PICTURE”, and press the [SET] button. 5 Use f to select the printing zone, and press the [SET] button. Select Setting photography information Print image selection e e e OTHER PRINT (➔P.21) continued 28 Enjoy various printing! 2 Multiple print (random picture - all frames) 6 At the “SETTINGS FOR MULTIPLE” window, use f to select “FINISH SETTINGS”, and press the [SET] button. The picture is displayed. Use f g to check the pictures on the memory card. 7 Use the [QUANTITY] [+] [-] buttons to set the print sets quantity. After setting the sets quantity, press the [SET] button. e e e MULTIPLE PRINT (➔P.24) continued 8 TIP • To halt printing while printing multiple prints, press the [BACK] button. Press the [PRINT] button. The Printing window is displayed and printing is started. At the end of printing, the paper ejects from the printer and the monitor returns to the picture window. • Do not touch the moving paper while printing. • Do not remove the memory card while printing. • Do not pull out the trash box while printing. • When an error window or information window is displayed, refer to pages 54 to 61. • Do not turn off the printer during printing. • Do not open a memory card cover during printing. Note TIP • A preview window can be displayed if the [DISPLAY] button is pressed for checking a print image. TIP • The following 7 items of photography information are printed: • Shutter speed • Aperture • Sensitivity (ISO) • Focal length • FLASH ON/OFF • Recorded pixels, image height/width • Cancel automatic compensation command (CR) ON/OFF • Photography information can only be printed for images which have the above information recorded. • See the sample index print on P.31 for an image of the print when is selected. 31 Enjoy various printing! 2 Enjoy various printing! Index print (set range) 6 At the “SETTING FOR INDEX” window, use f to select “FINISH SETTING”, and press the [SET] button. Use g to select the picture at which index printing is to start, and press the [SET] button. 7 Use g to select the picture at which index print is to end, and press the [SET] button. 8 9 e e e INDEX PRINT (➔P.29) continued Use the [QUANTITY] [+] [-] buttons to set the print sets quantity. After setting the sets quantity, press the [SET] button. TIP • To halt printing while printing multiple prints, press the [BACK] button. Press the [PRINT] button. The Printing window is displayed and printing is started. At the end of printing, the paper ejects from the printer and the monitor returns to the picture window. TIP • When the image is 4 frames or more, and g is pressed for 1 second or longer, the image is quick scrolled. However, for files other than Exif (JPEG, TIFF-YC/RGB), only image type characters are displayed. TIP • When the image is 4 frames or more, and g is pressed for 1 second or longer, the image is quick scrolled. However, for files other than Exif (JPEG, TIFF-YC/RGB), only image type characters are displayed. TIP • A preview window can be displayed if the [DISPLAY] button is pressed for checking a print image. I Sample index print. File name Date Aperture Shutter speed Sensitivity (ISO) Focal length FLASH ON/OFF Recorded pixels Cancel automatic compensation command (CR) ON/OFF 30 Enjoy various printing! 2 Index print (all frames) 6 At the “SETTING FOR INDEX” window, use f to select “FINISH SETTING”, and press the [SET] button. The picture is displayed. Use fg to check the pictures on the memory card. 7 Use the [QUANTITY] [+] [-] buttons to set the print sets quantity. After setting the sets quantity, press the [SET] button. e e e INDEX PRINT (➔P.29) continued 8 TIP • To halt printing while printing multiple prints, press the [BACK] button. Press the [PRINT] button. The Printing window is displayed and printing is started. At the end of printing, the paper ejects from the printer and the monitor returns to the picture window. I Index print icons Voice file Destroyed file Files of supportable format, but since the picture was destroyed, they cannot be displayed. Supportable formats: Page 82 (Specifications) Unknown file File other than supportable format. Cannot be displayed. Supportable formats: Page 82 (Specifications) Picture file with voice memo Picture file (AVI) TIP • A preview window can be displayed if the [DISPLAY] button is pressed for checking a print image. The following steps vary depending on the printing zone. ALL FRAMES: Index prints all the frames on the memory card (→P.30). SET RANGE: Index prints by determining the zone of the frames to be printed (→P.31). • Do not touch the moving paper while printing. • Do not remove the memory card while printing. • Do not pull out the trash box while printing. • When an error window or information window is displayed, refer to pages 54 to 61. • Do not turn off the printer during printing. • Do not open a memory card cover during printing. • Images are printed in the order in which they are displayed. • The time required to print up to 25 images shot using a 3- megapixel class digital camera (file sizes of 500-600KB) is roughly 5 minutes, though this is dependent on the image content. Note • Do not touch the moving paper while printing. • Do not remove the memory card while printing. • Do not pull out the trash box while printing. • When an error window or information window is displayed, refer to pages 54 to 61. • Do not turn off the printer supply during printing. • Do not open a memory card cover during printing. • Images are arranged in their display order and printed. • The time required to print up to 25 images shot using a 3- megapixel class digital camera (file sizes of 500-600KB) is roughly 5 minutes, though this is dependent on the image content. Note 33 Enjoy various printing! 2 Enjoy various printing! 5 Press the [PRINT] button. The Printing window is displayed and printing is started. At the end of printing, the paper ejects from the printer and the monitor returns to the picture window. • Do not touch the moving paper while printing. • Do not remove the memory card while printing. • Do not pull out the trash box while printing. • When an error window or information window is displayed, refer to pages 54 to 61. • Do not turn off the printer during printing • Do not open a memory card cover during printing. Note TIP • To halt printing while printing plural prints, press the [BACK] button. 32 ID PRINT Prints up to 24 frames of the picture of the chosen size on one sheet of paper. Enjoy various printing! 2 Setting ID print 1 Use f to “ID PRINT” and press the [SET] button. 2 3 Use fg to select the pictures you want to print. 4 Use the [QUANTITY] [+] [-] buttons to set the print quantity. After setting the print quantity, press the [SET] button. Use f to “SIZE&LAYOUT” and press the [SET] button. Initial settings: 35 mm × 45 mm × 4 51 mm × 51 mm × 2 35 mm × 45 mm × 2 45 mm × 60 mm × 2 126 mm × 85 mm × 1 50 mm × 38 mm × 4 TIP • The contents of “SIZE& LAYOUT” can be changed using “ID SETTINGS” (→P.34). TIP • A preview window can be displayed if the [DISPLAY] button is pressed for checking a print image. e e e OTHER PRINT (➔P.21) continued Select 35 Enjoy various printing! 2 Enjoy various printing! Set number of frame 5 Set the number of frames. Use f to select the direction you want to set and use g to select the number of frames. c: Increases the number of frames by 1. d: Decreases the number of frames by 1. At the end of setting, press the [SET] button. Setting check 6 If the preview contents are correct, press the [SET] button. The setting is registered and the monitor returns to the “MODE” window. TIP • “ROTATION” can be set using g. When “ROTATION” is set, the picture is automatically turned during ID printing. • When re-setting, press the [BACK] button. Try printing at the registered settings 1 Load the paper and insert the memory card into the printer, and press the [ID PRINT] button on the printer. 2 Use f to select the newly registered ID photo print setting, and press the [SET] button. Thereafter, select the picture the same as from step of page 32 and print. 3 “PAPER SIZE”, “FRAME SIZE”, “NUMBER OF FRAMES” setting range. • The image of the first frame of the memory card is used at the preview window. When the first frame is destroyed, is unknown, or is an audio file, an icon is displayed and preview display is not performed. In this case, the “ROTATION” setting remains the same as the last time. Note 34 ID SETTINGS ID print frame size and number of frames can be freely selected and registered. The registered settings are saved even when the printer power is turned off. Enjoy various printing! 2 ID settings 1 Use f to select “ID SETTINGS”, and press the [SET] button. 2 Use f to select the setting you want to change, and press the [SET] button. Select Set frame size 4 Set the frame size. Use f to select the direction you want to set and use g to set the frame size. c: Widens the frame size by 1 mm. d: Narrows the frame size by 1 mm. At the end of setting, press the [SET] button. Set paper size 3 Use f to select the paper size, and press the [SET] button. • When the set frame size aspect ratio is not within the 0.5–2 range, an alarm display appears and the monitor returns to the “FRAME SIZE” window. Input so that the aspect ratio is within the 0.5–2 range. Note • 6 templates of frame layout can be registered. • Any template except 35 × 45 mm × 4, 51 × 51 mm × 2 can be replaced with your preference taking the following procedure. • For 35 × 45 mm × 4 and 51 × 51 mm × 2, paper size and number of frame cannot be changed, and automatic “ROTATION” of each picture can be set in the setting check screen. Note e e e OTHER PRINT (➔P.21) continued Paper Size Frame Size Horizontal Vertical 100 mm × 148 mm 20 mm – 142 mm 20 mm – 94 mm 20 mm – 68 mm 74 mm × 100 mm 20 mm – 94 mm 20 mm – 49 mm 55 mm × 100 mm 20 mm – 94 mm Number of Frames Horizontal Vertical 1 – 6 1 – 4 1 – 3 1 – 4 1 – 2 1 – 4 35 mm 79 mm × 100 mm 45 mm 2 2 51 mm 100 mm × 110 mm 51 mm 1 2 Enjoy various printing! 37 EDIT/PRINT QUALITY Edit your pictures using such functions as “ZOOM/MOVE” to magnify the picture, “ROTATION” to changes the orientation (vertical or, horizontal) of the picture, and “PREFERABLE QUALITY” to change the quality to match the scene. Enjoy various printing! 2 Setting the Edit/Print Quality menu 1 Select the picture to be finished in each mode, and press the [EDIT] button. The “EDIT/PRINT QUALITY” window is displayed. Use f to select the preferred picture finish, and press the [SET] button. ZOOM/MOVE: Magnifies the picture and adjusts its position. This function prints the picture so that the parts you do not want to see are cropped (→P.37). ROTATION: This function sets the direction (vertical, horizontal) of the picture in 90° steps (→P.38). PREFERABLE QUALITY: This function allows individual images to be edited using the “MODE”, “PINPOINT COLOR CONV.” and “EFFECT” settings (→P.38). CANCEL EDIT: This function resets the “ZOOM/MOVE”, “ROTATION” and “PREFERABLE QUALITY” photo editing (→P.39). PRINT QUALITY: This function allows adjustment of the brightness and density of the color of all the pictures to be printed. Adjusted print quality can also be formatted (→P.39). • Editing cannot be performed in the Index mode. • When “ROTATION” is performed after “ZOOM/MOVE”, the “ZOOM/MOVE” settings are canceled. When performing both “ZOOM/MOVE” and “ROTATION” photo finishing, perform them in “ROTATION” → “ZOOM/MOVE” order. Note Zoom/Move 1 The “ZOOM RATE” window is displayed. Use f to adjust the picture zoom rate. a : Raises the picture zoom rate. b : Lowers the picture zoom rate. After adjusting the zoom rate, press the [DISPLAY] button. 2 TIP TIP • For 1 frame display, “ZOOM/ MOVE” picture finishing can be performed by using f at the “Selection of picture” window. • When you want to return the picture to its state before finishing, press the [BACK] button. • When you want to return the picture to its state before finishing, press the [BACK] button. TIP • The zoom specifications are as follows: Max. zoom magnification: 5× No. of steps: 17 The “MOVE POSITION” window is displayed. Use fg to adjust the part you want to print. After adjustment, press the [SET] button. A picture with is displayed. 36 DPOF PRINT DPOF print prints according to the DPOF information on the memory card. DPOF print can be performed by loading the paper and a memory card containing DPOF data. Enjoy various printing! 2 DPOF print 1 When there is DPOF information on the memory card, the “ DPOF CHECK” window is displayed. When performing DPOF print: Press the [PRINT] button. When there is the DPOF information not corresponding to the printer, a message is displayed. When not performing DPOF print: When the [BACK] button is pressed, the printer advances to normal printing operation (Step on page 15). I DPOF information not supported by the printer The DPOF information shown below cannot be used to print on this printer. • A rotation setting other than 0° is specified. • A text print setting other than the date is specified. • The trimming extends beyond the image area. • The trimmed image is smaller than 32 pixels. • The image type or image size (number of horizontal or vertical pixels) is not supported by the printer. • DPOF printing works only when print size is set to 4” × 6” size. • The DPOF settings on the memory card cannot be changed with this printer. The DPOF information on the memory card cannot be checked either. • DPOF supports borderless full-size prints and index prints (no text). Note • Do not touch the moving paper while printing. • Do not remove the memory card while printing. • Do not pull out the trash box while printing. • When an error window or information window is displayed, refer to pages 54 to 61. • Do not turn off the printer during printing • Do not open a memory card cover during printing. Note TIP • Refer to P.13. 39 Enjoy various printing! 2 Enjoy various printing! Print quality 1 The “PRINT QUALITY” window is displayed. Use f to select the item you want to adjust and use g to adjust the value. DENSITY: Adjusts the picture density. CONTRAST: Adjusts the picture contrast. SHARPNESS: Adjusts the picture sharpness. COLOR CONTROL: Adjusts the picture color. There are three color controls. Cyan, magenta and yellow are adjusted. CYAN – ↔+ MAGENTA – ↔+ YELLOW – ↔+ COLOR: Adjusts the density of the picture color. INITIAL: Returns the adjustment value of all the images to be printed to the center. 2 After setting, press the [SET] button. The monitor returns to the original display of picture window. This function controls the picture quality of all the pictures to be printed. Cancel edit 1 Execute format processing at the “EDIT/PRINT QUALITY” window. Use f to select “CANCEL EDIT”, and press the [SET] button. A picture without is displayed. This function returns the selected picture to its state before editing. TIP • When you want to return the picture to its state before manual adjustment, press the [BACK] button. TIP • The control picture quality contents are saved even when the printer power is turned off and are effective the next time the power is turned on. Select 38 Enjoy various printing! 2 Rotation 1 The “ROTATION” window is displayed. Use g to adjust the picture angle. d: Rotates the picture 90 degrees to the left (counterclockwise). c: Rotates the picture 90 degrees to the right (clockwise). After adjusting the angle, press the [SET] button. A picture with is displayed. Preferable quality 1 The “PREFERABLE QUALITY” window appears. Use f to select the desired photo finishing, and then press the [SET] button. MODE: Six kinds of modes can be chosen according to a photography scene (→P.40). PINPOINT COLOR CONV.: The specific color in a picture can be changed into the tone of liking by six kinds of adjustment items (color system) (→P.40). EFFECT: It is the function in which the print with which the original picture and atmosphere are different can be enjoyed. Sepia tone, Monochrome tone, etc (→P.41). RESET PREFERABLE QUALITY: This function resets the “PREFERABLE QUALITY” settings specified above. TIP • When you want to return the picture to its state before finishing, press the [BACK] button. • In some images, there may be little or no change. • The changes in the image shown on the screen may not necesssarily match the print. • In images where the “PREFERABLE QUALITY” function has been used, AUTO QUALITY ADJUSTMENT is set to off. • Though the adjustment details for each image are stored, the image editing is initialized when the printer is switched off or the memory card is removed. • “PINPOINT COLOR CONV.” may also change colors other than the specified color slightly. • Though the “PINPOINT COLOR CONV.” function can be used to make approximate changes to color tones, it cannot necessarily change the color tones as desired. • “MODE”, “PINPOINT COLOR CONV.” and “EFFECT” cannot be set concurrently for the same image. Only the setting specified last is valid. Note • In some images, there may be little or no change. • Quality adjustments are only reflected in the quality adjustment window. The Single-frame, 9-frame and Preview displays do not change. • The changes in the image shown on the screen may not necesssarily match the print. Note 41 Enjoy various printing! 2 Enjoy various printing! Preferable quality - Effect 1 The “EFFECT” window is displayed. Use f to select the preferred effect, and press the [SET] button. 2 The Effect result window is displayed. After checking the result, press the [SET] button. A picture with is displayed. When the “EFFECT” is used, printing of a different atmosphere than the original picture can be enjoyed. The following photo finishing is possible using the “EFFECT”. i FANTASY (Brightening effect) i SEPIA TONE i MONOCHROME i PAINTING TONE TIP • When you want to return the picture to its state before finishing, press the [BACK] button. Preferable quality - Cancel Effect 1 Use f to select “CANCEL EFFECT” and then press the [SET] button. A picture without is displayed. Select e e e PREFERABLE QUALITY (➔P.38) continued I Pinpoint color conversion - Color conversion range • See the figure at right for the conversion range for each color. • When a yellow flower is tinged with orange, shifting the “YELLOW AXIS” towards the “GREEN” setting will remove the orange tones. • When a blue sky is tinged with purple, shifting the “BLUE AXIS” towards “CYAN” will remove the purple tones. RED AXIS YELLOW AXIS GREEN AXIS CYAN AXIS BLUE AXIS MAGENTA AXIS 40 Enjoy various printing! 2 Preferable quality - Mode 1 The “MODE” window appears. Use f to select the desired mode, and then press the [SET] button. Six modes are available according to the scene being shot. PORTRAIT/SCENERY/FLOWERS/BLUE SKY/OBJECT In each mode, recommended adjustments are set for each of the settings, but these can be changed. CUSTOM: Each adjustment is set to the medium value. Set the adjustments as desired. 2 The setting window appears. Use f to select the item you want to adjust, use g to adjust the value, and then press the [SET] button. The icon is displayed in images that have been adjusted. The 6 adjustments are listed below. COLOR TONE: Varies the degree of color variation in colored sections. +: Brightens the color tones / –: Softens the color tones COLOR LEVEL: Varies the brightness of the colors in colored sections. +: Brighter colors. / –: Darker colors BRIGHTNESS: Varies the intensity of primarily bright sections. +: Brighter colors. / –: Darker colors. DARKNESS: Varies the intensity of primarily dark sections. +: Brighter colors. / –: Darker colors. CHROMATICITY: Varies the color intensity. Allows colors to be made extremely intense or pale. +: More intense colors. / –: Paler colors. RESET: Returns the processing adjustments for the selected image to the recommended default settings and applies them to the image. “CUSTOM” settings revert to the median values. Preferable quality - Pinpoint color conv. 1 The “PINPOINT COLOR CONV.” window is displayed. Use f to select the adjustment and g to change the setting and adjust the image quality. Then press the [SET] button. Specific colors in an image can be changed to the desired color tones using six types of adjustment (color). Combinations of adjustments can also be set. [RED AXIS]: Yellow ← Reds →Magenta [MAGENTA AXIS]: Red ←Magentas→ Blue [BLUE AXIS]: Magenta ← Blues → Cyan [CYAN AXIS]: Blue ← Cyans →Green [GREEN AXIS]: Cyan ← Greens →Yellow [YELLOW AXIS]: Green ←Yellows → Red [RESET]: Resets the selected color processing adjustments to their median values. See P.41 for the conversion range for each color. • Depending on a picture, it may almost be changeless. • Change and the print of a picture which appear in a monitor are not necessarily in agreement. • In images where the “PREFERABLE QUALITY” function has been used, AUTO QUALITY ADJUSTMENT is set to off. • Though the adjustment details for each image are stored, the image editing is initialized when the printer is switched off or the memory card is removed. Note e e e PREFERABLE QUALITY (➔P.38) continued • In some images, there may be little or no change. • The changes in the image shown on the screen may not necessarily match the print. • In images where the “PREFERABLE QUALITY” function has been used, AUTO QUALITY ADJUSTMENT is set to off. • Though the adjustment details for each image are stored, the image editing is initialized when the printer is switched off or the memory card is removed. • Colors other than the specified color may also change slightly. • While this function can make approximate changes to color tones, it cannot necessarily change the color tones as desired. Note 43 Enjoy various printing! 2 Enjoy various printing! Save Image - Save 1 The “SAVE DIRECTION” window appears. Use f to select the image data save direction and then press the [SET] button. 2 A confirmation window appears showing the number of saved files and the save direction. Check that information is correct and then press the [SET] button. If the information is incorrect, press the [BACK] button to return to the previous screen. • Do not turn off the printer during saving. • Do not open the memory card cover during saving. Note • Do not turn off the printer during saving. • Do not open the memory card cover during saving. Note 3 Precautionary notes are displayed. Check the notes and press the [SET] button. Image data saving begins. The [BUSY] lamp blinks during saving. 4 When image data saving ends, the “SAVING COMPLETE” window appears. To print an index of the saved images, use f to select “YES” and then press the [SET] button. Then proceed with index printing (→P.30). To skip index printing, select “NO” and press the [SET] button to return to the “MENU” window (→P.21). • Do not turn off the printer during saving. • Do not open the memory card cover during saving. Note e e e SAVE IMAGE/ERASE PICTURES (➔P.42) continued 42 SAVE IMAGE/ERASE PICTURES Provides a simple way to back up images on one memory card to another memory card. Enjoy various printing! 2 Save Image/Erase Pictures 1 Press the [MENU] button. Use f to select “SAVE IMAGE” and then press the [SET] button. 2 In the “FILE MANIPULATION” window, use f to select the desired function and then press the [SET] button. SAVE: (→P.43) Images on one memory card can be saved on another memory card. ERASE FRAME: (→P.44) Selects and erases images on a memory card one frame at a time. ERASE ALL: (→P.45) Erases all the images on the memory card. Select • “SAVE” is the function of only package preservation. • Refer to 14 pages about the image data which can be saved. • Refer to 13 or 14 pages about the memory card which can be used. Note I Images are saved on the destination memory card as shown below. • The images are saved in the “✽✽✽_FUJI” folder, which is in the DCIM folder. (A number between 100 and 999 is inserted for “✽✽✽” in the above folder name.) The number in the folder name increases (100, 101, etc.) each time images are saved. If the number in the folder name exceeds 999, no further images can be saved. • Image file names are written as “DSCF✽✽✽✽”. (A number between 0001 and 9999 is inserted for “✽✽✽✽” in the above file name.) File names such as “DSCF0001”, “DSCF0002”, etc. are assigned in the order of image display. The file extension does not change. See P.14 for information on the image display order. 45 Enjoy various printing! 2 Enjoy various printing! Save Image - Erase all 1 The “ERASE ALL” window is displayed. Use g to check the content of the memory card and then press the [SET] button. 2 The “ERASE ALL FRAMES” window appears. Use f to select to “ERASE ALL” and then press the [SET] button. Image data erasing begins. Select “TO CANCEL” and press the [SET] button to cancel erasing. • Do not turn off the printer during erasing. • Do not open the memory card cover during erasing. Note • Do not turn off the printer during erasing. • Do not open the memory card cover during erasing. Note 3 The erasing window is displayed. 4 When image data erasing ends, the erasing completed window appears. Press the [SET] button to return to the “FILE MANIPULATION” window (→P.42). Erases all the images on the memory card. e e e SAVE IMAGE/ERASE PICTURES (➔P.42) continued 44 Enjoy various printing! 2 Save Image - Erase frame 1 The “ERASE FRAME” window appears. Use g to select the frame to be erased and then press the [SET] button. 2 Check that the frame to be erased is displayed in the check frame erase window. Press the [SET] button to begin erasing the image data. The [BUSY] lamp blinks during erasing. Press the [BACK] button to cancel erasing. • Do not turn off the printer during erasing. • Do not open the memory card cover during erasing. Note • Do not turn off the printer during erasing. • Do not open the memory card cover during erasing. Note 3 The erasing window is displayed. 4 If there is still image data on the memory card when image data erasing ends, the “ERASE FRAME” window appears . To finish erasing data at this point, press the [BACK] button. If there is no image data on the memory card when image data erasing ends, the erasing completed window appears. Press the [SET] button to return to the “FILE MANIPULATION” window (→P.42). Selects and erases images on a memory card one frame at a time. e e e SAVE IMAGE/ERASE PICTURES (➔P.42) continued TIP • Use the [DISPLAY] button to switch to a window with no information displayed (single frame - no text) or a window showing 9 frames (9-frame) (→P.18). TIP • Use the [DISPLAY] button to switch to a window with no information displayed (single frame - no text) or a window showing 9 frames (9-frame) (→P.18). 47 Other methods of use 3 Other methods of use Various settings - Auto quality adjustment 1 Use f to select the desired setting. YES: Picture quality is automatically adjusted. NO: Picture quality is not automatically adjusted. Installing Image Intelligence provides optimized image correction for the scene shot and uses automatic image analysis to give vivid colors and smooth color tone reproduction. 2 At the end of setting, press the [SET] button. The “VARIOUS SETTINGS” window is displayed. TIP • Initial setting is “YES”. e e e VARIOUS SETTINGS (➔P.46) continued Various settings - Start up mode 2 The “STARTUP MODE” window is displayed. Return to the “OTHERS” window by using f to select and pressing the [SET] button. FULL: “PRINT : EACH FRAME” and “PRINT : ALL FRAMES” are selectable in “MENU” window. ID PRINT: “ID PRINT” and “PRINT : EACH FRAME” are selectable in “MENU” window. • The startup window selection settings are saved even when the printer power is turned off. Note 1 Use f to select “STARTUP MODE”, and press the [SET] button. 46 Other methods of use 3 OTHER FUNCTIONS STARTUP MODE, LANGUAGE, VARIOUS SETTINGS and etc. can be set. Refer page 11 regarding how to set LANGUAGE. Various settings such as “AUTO QUALITY ADJUSTMENT” and “SLIDE SHOW” can be made. Make these settings before printing. Other functions 1 Press the [MENU] button on the top of the printer. Use f to select “OTHER FUNCTIONS” and then press the [SET] button. Select 2 Use f to select the desired function and then press the [SET] button. SELECT MEMORY CARD: (→P.50) SLIDE SHOW: (→P.48) VARIOUS SETTINGS: (→P.46) HEAD CLEANING: (→P.51) TOTAL NO. OF PRINTS: (→P.50) LANGUAGE: (→P.11) Various settings 1 The “VARIOUS SETTINGS” window is displayed. Use f to select the item and press the [SET] button. AUTO QUALITY ADJUSTMENT: Automatically performs optimum compensation according to the photographed scene of each picture when printing (→P.47). IMAGE DISPLAY ORDER: Sets the order in which the picture data is displayed when a memory card was loaded into the printer (→P.48). SLIDE SHOW: Setting for “Slide Show” that automatically reproduces the picture data on the memory card (→P.48). LCD MONITOR BRIGHTNESS: Adjusts the brightness of the LCD monitor (→P.48). INITIALIZE SETTINGS: Returns the various setting to the factory shipping state (→P.49). STARTUP MODE: (→P.47) TIP • The contents of the various settings are saved even when the printer power is turned off and are effective the next time the power is turned on. 49 Other methods of use 3 Other methods of use Various settings - Initialize settings 1 Select “INITIALIZE” and press [SET] button. The various printer settings (“AUTO QUALITY ADJUSTMENT”, “IMAGE DISPLAY ORDER”, “LCD MONITOR BRIGHTNESS”) return to their factory shipping state. The “VARIOUS SETTINGS” window is displayed. This function returns the various setting to the factory shipping state. I Executing slide show q Load the memory card into the printer, and press the [MENU] button at the top of the printer. Use f to select “OTHER FUNCTIONS” and press the [SET] button. w Use f to select “SLIDE SHOW” and press the [SET] button. • Do not open a memory card cover during printing. • Do not remove the memory card during reproduction. • When an error window or information window is displayed, refer to pages 54 to 61. Note Select TIP • When the [DISPLAY] button is pressed, only pictures are displayed. e e e VARIOUS SETTING (➔P.46) continued e The picture data on the memory card is automatically reproduced. When the [BACK] button is pressed, the slide show is stopped. 48 Other methods of use 3 Various settings - Setting slide show 1 Set the interval the pictures are to be displayed. Use d to select the “SPEED” tab. Use f to select the desired setting. SLOW: The time the picture is displayed becomes long. FAST: The time the picture is displayed becomes short. 2 Set if repeat reproduction is to be performed. Use c to select the “LOOP” tab. Use f to select the desired setting. YES: The pictures on the memory card are reproduced repeatedly. NO: The pictures on the memory card are not reproduced repeatedly. Setting for “SLIDE SHOW” that automatically reproduces the picture data on the memory card. 3 At the end of setting, press the [SET] button. The “VARIOUS SETTINGS” window is displayed. TIP • Initial setting is “SLOW”. TIP • Initial setting is “YES”. Various settings - LCD monitor brightness adjustment 1 Use g to adjust the brightness of the LCD monitor, and press the [SET] button. The “VARIOUS SETTINGS” window is displayed. Adjusts the brightness of the LCD monitor. TIP • The “LCD MONITOR BRIGHTNESS ADJUSTMENT” window can also be displayed by pressing the [DISPLAY] button for 2 seconds at the Display of picture window. e e e VARIOUS SETTING (➔P.46) continued Various settings - Image display order 1 Use f to select the desired setting. FROM THE TOP: Displays the first picture data when a memory card was loaded into the printer. FROM THE END: Displays the last picture data when a memory card was loaded into the printer. Sets the order in which the picture data is displayed when a memory card was loaded into the printer. 2 At the end of setting, press the [SET] button. The “VARIOUS SETTINGS” window is displayed. TIP • Initial setting is “FROM THE TOP”. 51 When trouble occurs 4 When trouble occurs HEAD CLEANING To print cleanly all the time, the printer must be serviced. When the print quality deteriorates or there are white lines running down the length of the paper, perform head cleaning. 2 Set the cleaning paper at the printer. Hold the cleaning paper with the white side at the front and set it straight into the paper holder. Insert the cleaning paper between the cleaning paper core and printer body and push it in approximately 1 cm using both hands. Top view Cleaning paper 3 After pressing the cleaning paper with your hand so that the sheet enters the printer, close the paper compartment cover. After that, execute head cleaning by pressing the [SET] button. The “Executing head cleaning” window is displayed. When the image above is not displayed, re-set the cleaning paper. 4 TIP • To continue printing, load the printing paper into the printer. At the end of head cleaning, the “HEAD CLEANING COMPLETED” window is displayed. Remove the cleaning paper and cleaning paper core from the printer. The monitor returns to the “OTHERS” window. • When printing is not clean even when head cleaning is executed, contact your FUJIFILM dealer. Note Executing head cleaning 1 If printing paper is loaded in the printer, remove the paper and store it in the paper case. Set the cleaning paper core at the paper holder and set the paper holder from the top of the printer. • Printing paper removed from the printer should be loaded into the paper case (→P.17). • See P.7 for information on the cleaning sheets and the cleaning sheet retainer. Note e e e OTHER FUNCTIONS (➔P.46) continued 50 Other methods of use 3 Selecting the Memory Card e e e OTHER FUNCTIONS (➔P.46) continued If 2 types of memory card are loaded in the memory card slots, use this procedure to select the card to be used. If 2 types of memory card are loaded in the memory card slots when the printer is switched on, the card used is the type specified the last time the printer was used. The factory default setting is “xD-Picture Card”. Show total number of prints 1 The total number of prints so far is displayed. Check the number and press the [SET] button. The total number of prints can be checked. 1 Use f to select the memory card to be used and then press the [SET] button. TIP • Initial setting is “xD-Picture card”. 53 When trouble occurs 4 When trouble occurs Symptom Cause Remedy Picture was magnified and printed because the picture size was too small. “NOTHING” is specified in the data print settings. LCD monitor is difficult to see. — Execute “LCD MONITOR BRIGHTNESS ADJUSTMENT” of the various settings and adjust to an easy-to-view brightness. When adjusting the brightness, watch the LCD monitor from the front (→P.48). Memory card cannot be inserted. The direction in which the memory card is inserted is incorrect. Insert the memory card in the correct direction (→P.13-14). Slot into which the memory card is being inserted is incorrect. Insert the memory card into the correct slot (→P.13-14). Cannot print even by pressing the [PRINT] button. Quantity of prints is not set. Set the quantity of prints. Printer cuts and ejects the paper. • When the power is turned on, there is paper remaining in the printer paper feed path. • The trash box or the paper compartment cover may have been opened while printing. Do not open the trash box or paper compartment cover while printing. Also, do not unplug the power cord while printing. Printed picture is fuzzy or there are vertical scratches running down the picture. Head is dirty. Use the accessory cleaning paper to clean the head (→P.51). The quantity of prints (sets) does not increase even when the [QUANTITY] button is pressed. Total quantity of prints is set to 1000 or more or 100 or more for each frame. Set the total quantity of prints up to 1000 and up to 100 for each frame. Print picture is grainy. It is recommended that printing be performed at a picture size of 640×480 pixels or more. — Plug the power cord into the power outlet and press the [POWER] button to switch the printer on. If there is unejected paper left in the printer, wait until it is fed out. Error state. Check the message on the LCD monitor and refer to page 54 and subsequent pages. Power is turned on, but the printer does not operate. A safety device may have operated. Unplug the power cord from the power outlet, wait a while, and then plug the power cord back in and turn on the power. Power cord was unplugged while printing. The printer was unplugged during image data saving or erasing. — Plug the power cord into the power outlet and press the [POWER] button to switch the printer on. When the recovery window appears, proceed as directed by the on-screen instructions. No images are displayed. The number of exceeds 9999. Use the digital camera to reduce the number of images on the memory card. The images are saved somewhere other than the specified folder. Save the images in a folder that can be displayed (→P.14). The date is inserted twice. The date is inserted on the image as specified in the camera settings. Select “NOTHING” in the data print settings (→P.22). The date will not be printed. No date information is included with the image. (The image format is not Exif.) Check the Owner’s Manual for the camera and save the image in the Exif file format. Select “DATE” in the data print settings (→P.22). 52 When trouble occurs 4 PRINTER UNIT When the memory card cover is removed If the memory card cover was removed during use, attach the cover as described below. 1Fit the protrusion on the left side of the memory card cover into the slot on the left side of the cover mount on the printer. 2Bend the protrusion on the right side of the memory card cover to fit into the slot on the right side of the printer. 3Open and close the memory card cover several times to check that it is attached correctly. 55 When trouble occurs 4 When trouble occurs Symptom Cause Remedy Printer ran out of paper while printing. Load the paper correctly (→P.12). An error was generated because the trash box was pulled out while printing. Reinstall the trash box, wait a while, and then advance to the next picture. • Memory card is faulty. • Memory card is not inserted fully. • Open the memory card cover and remove the memory card. Then firmly insert the memory card all the way into the slot. • Do not touch the [EJECT] button while the [BUSY] lamp is lit or blinking. • The picture data to be processed is not on the memory card. • Pictures are saved at the folder which is not specified. • There are no displayable pictures. Check the contents of the memory card. • Save a picture at the specified folder (→P.14). Mechanism or circuits did not operate correctly. • Unplug the power cord from the power outlet, wait a while, and then plug the power cord back into the power outlet and turn on the power. • If the printer still remains in this state, contact your FUJIFILM dealer. Cleaning paper was not put in correctly. Open the paper compartment cover and put in the cleaning paper correctly (→P.51). 54 When trouble occurs 4 Symptom Cause Remedy • Special paper is not used. • There is a gap between the paper holder and the paper. • There is dirt or dust on the clear section of the paper holder. • Load the Printpix Paper (→P.10, 12). • Reload the paper so that there is no gap between the paper holder and the paper. • Use a soft cloth to wipe off any dirt or dust on the clear section of the black paper holder. • Paper is not loaded. • Edge of paper is not aligned. • The paper holding sticker is not peeled off. • Load the paper correctly (→P.12). • Peel off the paper holding sticker (→P.12). • Special paper is not used. • There is a gap between the paper holder and the paper. • Dirt and garbage have arrived at the transparent portion of a paper holder. • Load the Printpix Paper (→P.10, 12). • Reload the paper so that there is no gap between the paper holder and the paper. • Use a soft cloth to wipe off any dirt or dust on the clear section of the black paper holder. Paper is jammed. • Trash box is full. • Paper was not loaded properly. • Paper was not ejected properly. • Empty and reinstall the trash box. • Unplug the power cord from the power outlet, wait a while, and then plug the power cord back into the power outlet and turn on the power. • Open the paper compartment cover and wind the paper by turning the holder toward rear with both hands. • If the printer still remains in this state, contact your FUJIFILM dealer. WHEN AN ERROR IS DISPLAYED ON THE LCD MONITOR See when a window with is displayed. When the printer power is off and when the memory card is removed, the quantity and edit settings are cleared. Paper roll may be loose. • Reset the paper so there is no gap between the paper holder and the paper. • Open the paper compartment cover and tighten the paper on the roll and reload the paper. • If the printer still remains in this state, contact your FUJIFILM dealer. Trash box is full. • Empty and reinstall the trash box. • Unplug the power cord from the power outlet, wait a while, and then plug the power cord back into the power outlet and turn on the power. • If the printer still remains in this state, contact your FUJIFILM dealer. 57 When trouble occurs 4 When trouble occurs Symptom Cause Remedy An error occurred during image data saving. The save destination memory card is faulty. No images are saved after the currently displayed frame. Replace the save destination memory card. • The memory card contains no images. • Pictures are saved at the folder which is not specified. • Open the memory card cover and remove the memory card. Then insert the memory card containing the images to be erased. • Openi the memory card cover and take out the memory card. Save pictures at the specified folder (→P.14). Memory card error. (Display changes according to the kind of memory card.) • Open the memory card cover and remove the memory card. Then re-insert the card. • Open the memory card cover and remove the currently displayed memory card. Then insert the correct memory card. The memory card cover was opened during memory card operation. Close the memory card cover. Press the [SET] button and redo the procedure from the menu window. The limit on the number of saves to the destination memory card has been exceeded. (Display changes according to the kind of memory card.) Open the memory card cover and remove the currently displayed memory card. Then insert a memory card with a lower number of saves (→P.43). 56 When trouble occurs 4 Symptom Remedy Cause Initialization error in the save destination memory card. (Image display differs depending on the save destination memory card.) Open the memory card cover and remove the currently displayed memory card. Then insert the correct memory card. Initialization error in the save origin memory card. (Display changes according to the kind of memory card.) Open the memory card cover and remove the save origin memory card. Then insert the memory card containing the image data to be saved. The PC card used for image erasing is write-protected. Open the memory card cover and remove the PC card used for image erasing. Remove the write protection and then re-insert the card. The PC card used for image saving is write-protected. Open the memory card cover and remove the PC card. Remove the write protection and then re-insert the card. • The save origin memory card is blank. • The images on the save origin memory card are saved somewhere other than the specified folder. (Display changes according to the kind of memory card.) • Open the memory card cover and remove the currently displayed memory card. Then insert the memory card containing the images to be saved. • Save a picture at the specified folder (→P.14). Insufficient space left on the save destination memory card. (Display changes according to the kind of memory card.) Open the memory card cover and remove the save destination memory card. Then insert a memory card with ample remaining space. The save destination memory card already contains 10,000 or more images. No further image data can be saved when there are 10,000 or more images on the destination memory card. Open the memory card cover and remove the save destination memory card. Then insert a memory card that contains fewer than 10,000 images. 59 When trouble occurs 4 When trouble occurs Symptom Cause Remedy An attempt was made to select a print size that cannot be selected with this number of divisions. Change the number of divisions and select change print size or cancel print size change and press the [SET] button. An attempt was made to select a number of divisions that cannot be selected with this print size. Change the print size and select change number of divisions or cancel number of divisions change and press the [SET] button. There is a editing set frame. The problem is whether or not finish setting remains when printing after the end of printing. Clear the quantity of prints setting. When you want to start a new printing without edit setting remaining, select “YES”. When you want to continue printing with edit setting remaining, select “NO”. When picture turn is performed after zoom setting, zoom setting is formatted. When you want to turn the picture even though zoom setting was formatted, select “YES” and press the [SET] button. When you do not want to format the zoom setting, select “NO” and press the [SET] button. When “ROTATION” is performed after “ZOOM/MOVE”, the “ZOOM/MOVE” settings are canceled. When performing both “ZOOM/MOVE” and “ROTATION” photo finishing, perform them in “ROTATION” → “ZOOM/MOVE” order. Since an attempt was made to change the print mode, the previously quantity and edit settings are canceled. To perform the print mode change, select “YES” and press the [SET] button. To cancel the print mode change, select “NO” and press the [SET] button. 58 When trouble occurs 4 Symptom Cause Remedy Paper was cut because printing was interrupted. Printer is warming up or overheated. Wait a while. Memory card is not inserted. Insert a memory card. Paper trash box is not installed. Install the trash box. — Put in the Cleaning paper and Cleaning paper core. Paper compartment cover is open. Load the paper correctly and close the paper compartment cover. WHEN DATA IS DISPLAYED ON THE LCD MONITOR See when a window with or the “Select item” window was displayed. Paper compartment cover is open. Close the paper compartment cover. Wait a while and operation will advance to the next window. 61 When trouble occurs 4 When trouble occurs Symptom Cause Remedy The memory card cover was opened and the memory card removed while image data was being saved or erased. Insert the memory card that was being used and close the memory card cover. Removing the memory card during image data saving or erasing may corrupt the image data. The memory card cover was opened during image data saving. To resume image data saving, select “RESUME” and press the [SET] button. To cancel data saving, select “CANCEL” and press the [SET] button. Do not open the memory card cover during image data saving. The [BACK] button was pressed during image data saving, or the memory card cover was opened during image data saving and then closed. To resume image data saving, select “RESUME” and press the [SET] button. To cancel data saving, select “CANCEL” and press the [SET] button. The image data to be erased is protected. Cancel image erasing and then open the memory card cover and remove the memory card. Use your digital camera to remove the image protection and then redo the image erasing. Pressing the [BACK] button allows you to select another image to be erased. During an erase all operation, some of the images were protected. Data that cannot be erased was found during image data erasing. — The memory card cover was opened during memory card recovery. Alternatively, the memory card to be recovered was not in the memory card slot. Insert the memory card to be recovered into the memory card slot and close the memory card cover. Press the [SET] button to return to the “FILE MANIPULATION” window. To erase protected images, exit the deletion procedure, open the memory card cover and remove the memory card. Then use your digital camera to cancel the image protection before redoing the erasing. • The memory card cover was opened during printing. • The memory card cover was removed during printing. • Close the memory card cover. • If the memory card cover is removed, re- attach the cover (→P.52). 60 When trouble occurs 4 Symptom Cause Remedy Edit (ZOOM/MOVE, ROTATION and PREFERABLE QUALITY) is set for the selected frame. Press the [EDIT] button and cancel edit settings by EDIT/PRINT QUALITY. Printing other than index print cannot be performed because the file is an AVI file (moving picture file). The icon that identifies the frame is printed even in the index print mode. — No DPOF settings have been specified. Press the [BACK] button to return to the menu window. Perform DPOF printing from a memory card on which DPOF settings have been specified correctly using a digital camera, etc. One or more images cannot be printed due to an error in the DPOF settings data. Press the [PRINT] button to print the images. Press the [BACK] button to return to the menu window. Insert a memory card containing normal DPOF print settings specified using your digital camera and then perform DPOF printing (→P.36). More than 1000 prints are specified in the DPOF settings. This printer does not support DPOF settings for 1000 prints or more. Insert a memory card containing DPOF print settings with fewer than 1000 prints specified using your digital camera and then perform DPOF printing. Image saving/erasing was interrupted due to the printer being switched off during saving/erasing. Perform memory card recovery. Press the [SET] button and begin memory card recovery as directed by the on-screen instructions. If image saving/erasing was interrupted, data on the memory card may be corrupted unless recovery is performed. Press the [SET] button to begin memory card recovery. Press the [SET] button to begin memory card recovery. If image saving/erasing was interrupted, data on the memory card may be corrupted unless recovery is performed. Memory card recovery processing was stopped. Press the [BACK] button to begin memory card recovery. Press the [SET] button to end memory card recovery. 63 Connecting to a Digital Camera and Printing 5 Connecting to a Digital Camera and Printing CONNECTING TO A DIGITAL CAMERA AND PRINTING I Compatible digital cameras Only PictBridge-compatible digital cameras can connect to a printer for image printing. Check the Owner’s Manual for your digital camera for details. I Connection h If the printer is being used connected to a PC, stop any print jobs on the PC and disconnect the printer from the PC before connecting it to the digital camera. h During printing, wait until printing ends before connecting the digital camera. h Connect the digital camera directly to the printer using a USB cable. Do not use a USB hub. h Close the memory card cover and paper compartment cover and set the trash box in position before connecting the cable. I Printing Procedure h The printing procedure differs depending on the digital camera model. Check the Owner’s Manual for your digital camera for details. I PictBridge Function Compatibility h Photo types: 4” × 6”, borderless, 25-shot index, date printing supported. I Quality Adjustments h Quality adjustments specified on the printer are still valid when images are printed from a digital camera. “Edit/Print Quality” (→P.37) “Auto Quality Adjustment” (→P.47) I Restrictions h When an incompatible image is found during DPOF printing of multiple images, the subsequent images also cannot be printed. Glossary of Terms I What is “PictBridge”? PictBridge is a standard for printing images shot on a digital camera without using a PC by connecting the camera directly to the printer. By using PictBridge to connect a digital camera and printer, digital photos can be printed quickly and easily using simple procedures on the camera, even when different brands of camera and printer are used. 62 When trouble occurs 4 Definition of terms G DCF Short for Design rule for Camera file system, standard established by the Japan Electronics and Information Technology Industry Association (JEITA). G DPOF This stands for Digital Print Order Format and refers to a format for recording print settings for digital camera images on media such as xD-Picture Cards. The settings include the frames to be printed and the number of copies of each frame. G Exif Exif is a full color still picture format for digital still cameras approved by the Japan Electronics and Information Technology Industry Association. It is interchangeable with TIFF and JPEG and can be handled by general picture processing software. It also sets forth a thumbnail and camera information recording method. DCF, which includes folder structure and file name rules, is a JEITA Exif Print Standard. G Exif Print Exif Print is the general name of Exif 2.2 that amplifies the recording method stipulation of the original standard Exif 2.1. High quality print output that faithfully reflects the digital camera photographic data and the intent of the photographer can be obtained. G Folder A location in which related files are stored. Other folders can also be stored inside a folder. G Image Intelligence FUJIFILM’s own image processing software for ultra-high-quality digital images. G JPEG JPEG stands for Joint Photographic Experts Group, and originally was the name of the group that recommended standardization of picture compression. JPEG is a file format for compressing and storing standardized color pictures. The compression rate can be selected, but the higher the compression rate, the poorer the picture quality at decompression (picture recovery). G Motion JPEG Motion JPEG is a file format AVI (Audio Video Interleave) format for handling both pictures and audio with one file. The pictures in the file are recorded in JPEG format. With a PC, the picture and audio can be reproduced by using the following software: Windows: MediaPlayer ✽DirectX8.0 or later Macintosh: QuickTime Player ✽QuickTime 3.0 or later G PC card A large 54.0 mm width × 85.6 mm long calling card with a 68-pin socket. Three types are available with lengths of 3.3 mm (Type I), 5.0 mm (Type II), and 10.5 mm (Type III). These cards are used as portable PC memory card and modem, network card, and external memory device, and similar applications. G Printpix system A printing system that uses heat sensitive paper that generates colors when heated. G Thermal head Printing head. G USB Stands for Universal Serial Bus, a general-purpose serial interface standard for low and medium speed devices. Maintenance Printer maintenance G Gently wipe the cabinet and operation panel with a soft cloth. When soiling is severe, wipe with a cloth dampened with a neutral solvent diluted with water and then wipe with a dry cloth. G Unplug the power cord plug from the AC outlet before servicing the printer. The thermal head, lamps, and mechanisms inside the printer have a service life. It is recommended that they be inspected and replaced about every 3000 sheets. The total number of prints can be checked using the menus. See P.50 for details. 65 Connecting to a Digital Camera and Printing 5 Connecting to a Digital Camera and Printing Printing can be controlled from the digital camera. — Symptom Cause Remedy Printing image data with DPOF settings specified. — The digital camera cable was connected while the printer was connected to a PC. To use the printer with a digital camera connected, press the [SET] button. ✽If connection fails, disconnect the USB cable for the PC and then connect the digital camera again. While the printer was connected to a PC as a card reader, the digital camera cable was connected before card reader operation ended. Will connect after card reader operation ends. ✽Wait until card reader operation is fully completed before connecting the digital camera cable. ✽If connection fails, disconnect the USB cable for the PC and then connect the digital camera again. PictBridge connection failed. Check that the cable is connected securely. Disconnect the USB cable and then connect the digital camera again. Check the paper type and settings. Printing image data. Do not turn off the printer. Connecting to the digital camera. Printer display screen 64 Connecting to a Digital Camera and Printing 5 Preparing the printer and digital camera 1 Plug the digital camera end of the USB cable used for PictBridge into the USB port on the digital camera. 2 Connect the USB cable to the port on the side of the printer. The middle port on the side of the printer is specifically for PictBridge (digital camera connection). 3 When the printer is switched on, the digital camera connection screen appears. The table below lists the printable print sizes. Connect the printer and digital camera with the USB cable used for PictBridge. TIP • A digital camera and a printer are connectable in the state where a power supply is not shut off. • The information shown (paper types, paper sizes and border settings) indicates the current values for the printer. Note TIP • The USB cable used for PictBridge is the same cable used for the PC and the digital camera connecting. • The USB cable used for PictBridge may be bundled with the digital camera or with the PC connection kit for the digital camera. Printing 1 Select one or more images on the digital camera and then print the images. Refer to the Owner’s Manual for your digital camera for the printing procedure. hFor index printing • The time required to print a 25-frame index of images shot using a 3-megapixel class digital camera (file sizes of 500- 600KB) is roughly 10 minutes, though this is dependent on the image content. • In an index print, corrupted files or unknown files are printed as blank frames. Note Print size (mm) Paper type 4” × 6” (borderless) 100 × 148/4” × 6” Photo 67 Using the printer connected to a PC 6 Using the printer connected to a PC INSTALLATION WORKFLOW Preparations completed Macintosh FinePixViewer installation USB Mass Storage Driver and Exif Launcher are also installed simultaneously USB printer driver installation Check the hardware and software requirements Acrobat Reader installation Enable File Exchange I Installation time: Approximately 20 minutes This time is a criterion only. This time varies depending on the PC and OS used. Read the procedure thoroughly and use correctly. I When you have installed all the software... Once you have finished installing all the software components, remove the CD-ROM. You will need this CD-ROM if you ever have to re-install any of the software, so keep it in a safe place away from dampness and out of direct sunlight. Windows e e 66 Connecting to a Digital Camera and Printing 5 Procedures for FUJIFILM digital cameras and printers 2 Connect a digital camera. Press the [PRINT] button on the printer. “DPOF CHECK” window is displayed. In order to start a print, press [SET] button of a printer. 3 4 Printing begins. The operation method of a digital camera changes with models. Please confirm the handling description of a digital camera for details. Note hFor index printing The time required to print a 25-frame index of images shot using a 3-megapixel class digital camera (file sizes of 500- 600KB) is roughly 10 minutes, though this is dependent on the image content. Note When printing while connected to a FUJIFILM PictBridge-compatible digital camera, specifying the DPOF settings on the digital camera beforehand allows printing to be started simply by pressing the [PRINT] button on the top of the printer. TIP • Refer to 36 pages about DPOF. 1 Setup DPOF setting with a digital camera. DPOF printing supports single-screen prints, index prints and date imprinting. 69 Using the printer connected to a PC 6 Using the printer connected to a PC TROUBLESHOOTING TABLE-Windows If the software does not operate correctly, check that you are using the correct hardware and software. If the problem persists even though you are using the correct hardware and software, refer to the table below and then see the reference page listed for your problem. Type Problem Page Installation problems 70 70 71 73 73 73 73 72 72 Printer problems Pictures cannot be printed from FinePixViewer. I want to print from an application other than FinePixViewer. Application problems FinePixViewer automatic startup is slow. I want to stop FinePixViewer from launching automatically. I want to quit Exif Launcher. Memory card problems The printer is connected to the PC but the “Removable disk” icon does not appear. FinePixViewer does not recognize the memory card. When the “Removable disk” icon is double-clicked, a “Cannot access drive. The device is not ready.” warning appears. When the USB cable is disconnected, a “Device eject alarm” appears. 74 74 75 75 75 When the USB cable is disconnected or when the “Removable disk” icon is double-clicked, a message appears and the window does not open. When the memory card is accessed, the PC hangs. The CD-ROM labeled “Windows” was requested during driver installation. The printer is connected to the PC but is not recognized. When the printer was connected to the PC, the “Add New Hardware Wizard” appeared. FinePixViewer does not start up. 75 Hardware and software requirements (Windows) Compatible PCs IBM PC/AT or compatible Operating System Windows 98 (Including Second Edition) Windows Millennium Edition (Windows Me) Windows 2000 Professional Windows XP Professional Windows XP Home Edition CPU Pentium 300MHz or better RAM 64MB minimum (for Windows 98/98 Second Edition /Me/2000 Professional) 128MB (Windows XP) Hard disk space Amount required for installation 140MB minimum Amount required for operation 300MB minimum Display 800 × 600 pixels or better, 16-bit color or better Internet connection Modem or ISDN connection, transmission speed 56 kbps minimum (Recommended) 68 Using the printer connected to a PC 6 INSTALLATION Software installation manual (Manual_en.pdf) This is an on-screen guide to installing software such as the printer driver. To read the on-screen Installation Manual on a PC, install Acrobat Reader. Viewing the Software installation manual (Windows) 1Open “My Computer”, click the “Printpix” CD-ROM icon and select “Open”. 2Double-click the “Manual_en.pdf” or “Manual_en” icon on the CD-ROM. Viewing the Software installation manual (Macintosh) 1Double-click the “Manual_en.pdf” icon. TIP • For details of the software installed, click the [Explanation] button. Start up the software installer (Windows) 1 Start up the software installer (Macintosh) 1 When the enclosed CD-ROM is loaded into the CD-ROM drive, the “Printpix” volume is automatically opened. 2 Double-click the “Installer” icon to launch the installer. • If the “Printpix” volume does not automatically open, double- click the CD-ROM icon. Note Double-click Starting of the installer of software 1 The installer setup window appears. Click the “Installation of Printer Driver” button and then install the driver as directed by the on-screen instructions.After the printer driver installation ends, click the install buttons for FinePixViewer and Acrobat Reader and install the software as directed by the on-screen instructions. Click Click • For more detailed information, read the Installation Manual (Manual_en.pdf) provided on the enclosed CD-ROM. Note Load the enclosed CD-ROM into the CD-ROM drive. The installer starts up automatically. 71 Using the printer connected to a PC 6 Using the printer connected to a PC Check Solution • If “Universal Serial Bus controllers” is not displayed, the USB functions is disabled. Refer to the User’s Manuals supplied with your PC for details of how to enable the USB functions. USB functions are disabled when the item is marked with a yellow exclamation mark “!” or red cross “x”. Refer to the User’s Manuals supplied with your PC for details of how to enable the USB functions. Double-click “System” in “Control Panel”, select device manager, and check if “Universal Serial Bus Controller” (for card reader) and “FUJIFILM USB Printer Device” (for printer) are displayed. ✽With Windows 2000 Professional / Windows XP, when the “System properties” dialog box appears, click “Hardware” and then click the [Device Manager] button. • When “FUJIFILM USB Printer Device” is not displayed, the USB driver (printer) was not installed correctly. Uninstall the driver and then reinstall the driver correctly. I When the printer was connected to the PC, the “Add New Hardware Wizard” appeared. Check Install the FinePixViewer and printer drivers (→P.68). Were the FinePixViewer and printer drivers installed? Solution 70 Using the printer connected to a PC 6 INSTALLATION PROBLEMS-Windows I The CD-ROM labeled “Windows” was requested during driver installation. I The printer is connected to the PC but is not recognized. Check Solution Turn the printer power on. Check if one end of the USB cable is connected to the printer and the other end is connected to the PC. Is the printer power on? Are the printer and PC connected by a USB cable? Use the printer with Windows 98/98 SE /Me/2000 Professional/XP. Is a supported OS used? Log in by Administrator group. For more information on Administrator group, refer to the PC manual. In the case of Windows 2000 Professional or Windows XP, does the user log in as a member of Administrator group? If they are displayed, driver was not installed correctly. Uninstall the corresponding driver and then reinstall the driver correctly. Is “USB Printer” (for printer) or “USB Mass Storage” (for card reader) displayed at “Other devices” in Device Manager? Solution • If no Windows CD-ROM was supplied with the PC, contact the PC manufacturer. Note Name of folder ✽When using CD-ROM Drive D OS Type Windows 98 Windows Me Windows XP D:\win98 D:\win9x D:\i386 Windows 2000 Professional D:\i386 q Replace the Printpix CD-ROM with the Windows CD-ROM. w Click the [Browse] button in the “Copy files” dialog box. e In the dialog box that then appears, select the CD-ROM icon in the drive display area, refer to the information in the table below and specify the appropriate folder and then click the [OK] button. r In the “Copy files” dialog box, click the [OK] button to install the driver. Then click the [Finish] button. 73 Using the printer connected to a PC 6 Using the printer connected to a PC MEMORY CARD PROBLEMS-Windows Check Solution I The printer is connected to the PC but the “Removable disk” icon does not appear. If the printer is connected as a printer, switch to card reader connection (→P.80). Insert a memory card into the printer. Is the “CONNECTED TO PC IN CARD READER MODE” message displayed on the printer screen? Is a memory card inserted into the printer? Install FinePixViewer. Was FinePixViewer installed correctly? Check Solution I When the “Removable disk” icon is double-clicked, a “Cannot access drive. The device is not ready.” warning appears. Insert a memory card into the printer. Is a memory card inserted into the printer? Check Solution I When the USB cable is disconnected, a “Device eject alarm” appears. Before disconnecting the USB cable, click the “Unplug or Eject Hardware” icon on the task bar and disconnect the printer. When the USB cable was disconnected by the incorrect method, Windows may be faulty. Reboot Windows. Was the USB cable disconnected by the correct disconnection method (Windows Me/2000 Professional/XP)? Check Solution I FinePixViewer does not recognize the memory card. Turn the printer power on. Is the printer power turned on? Check if one end of the USB cable is connected to the printer and the other end is connected to the PC. Are the printer and PC connected by a USB cable? If the printer is connected as a printer, switch to card reader connection (→P.80). Is the “CONNECTED TO PC IN CARD READER MODE” message displayed on the printer screen? Select “View” →“Refresh” from the FinePixViewer menu. Updated to newest data? Is the icon for the memory card inserted into the printer displayed on the screen on the top of the printer? Switch the printer off, insert only the memory card to be used and then switch the printer back on. 72 Using the printer connected to a PC 6 PRINTER PROBLEMS-Windows Check Solution I Pictures cannot be printed from FinePixViewer. If the printer is connected as a card reader, switch to printer connection (→P.80). Is the printer driver installed? Install the printer driver (→P.68). Is the “CONNECTED TO PC IN PRINTER MODE” message displayed on the printer screen? Select the printer name “FUJIFILM CX-550”. Is the printer that is to do the printing selected? Is the printer name “FUJIFILM CX-550”? Solution I I want to print from an application other than FinePixViewer. The printer driver can print from various applications. Select “File” →”Print” from the menu. The dialog box that appears varies depending on the application. The items to be set and the printed result are also different. For more information, refer to the application manual. 75 Using the printer connected to a PC 6 Using the printer connected to a PC Solution APPLICATION PROBLEMS-Windows Check I I want to quit Exif Launcher. Right-click the Exif Launcher icon in the taskbar and select “Exit” from the pop-up menu. Is there an Exif Launcher icon on the taskbar? (When there is no Exif Launcher icon on the taskbar, Exif Launcher is not running.) Check Solution I FinePixViewer automatic startup is slow. Click the [Start] button and select “Programs” →“Startup” from the Start menu. Right-click on any shortcuts for infrequently used applications from the “Startup” window. Click “Delete” from the pop-up menu and then restart your PC. Are there too many resident applications? I I want to stop FinePixViewer from launching automatically. Either of the following two methods can be used to prevent FinePixViewer from launching automatically: • Change the Exif Launcher settings q Right-click the Exif Launcher icon in the taskbar and select [Settings] from the pop-up menu. w Clear the “Start automatically when connected” checkbox. ✽To restore the original setting, use the same procedure and place a tick in the automatic launch checkbox. • Remove Exif Launcher q Right-click the Exif Launcher icon in the taskbar and select “Exit” from the pop-up menu. w Click the [Start] button and select “Programs” →“Startup”. Right-click “Exif Launcher” and select “Delete” from the pop-up menu. ✽To restore the original setting, create a shortcut to Exif Launcher in the “Startup” folder. Solution I FinePixViewer does not start up. Check Solution Load the “Printpix” CD-ROM and install DirectX. q The installation screen appears. Click the [Cancel installation] button. w Double-click the “My Computer” icon to open the “My Computer” window, right- click the CD-ROM icon and select “Open”. e Double-click “DXSetup.exe” in the “DirectX8” folder on the CD-ROM and then proceed with the installation as directed by the on-screen instructions. (Refer to the Installation Manual on the enclosed CD-ROM for details.) Does the following message screen appear? 74 Using the printer connected to a PC 6 Check Solution I When the USB cable is disconnected or when the “Removable disk” icon is double-clicked, a message appears and the window does not open. Some USB removable drives do not operate correctly if other USB removable drives are being used at the same time. Disconnect all the connected USB removable drives and then connect the printer. However, with some USB storage devices, computer operation may become unstable when the Exit Launcher is resident. See “I want to stop FinePixViewer from launching automatically” (→P.75) and try removing the Exif Launcher. Is another USB removable drive connected? Check Solution I When the memory card is accessed, the PC hangs. Install the driver (→P.68). The driver is not installed correctly. Uninstall the corresponding driver and reinstall it correctly. Was the driver installed? Is [USB Printer](for printer) and [USB Mass Storage] (for card reader) displayed at “Other devices” in “Device Manager”? • If “Universal Serial Bus controllers” is not displayed, the USB functions is disabled. Refer to the User’s Manuals supplied with your PC for details of how to enable the USB functions. USB functions are disabled when the item is marked with a yellow exclamation mark “!” or red cross “x”. Refer to the User’s Manuals supplied with your PC for details of how to enable the USB functions. • When “FUJIFILM USB Printer Device” is not displayed, the USB driver (printer) was not installed correctly. Uninstall the driver and then reinstall it correctly. Double-click “System” in “Control Panel” and select “Device Manager”, and then check if “Universal Serial Bus Controller” (for card reader) and “FUJIFILM USB Printer Device” (for printer) are displayed. 77 Using the printer connected to a PC 6 Using the printer connected to a PC INSTALLATION PROBLEMS-Macintosh I When the printer was connected to the Macintosh, the “Required software was not found” message or “Required driver cannot be used” message appears. Check Solution Install the software (→P.68). Is the software installed? PRINTER PROBLEMS-Macintosh Check Solution I Pictures cannot be printed from FinePixViewer. Install the printer driver (→P.68). Is the printer driver installed? Check if one end of the USB cable is connected to the printer and the other end is connected to the Macintosh. Are the printer and Macintosh connected by a USB cable? Select CX-550 as the printer. Is a printer selected? Is the CX-550 selected in the Chooser? Set “CX550”, “CX-550Monitor”, “FTLUSB _Lib”, and “FTLUSB_Drv_04CB5000” in Extensions Manager to Enable and restart the Macintosh. Is the printer driver enabled? Solution I I want to print pictures from an application other than FinePixViewer. Select “File” →“Print” from the menu. The dialog box that is displayed here varies depending on the application. The setting items and printed result are also different. For more information, refer to the application manual. If the printer is connected as a card reader, switch to printer connection (→P.80). Is the “CONNECTED TO PC IN PRINTER MODE” message displayed on the printer screen? Was the “P104: Connection to the printer is failed” error message displayed? Close the Chooser and switch the printer off and then on again. Then select the CX-550 in the Chooser and try printing again. When I tried to launch FinePixVeiwer, the “Quick Time Lib could not be found” message appeared. 76 Using the printer connected to a PC 6 TROUBLESHOOTING TABLE-Macintosh If the software does not operate correctly, check that you are using the correct hardware and software. If the problem persists even though you are using the correct hardware and software, refer to the table below and then see the reference page listed for your problem. Type Problem Page Installation problems 77 78 78 79 78 77 77 Printer problems Pictures cannot be printed from FinePixViewer. Application problems I want to stop FinePixViewer from launching automatically. Memory card problems The printer is connected to the Macintosh, but the “Removable disk” icon is not displayed. FinePixViewer does not recognize the memory card. Mac OS “Initialize disk” message was displayed. A warning message appears when the memory card was removed or the USB cable was disconnected from the printer. 79 79 79 The Macintosh hangs when the memory card is accessed. When the printer was connected to the Macintosh, the “Required software was not found” message or “Required driver cannot be used” message appears. I want to print pictures from an application other than FinePixViewer. I want to quit Exif Launcher. 79 Macintosh hardware and software requirements Compatible models Power Macintosh G3, PowerBook G3, Power Macintosh G4, iMac, iBook, Power Macintosh Cube, PowerBook G4 Operating System Mac OS 8.6 to 9.2 RAM 64MB to minimum Hard disk space Amount required for installation 70MB minimum Amount required for operation 300MB minimum Display 800 × 600 pixels or better, approx. 32,000 colors Internet connection Transmission speed 56 kbps minimum (recommended) modem connection. 79 Using the printer connected to a PC 6 Using the printer connected to a PC Solution Check Check Solution I The Macintosh hangs when the memory card is accessed. Install the software (→P.68). Is the software installed? Solution I A warning message appears when the memory card was removed or the USB cable was disconnected from the printer. This operation may destroy the memory card and data. Drag the drive icon to “Trash” before disconnecting the USB cable from the printer. Was the USB cable unplugged while the printer was mounted as a disk drive? APPLICATION PROBLEMS-Macintosh Solution I I want to quit Exif Launcher. Select “Exif Launcher Setting” in the FinePixViewer “Settings” menu and click “Quit Exif Launcher immediately”. I I want to stop FinePixViewer from launching automatically. Either of the following two methods can be used to prevent FinePixViewer from launching automatically. • Change the Exif Launcher settings q Select “Exif Launcher setting” in the “Settings” menu in FinePixViewer and click “Do not run Exif Launcher at restart”. w Restart your Macintosh. ✽To restore the original setting, use the same procedure and select the “Run Exif Launcher at restart” checkbox. Then restart your Macintosh. • Remove Exif Launcher. q Select “Exif Launcher Setting” in the “Settings” menu in FinePixViewer and select the “Quit Exif Launcher immediately” checkbox. w Open “System Folder” →“Startup Items” and drag “Exif Launcher” to the Trash. e Select “Empty Trash...” in the “Special” menu. ✽To restore the original setting, reinstall the software. Solution I When I tried to launch FinePixViewer, the “Quick Time Lib could not be found” message appeared. Install QuickTime as described below. q Load the “Printpix” CD-ROM. w Open the “English” folder inside the “QuickTime” folder on the CD-ROM. e Double-click the “Qucick Time Installer” or the “Qucick Time Installer.exe” icon. Then follow the on-screen instructions. 78 Using the printer connected to a PC 6 MEMORY CARD PROBLEMS-Macintosh I The printer is connected to the Macintosh, but the “Removable disk” icon is not displayed. Load a memory card into the printer. Is a memory card loaded into the printer? Check Solution I Mac OS “Initialize disk” message was displayed. Use a FinePix digital camera to format the memory card. Do you have a FinePix digital camera? Enable “File Exchange” in Extension Manager and then restart the Macintosh. Is File Exchange enabled? (When viewing pictures taken with a FinePix digital camera.) Check Solution Turn the printer power on. Is the printer power turned on? Use the printer with Mac OS 8.6 to 9.2. Is a compatible OS used? Check if one end of the USB cable is connected to the printer and the other end is connected to the Macintosh. Are the printer and Macintosh connected by a USB cable? At the Extension Manager, enable “USB04CB_StorageShim” and “USB04CB _StorageDriver” and then restart the Macintosh. Is Mass Storage Driver enabled? If the printer is connected as a printer, switch to card reader connection (→P.80). Is the “CONNECTED TO PC IN CARD READER MODE” message displayed on the printer screen? Check Solution I FinePixViewer does not recognize the memory card. Turn the printer power on. Is the printer turned on? Check if one end of the USB cable is connected to the printer and the other end is connected to the Macintosh. Are the printer and Macintosh connected by a USB cable? Select “View” →“Refresh” from the FinePixViewer menu. Is the window of FinePixViewer updated to the newest information? If the printer is connected as a printer, switch to card reader connection (→P.80). Is the “CONNECTED TO PC IN CARD READER MODE” message displayed on the printer screen? Switch the printer off, insert only the memory card to be used and then switch the printer back on. Is the icon for the memory card inserted into the printer displayed on the screen on the top of the printer? 81 Using the printer connected to a PC 80 Using the printer connected to a PC 6 SWITCHING BETWEEN PRINTER AND CARD READER CONNECTIONS Switching between printer and card reader connection modes must be performed on the printer. The change of printer connection/card reader connection 2 Press the [MENU] button. The “SWITCH USB CONNECTION” window is displayed. Use f to select your preferred connection method and then press the [SET] button. 3 Depending on the selected connection method, the Confirming switch to card reader or Confirming switch to printer window appears. Press the [SET] button to change the connection method. If the connection method is switched to printer mode, the Connected as printer window reappears. If the connection method is switched to card reader mode, the Connected as card reader window reappears. Press the [BACK] button to cancel switching. 1 When the printer is used connected to a PC using a USB cable, the screen shown at right appears. When it is used as a printer, the “CONNECTED TO PC IN PRINTER MODE” window appears. When it is used as a card reader, the “CONNECTED TO PC IN CARD READER MODE” window appears. Connected as printer window Connected as card reader window Card reader change check window Printer change check window 83 82 Specifications Model FUJIFILM Digital Photo Printer CX-550 Printing method Printpix system Paper (Roll type) Printpix paper of standard roll type RK-SD40 Paper size 100 mm × 7.09 m/0.3 ft. × 23.3 ft. (40 prints, 4” × 6” size) Print size (mm/inch) 74 × 100/3 × 4: full size, 2 up, 4 up 100 × 120/4 × 4.7: full size 100 × 133/4 × 5.2: full size 100 × 148/4 × 6: full size, 2 up, 4 up, 9 up, 16 up, 25 up, index 25 up 100 × 178/4 × 7: full size Note: Only full-size prints can be borderless. Image size Max. 1220 (V) × 2172 (H) pixels (4” × 7” size without borders) Print resolution 310 dpi Color supported 16.77 million colors (256 gradations of Y, M, C) Print speed Approx. 99 seconds/4” × 6” size (without border)✽1 Functions • Borderless print • Full print • Index print (25 up) / 15 up with info. • Multiple print (2 up, 4 up, 9 up, 16 up, 25 up) • All print (Automatically prints all the frames in the memory card) • Zoom print • Rotation print • Edit/Print quality print • Preferable Quality print • DPOF print • Exif Print • ID print • PictBridge • Save / Erase Pictures ID print size (Default) ✽2 • 55 × 100/2 × 4: 2 up (35 × 45) (mm/inch) • 74 × 100/3 × 4: 2 up (45 × 60) • 79 × 100/3 × 4: 4 up (35 × 45) • 100 × 110/4 × 4: 2 up (51 × 51) • 100 × 148/4 × 6: full size (126 × 85), 2 up (55 × 75), 4 up (50 × 38) ✽2The number of ID photo frame is selectable. The frame size can also be adjustable by 1 mm steps, except for 79 × 100/3 × 4: 4 up (35 × 45) and 100 × 110/4 × 4: 2 up (51 × 51) Input source xD-Picture CardTM, PC-ATA card, Digital camera with Pict Bridge standard. Compatible xD-Picture Card 16, 32, 64, 128, 256, 512 MB Input image format DCF, Exif 1.0 to 2.2 ✽3 (JPEG, TIFF-YC/RGB), BMP (24bits), DPOF ✽3Exif 2.2 is a newly revised digital camera file format that contains a variety of shooting information for optimal printing. Image that can be JPEG saved/erased BMP, TIFF AVI, WAV Image save time For 10 MB (ten 1 MB files) xD-Picture Card ⇒ PC Card (Microdrive): Approx. 60 seconds xD-Picture Card ⇒ PC Card (xD-Picture Card): Approx. 34 seconds Input image size 120 × 160 to 6144 × 6144 Pixels Video output NTSC video out (RCA pin jack) (U.S.A. and Canada) ✽ Use a VIDEO cable less than 3.0 m long. PAL video out (RCA pin jack ) (other countries) Monitor Built in 2.5 inch color LCD Digital interface USB (Windows 98/98 SE/Me/2000 Professional/XP, Mac OS 8.6 to 9.2), PictBridge USB port ✽ Use a USB cable less than 3.0 m long. Paper feeding method Automatic roll paper feeding (40 prints, 4” × 6” size) Power supply AC 120 V, 60 Hz (U.S.A. and Canada: NTSC) AC 220 V to 240 V, 50/60 Hz (other countries: PAL) Power consumption Printing : Approx. 2.5 A max. Standby : Approx. 0.3 A (U.S.A. and Canada) Printing : Approx. 1.3 A max. Standby : Approx. 0.2 A (other countries) Dimensions 250 (W) mm × 179.5 (H) mm × 336 (D) mm 9.8 (W) in. × 7.1 (H) in. × 13.2 (D) in. Mass (Weight) Approx. 5.0 kg/11.0 lbs Operating conditions +5 °C to +30 °C (+41 °F to +86 °F), 15 % RH to 80 % RH (No condensation) +30 °C to +35 °C (+86 °F to +95 °F), 15 % RH to 60 % RH (No condensation) Power cord length Approx. 1.8 m Operating system Windows 98/98 SE/Me/2000 Professional/XP Mac OS 8.6 to 9.2 Accessory Owner’s Manual, Power cord, Paper case, Retaining ring, CD-ROM, Cleaning Paper, Cleaning paper core • Exif Ver 2.2 is a picture standard that substantially expands the functions of the original Exif. However, Exif compatible machines may limit the functions. • These specifications are subject to change without notice. ✽1 Not including image processing time. Measured at room temperature when shipped from factory. BEFORE OPENING THE PACKAGE OF CD-ROM PROVIDED BY FUJI PHOTO FILM CO., LTD., (“FUJIFILM”) PLEASE READ THIS END USER LICENSE AGREEMENT CAREFULLY. ONLY IF YOU DO AGREE TO THIS AGREEMENT, YOU WILL BE ABLE TO USE THE SOFTWARE RECORDED ON THE CD-ROM. BY OPENING THE PACKAGE, YOU ACCEPT AND AGREE TO BE BOUND BY THIS AGREEMENT. IMPORTANT Be sure to read this page before using the Software. NOTICE This End User License Agreement (“Agreement”) is an agreement between Fuji Photo Film Co., Ltd. and you, which sets forth the terms and conditions of the license granted for you to use the software provided by FUJIFILM. The CD-ROM contains third party software. In case a separate agreement is provided by a third party supplier for its software, the provisions of such separate agreement shall apply to the use of such third party software, prevailing over those of this Agreement. 1. Definitions. (a) “Media” means the CD-ROM titled “Software for Printpix Digital Photo Printer CX-550” which is provided to you together with this Agreement. (b) “Software” means the software which is recorded on Media. (c) “Documentation” means the operation manuals of Software and other related written materials which are provided to you together with Media. (d) “Product” means Media (including Software) and Documentation collectively. 2. Use of Software. FUJIFILM grants to you a nontransferable, nonexclusive license: (a) to install one copy of Software onto one computer in binary machine executable form; (b) to use Software on the computer onto which Software is installed; and (c) to make one backup copy of Software. 3. Restrictions. 3.1 You shall not distribute, rent, lease or otherwise transfer all or any part of Software, Media or Documentation to any third party without FUJIFILM’s prior written consent. You also shall not sublicense, assign or otherwise transfer all or any part of the rights granted to you by FUJIFILM under this Agreement without FUJIFILM’s prior written consent. 3.2 Except as expressly granted by FUJIFILM hereunder, you shall not copy or reproduce all or any part of Software or Documentation. 3.3 You shall not modify, adapt or translate Software or Documentation. You also shall not alter or remove copyright and other proprietary notices that appear on or in Software or Documentation. 3.4 You shall not, or shall not have any third party, reverse-engineer, decompile, or disassemble Software. 4. Ownership. All copyrights and other proprietary rights to Software and Documentation are owned and retained by FUJIFILM or the third party suppliers as indicated on or in Software or Documentation. Nothing contained herein shall be construed, expressly or implicitly, as transferring or granting any right, license, or title to you other than those explicitly granted under this Agreement. 5. Limited Warranty. FUJIFILM warrants to you that Media is free from any defect in material and workmanship under normal use for ninety (90) days from the date of your receipt of Media. Should Media not meet the foregoing warranty, FUJIFILM shall replace such defective Media with other Media bearing no defect. FUJIFILM’s entire liability and your sole and exclusive remedy with regard to any defect in Media shall be expressly limited to such FUJIFILM’s replacement of Media as provided herein. End User License Agreement 6. DISCLAIMER OF WARRANTY. EXCEPT AS PROVIDED IN SECTION 5 HEREIN, FUJIFILM PROVIDES PRODUCT “AS IS” AND WITHOUT WARRANTIES OF ANY KIND, EXPRESS OR IMPLIED. FUJIFILM SHALL MAKE NO WARRANTY, EXPRESS, IMPLIED OR STATUTORY, AS TO ANY OTHER MATTERS, INCLUDING, BUT NOT LIMITED TO NON- INFRINGEMENT OF ANY COPYRIGHT, PATENT, TRADE SECRET, OR ANY OTHER PROPRIETARY RIGHTS OF ANY THIRD PARTY, MARCHANTABILITY, OR FITNESS FOR ANY PARTICULAR PURPOSE. 7. LIMITATION OF LIABILITY. IN NO EVENT SHALL FUJIFILM HAVE ANY LIABILITY FOR ANY GENERAL, SPECIAL, DIRECT, INDIRECT, CONSEQUENTIAL, INCIDENTAL, OR OTHER DAMAGES (INCLUDING DAMAGES FOR LOSS OF PROFITS OR LOST SAVINGS) INCURRED FROM THE USE OF OR INABILITY TO USE PRODUCT EVEN IF FUJIFILM HAS BEEN ADVISED OF THE POSSIBILITY OF SUCH DAMAGES. 8. No export. You acknowledge that neither Software nor any part thereof, will be transferred, or exported to any country or used in any manner in violation of any export control laws and regulations to which Software is subject. 9. Termination. In case you breach any of the terms and conditions hereof, FUJIFILM may immediately terminate this Agreement without any notice. 10.Term. This Agreement is effective until the date when you cease to use Software, unless earlier terminated in accordance with Section 9 hereof. 11.Obligation upon termination. Upon termination or expiration of this Agreement, you shall, at your own responsibility and expense, delete or destroy immediately all Software (including its copies), Media and Documentation. 12.Governing Law. This Agreement shall be governed by and construed in accordance with laws of Japan. Please note that this Guide is written on the assumption that you already have a basic understanding of how to use your PC (personal computer), Windows and Macintosh. For basic information on using your PC, Windows and Macintosh, refer to the respective manuals supplied with your PC. • xD-Picture Card™is a trademark of Fuji Photo Film Co., Ltd. • Microsoft and Windows are trademarks of the Microsoft Corporation of the U.S. registered in the U.S. and other countries. Windows is an abbreviated term referring to the Microsoft Windows Operating System. • Macintosh, Mac OS, QuickTime and the QuickTime logo are trademarks of Apple Computer, Inc., registered in the U.S. and other countries. • Adobe Acrobat® Reader™, ActiveShare™and PhotoDeluxe are trademarks of Adobe Systems Incorporated of the U.S. • SmartMedia™is a trademark of Toshiba Corporation. • All other company or product names are trademarks or registered trademarks of the respective companies. Do not attempt to play the CD-ROM enclosed with this product on an audio CD player. Doing so could damage your hearing or could damage your speakers or headphones. 84 EC DECLARATION OF CONFORMITY We Name: Fuji Photo Film (Europe) G.m.b.H. Address: Heesenstrasse 31, 40549 Dusseldorf, Germany declare that the product Product Name: FUJIFILM Digital Photo Printer Printpix CX-550 Manufacturer’s Name: Fuji Photo Film Co., Ltd. Manufacturer’s Address: 26-30, Nishiazabu 2-chome, Minato-ku, Tokyo 106-8620, Japan is in conformity with the following Standards Safety: EN60065 EMC: EN55022: 1988 Classe B EN55024: 1988 EN61000-3-2, EN61000-3-3:1955 + A1:1988 + A2:1988 following the provisions of the EMC Directive (89/336/EEC, 92/31/EEC and 93/68/EEC) and Low Voltage Directive (73/23/EEC). Dusseldorf, Germany November 1, 2003 Place Date Signature/Managing Director